Now that you have a WordPress theme that contains Power Builder plugin in it, you become curious what is it for, and what it actually can do. From this tutorial, you’ll learn how to add content using Power Builder editor.
Power Builder is a plugin that allows you to add and edit pages and posts like a pro without messing with long and complicated lines of code. Actually, with Power Builder you can arrange columns, blocks, add different types of content, and everything will be done pretty quickly. You won’t need to watch long tutorials or search the web to find the necessary lines of code.
Power Builder Location
- To use it you have to navigate to Pages tab on the left of WordPress Dashboard.

- Then click on Add new to create a new page. There will be Use Power Builder button.

- Click on it, and Power Builder editor will open.
Creating Page Structure with Power Builder
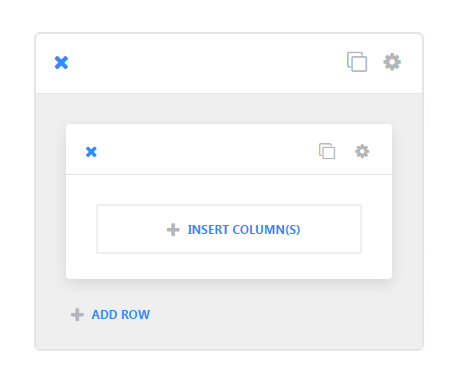
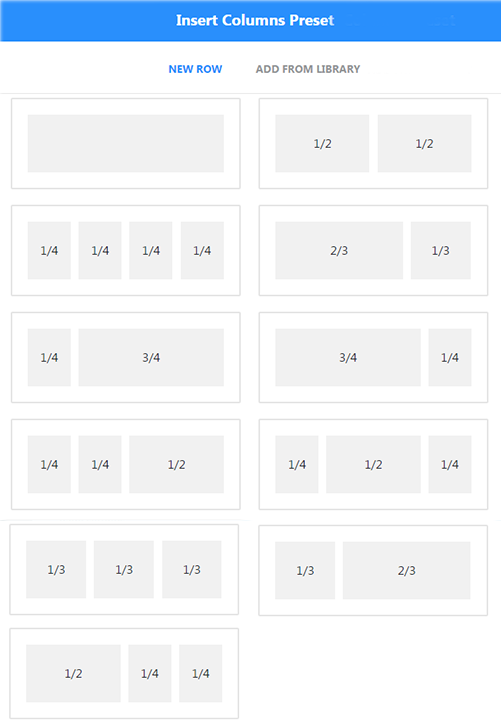
- Proceed to the block offering you to insert columns. A new window called Insert Columns Preset will open, and there you can choose how many columns you want to create on your page (from 1 to 4 columns).

- You will also see how much place each column will occupy on your page: ½, ⅓, ¼, ⅔, ¾. You can as well choose a single column layout.

- If you’ve applied changes and then didn’t like the result, then you can use the Change Structure option, and change your page’s structure to your liking.
- Scroll below to add more rows of content (actually, as many rows as you want). Each row can have its own number of columns with different layouts.
- To change rows settings you have to click on Settings icon that is placed on one of the rows, and Row Module Settings window will appear.
- From there you can change the following general settings:
- make the row you are customizing fullwidth or use custom width particularly set for the row;
- use grid padding — enable this option to apply the distance between columns;
- you can as well set your own custom padding for the row. If you leave the form for custom padding empty a default padding will take place;
- use custom padding on mobile — defines whether you want to use your custom padding on mobile devices.
Adding Content with Power Builder Modules

To add content to one of the columns you have to click on Insert Modules button.
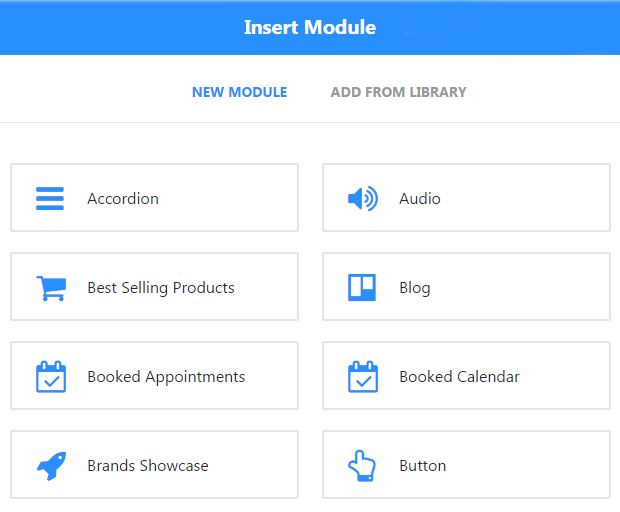
A new window called Insert Module will appear. Here you’ll see the list of available modules that can be added to your page.
Click on the module you want to add to the column to edit its settings.
Module Settings
[row][column xl=”6″ lg=”6″ md=”6″ sm=”6″]
- Accordion Power Builder Module
- Audio Power Builder Module
- Bar Counters Power Builder Module
- Blog Power Builder Module
- Blurb Power Builder Module
- Brands Showcase Power Builder Module
- Button Power Builder Module
- Call to Action Power Builder Module
- Carousel Power Builder Module
- Circle Counter Power Builder Module
- Contact Form Power Builder Module
- Countdown Timer Power Builder Module
- Divider Power Builder Module
- Icon Power Builder Module
- Image Power Builder Module
- Map Power Builder Module
[/column][column xl=”6″ lg=”6″ md=”6″ sm=”6″]
- Number Counter Power Builder Module
- Person Power Builder Module
- Post Slider Power Builder Module
- Posts Power Builder Module
- Services Power Builder Module
- Sidebar Power Builder Module
- Social Media Follow Power Builder Module
- Tabs Power Builder Module
- Taxonomy Power Builder Module
- Team Power Builder Module
- Testimonial Power Builder Module
- Text Power Builder Module
- Toggle Power Builder Module
- Slider Power Builder Module
- Video Power Builder Module
- Video Slider Power Builder Module
[/column][/row]


