If you are running an eCommerce store, you will need to import products into your Woocommerce store. In order to do it, you will use CSV files. Let’s see what CSV files exist for.
First of all, a CSV is a comma-separated values file. With the help of it you can save all your data in a table structured format. Generally, it allows you to import and export product, customer, and order information to and from your store.
And, please, note that for importing and exporting products only the CSV file is accepted.
But to import a CSV file it should be created first. We are more than happy to present you the easy and quick way to create a CSV file for products import, just following our tips step by step.
Please, pay attention that the software that allows editing CSV files should be installed. We recommend OpenOffice Calc program for this purpose.
Let’s get it started. In order to download the software and install it you will need:
Step 1. Download the OpenOffice program following the next link.
Step 2. Click I want to download Apache OpenOffice link.
Step 3. Once done you will be directed to another page where your OS and language should be selected. Then, press the Download Full installation button. Here is the screenshot for you to see the interface. 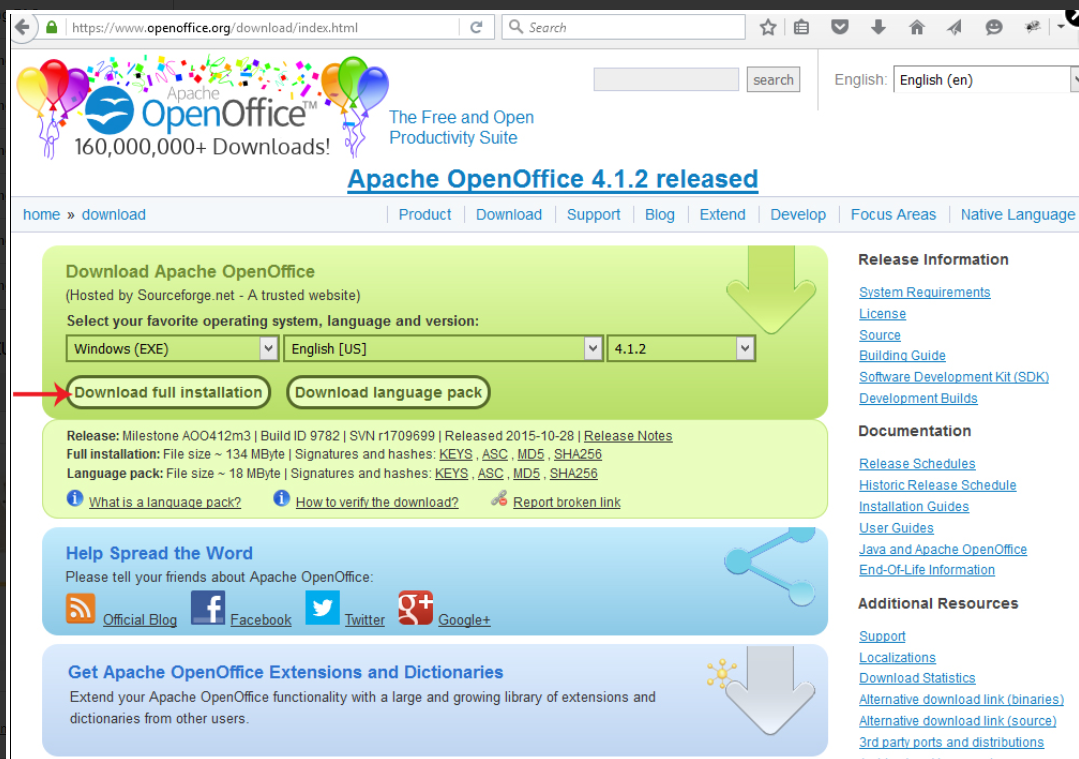
Step 4. You will see the pop-up window offering a Save File option. Do not hesitate and click on this Save File button.
Here is the visual example of the pop-up window. 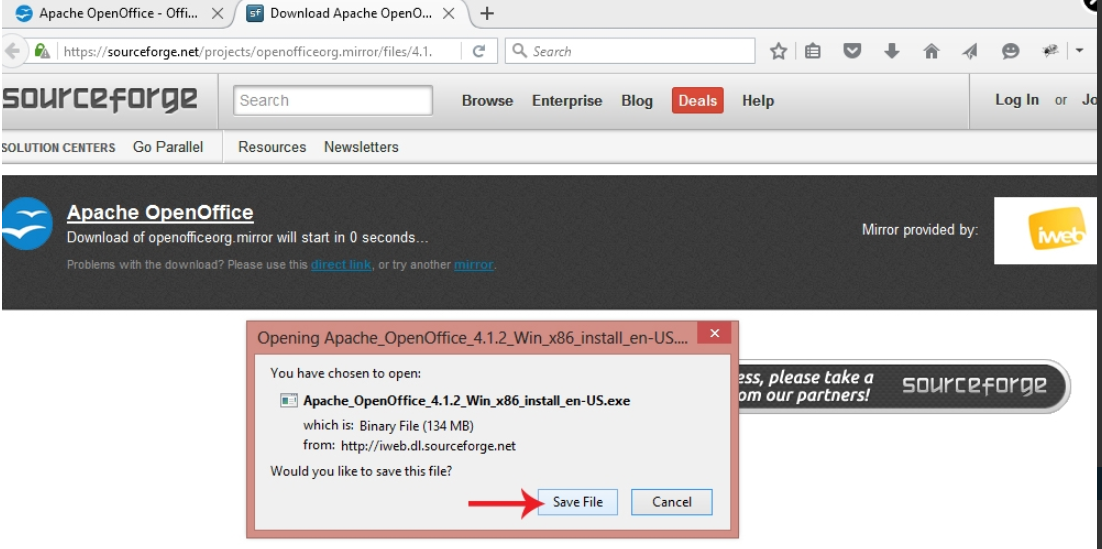
Step 5. This step presupposes that the .exe file is downloaded. Navigate to the file download location and proceed with OpenOffice program installation.
The next important stage is creating .csv files. Follow the tips described below:
Step 1. Please download the sample woocommerce_example_products.csv file using this link.
Step 2. Since OpenOffice Calc program is installed, you should use it to open the woocommerce_example_products.csv file.
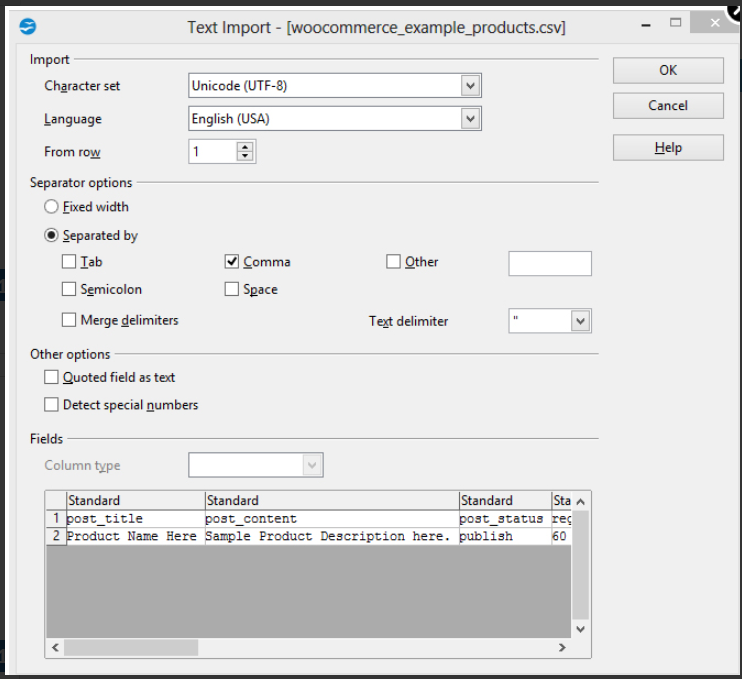
Pay attention to the settings to choose:

- The Character set should be Unicode (UTF-8);
- please, select the comma option;
- click OK button to proceed.
Step 3. To your attention the dialogue window will be opened. There you will see 2 blocks with radio buttons. “Your products will be exported as a CSV (comma separated values) table” is the section you will be exporting the products from. So, the products themselves should be chosen. The system will allow you to select the options of the exporting.
They are:
- All products;
- Products matching the search criteria;
- Selected products.
Check the screenshot to see the settings visually:
When creating a .CSV file, there are required fields to import products. So the proper .CSV file should have the following fields:
- post_title – specify the name of your product;
- post_content specify the product description;
- post_status – specify whether you wish to enable or disable the product, such as publish;
- regular_price – specify the product price. This field should not be empty;
- visibility – specify where you want to display your product(s), such as visible;
- manage_stock – such as yes or no;
- Image – should contain the URL to your image(s). For example: http://domain.com/images/name.jpg
- tax:product_type – specify the type of your product, such as simple;
- tax:product_cat – specify the category name;
- tax:product_tag – specify your product brand or manufacturer.
The truth is that it is better to see once than to read several times. Here we have the example for you: 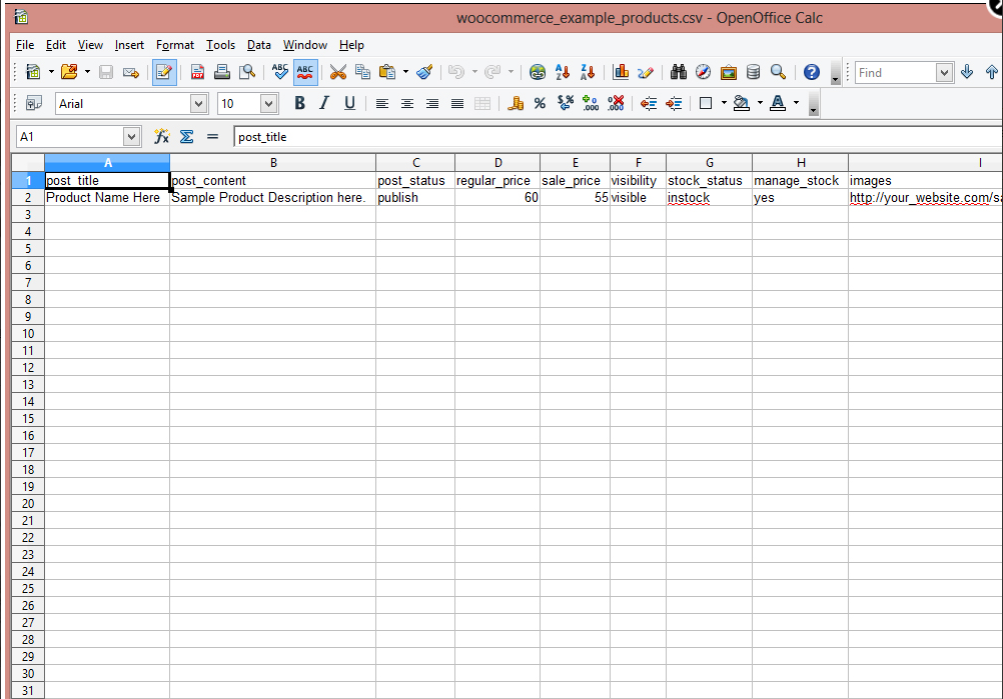
Step 4. Once the file is fulfilled properly, go to File -> Save As. Keep the Text CSV (.csv)(*.csv) type. Check the Edit filter settings option. Let’s take a look at the screenshot to avoid mistakes:

Then, click on the Save button.
Step 5. Next, make sure to click on the Keep Current Format button. You will see the similar window: 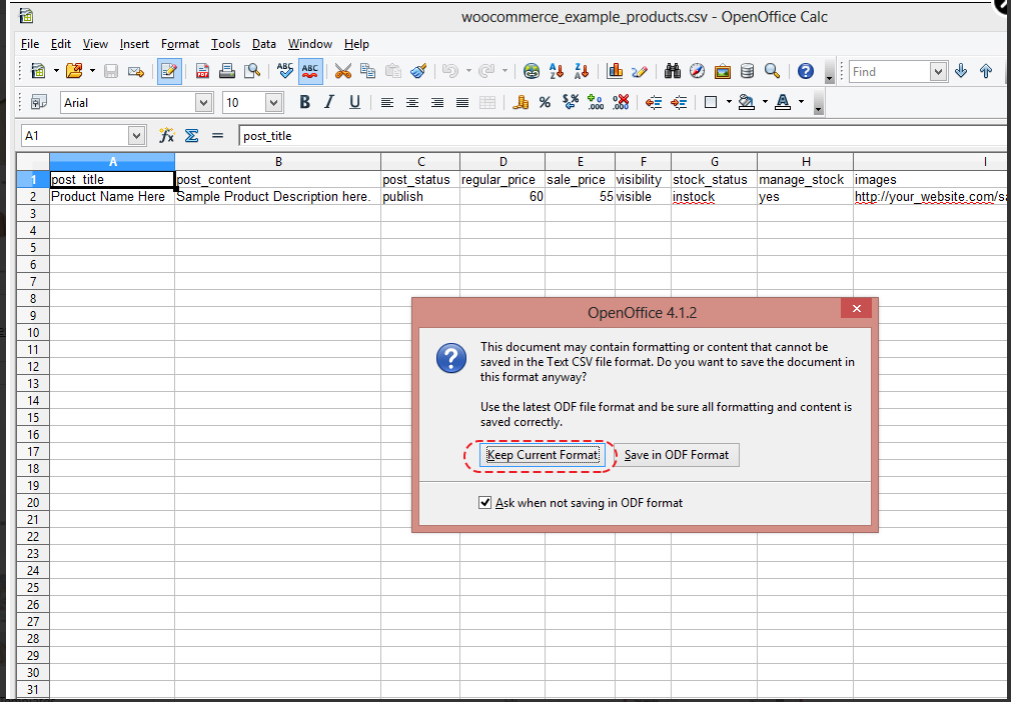
Step 6. We are almost done. So, you should get the popup window after step 5 is completed. Here, please, make sure to select the Character set: UTF-8.
Select the comma field delimiter and click OK.
Once again the screenshot to show the example to follow: 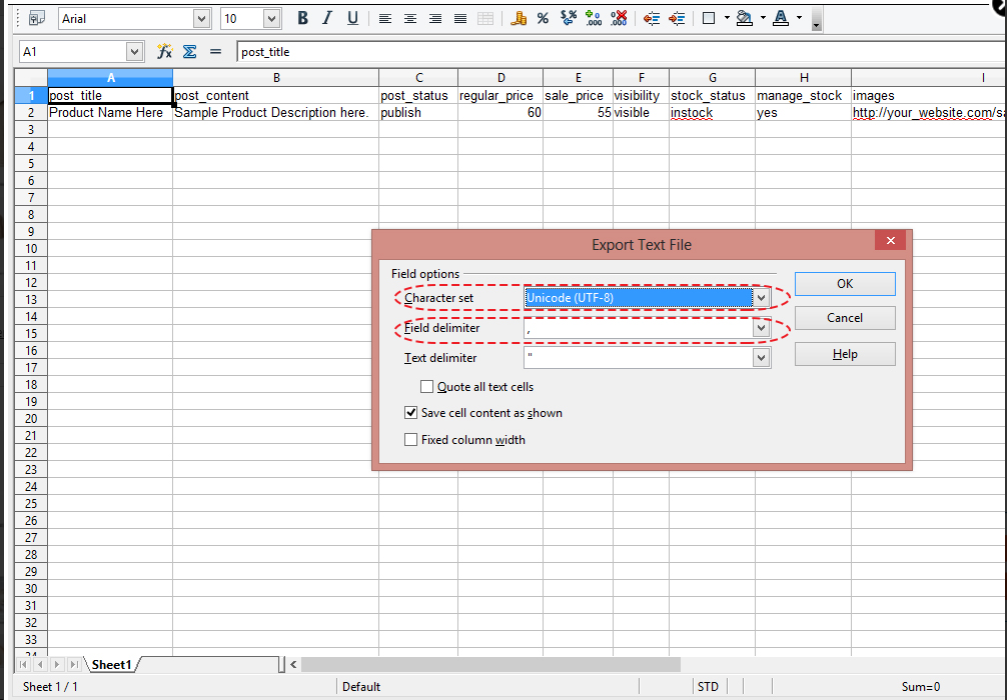
Our congrats. Thus, you have just created a .CSV file for products import for WooСommerce store.
We hope this article helped you to learn how create a .CSV file for products import.
Your attention is highly appreciated! Stay tuned for our pieces of advice to best suit your preferences in the process of the theme customization.