This tutorial shows how to create a multi-currency switcher and manage it in WooCommerce templates.

WooCommerce Multi-Currency Switcher
WooCommerce multi-currency allows you to reach customers from all over the world without any hassles surely.
Thanks to YayCurrency – WooCommerce Currency Switcher plugin, you can optimize your online store for an international customer base to a global level within minutes.
Now let’s start with the basic steps to create a currency switcher on your WooCommerce store.
1. Install YayCurrency Plugin
YayCurrency is a free-to-use plugin to handle currency conversions with ease. Once activated, please navigate to the WooCommerce menu -> YayCurrency to access the plugin dashboard.
2. Add New Currency
In the Manage tab, you can click on Add New Currency to start creating new ones for your store. The new currencies then appear in a list to allow you to configure how you want to display and accept them on your site.
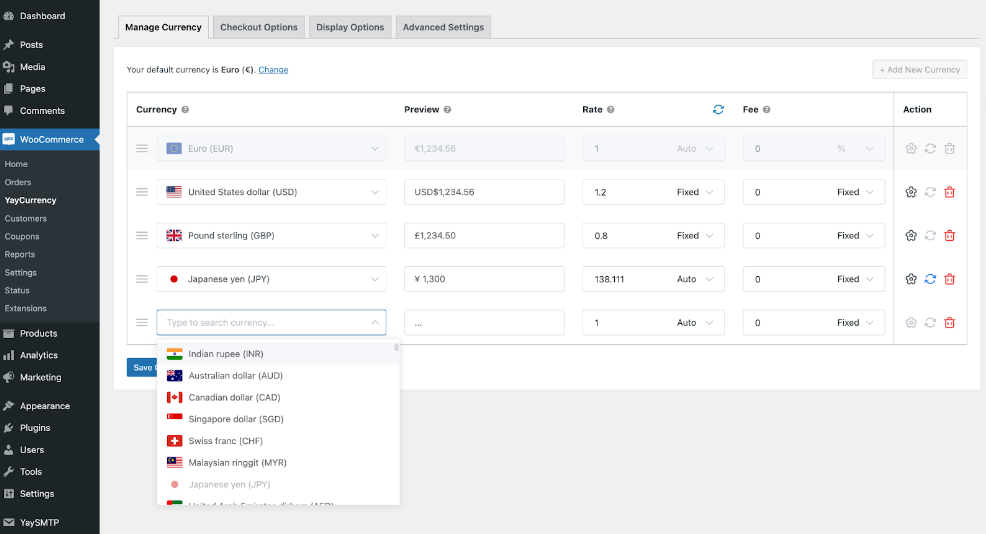
For each currency, you will have the option to use either an automatic or fixed foreign exchange rate, edit its display format, and add a conversion fee.
3. Customize currency switcher
Now it’s time to showcase the currencies on your website positions such as product page, sidebar, header menu, or widget.
Please open the Display Options tab, here you can activate the currency switcher on the product page or other page/post using the shortcode. Additional tweaks can be made to the currency converter used at these positions.

4. Define Currencies Based on Customer Locations
What’s more, in the Settings tab you will find advanced options to let the visitors view and purchase your products in their own local currency.
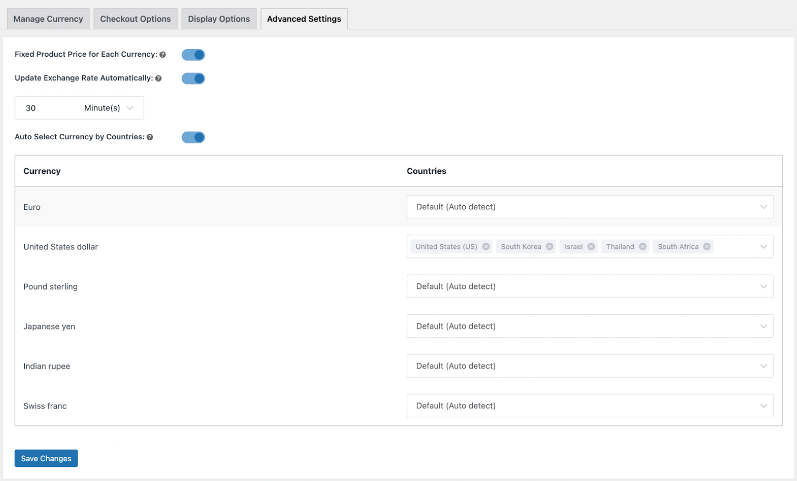
Here you can select and enter the interval in minutes, hours, or days that the automatic update of exchange rates should run. With this setting, the foreign exchange rates are periodically saved to the database using Yahoo Finance API. And the live exchange rate is retrieved right from the database.
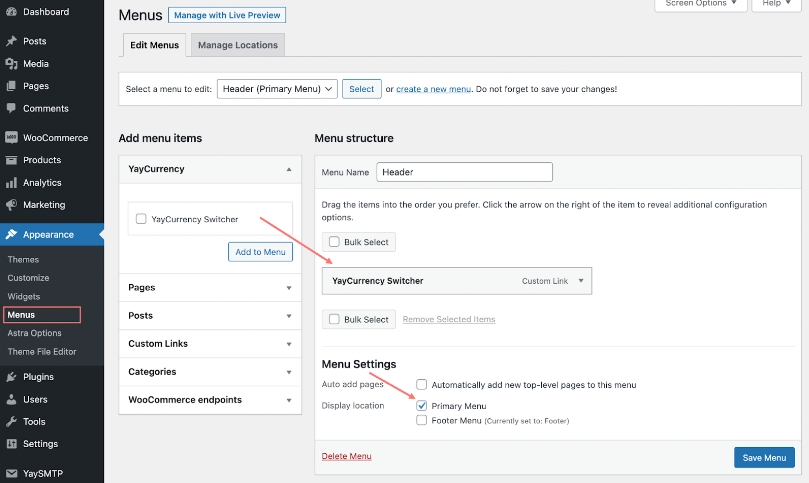
5. Display Currency Switcher on Menu
It’s simple to add the YayCurrency Switcher to your website header, top menu, or footer. You can go to Widgets or Menus to find the YayCurrency item. Just add it to the menu you want and save the menu to publish it.
Finally, you have done these simple steps to make currency switching go live on your WooCommerce store.
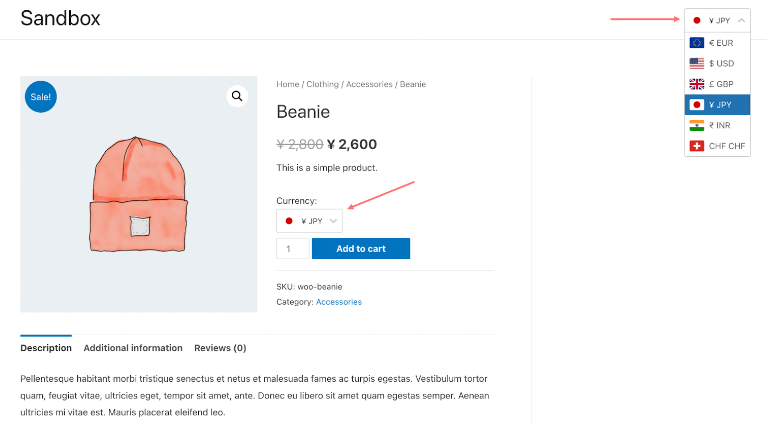
Let’s visit the product page and take a look. You can display the switcher at the optimal spot where the customer can easily find and use it!
It takes only a few minutes to complete the setup and now you can promote your products to international customers.
How to Manage Currency Switcher
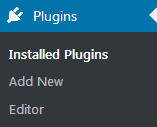
- Open the Plugins -> Installed Plugins section in your WordPress Dashboard. Make sure the WooCommerce Currency Switcher plugin (e.g., v.1.1.9) is installed and active. In order to disable the switcher, deactivate this plugin.

- Since it’s a WooCommerce extension, it’s integrated into the WooCommerce settings. Open the WooCommerce -> Settings section and click on a Currency tab to check available options.

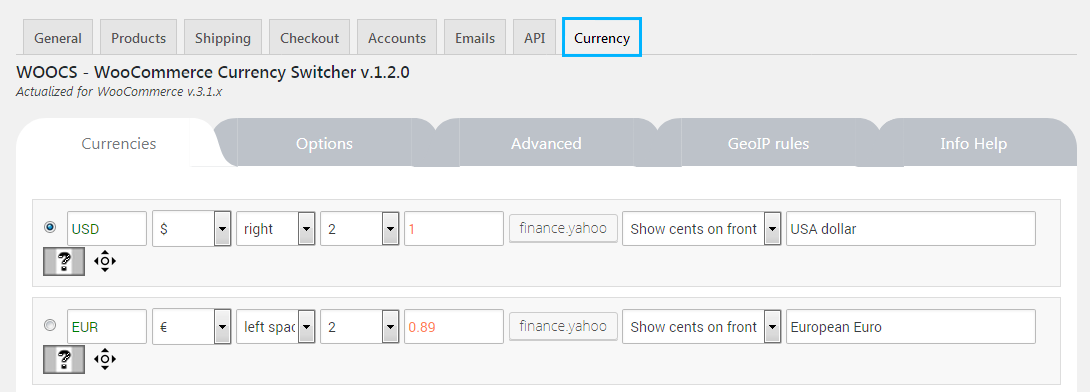
- In the free version of the plugin, you can operate with 2 ANY currencies only. If you want more currencies and features you can make an upgrade to the premium version. As for the moment, you have 2 currencies available under the Currencies tab: usually, these are USD and EUR. You may change them to any other ones if needed.
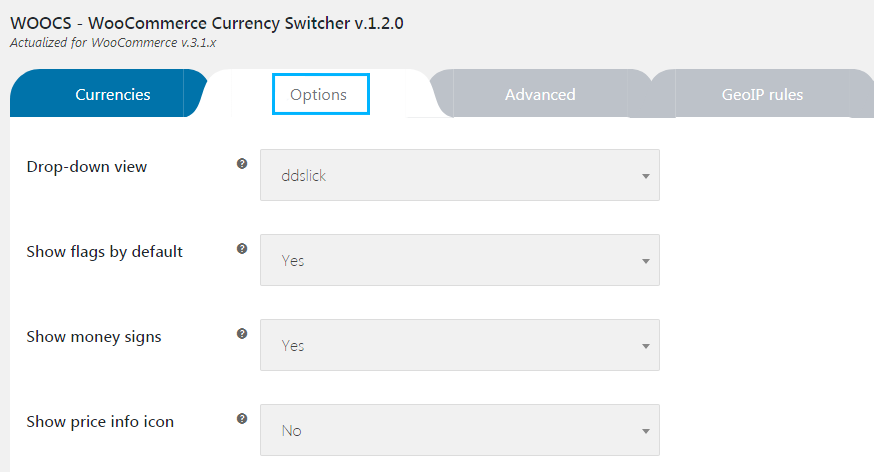
- Navigate to the Options tab to update the view, select the prices display options, etc.
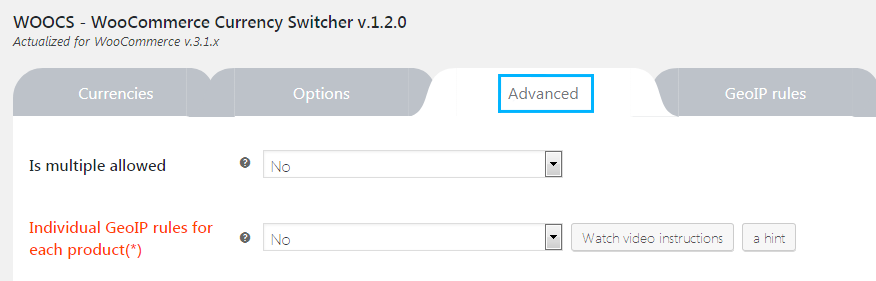
- The next tab is for the Advanced configuration – for example, you may allow Individual GeoIP rules for each product here.
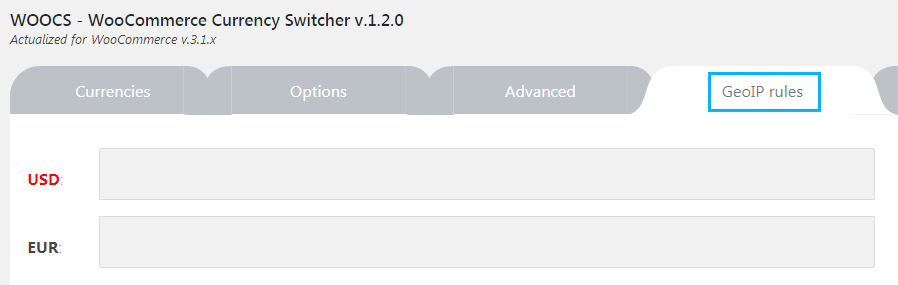
- For each country you select, you can select the preferred currency on the GeoIP rules tab.
- The last Info tab contains links to all the information you need to know while working with the currency selector. For example, you may find the link to the plugin’s documentation, FAQs section, the free flags icons offered by the plugin’s developers, and a quick start video guide.