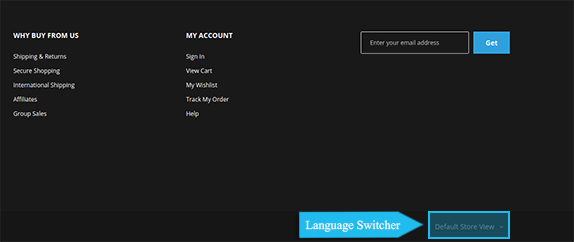
A “language switcher” allows your online store visitors to pick a language (Store View) they want to read your store content.

In case you do not see the “language switcher” in the header, you simply do not have any Store View for the language created.
So that, you need to create at least one more Store View.
[notice type=”warning”]See the tutorial on How to create a Store View with a new language?
* Remember to set one Store View (language) as default.
In this tutorial we are going to show you how to move the language switcher to the footer, which may be better and more appropriate for the design of your online store.
1. First, connect to your SSH and navigate to your Magento store installation folder.
*We will place the “language switcher” in the footer.panel.container placeholder.
2. Open the app\design\frontend\TemplateMonster\themeXXX\Magento_Theme\layout folder.
- “TemplateMonster” is your Magento theme vendor name, may be Zemez or Jetimpex.
- XXX here is your current theme number.
3. Then open the default.xml file to edit and insert the code you see below before the </body> tag.
To make the switcher appear on the right, you’ll need to edit CSS styles.
4. Open the app\design\frontend\Zemez\themeXXX\Magento_Theme\web\css\source\_extend.less file find the next code:
5. Change column to row, so that, you’ll get something that looks like this:
6. Save the file changes and clear Magento cache.
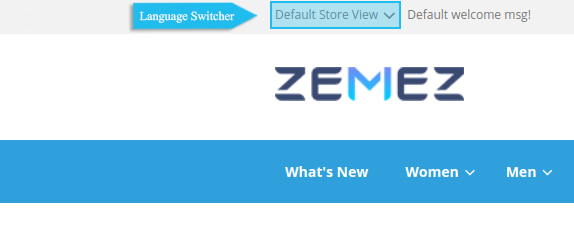
Result: