From this tutorial you’ll learn how to manage checkout options.
Managing Checkout Options
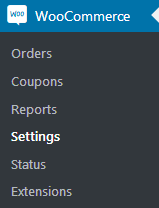
- First, you need to log in to WordPress Dashboard. Navigate to WooCommerce > Settings tab in the left column. Here you need to switch to Checkout tab at the top.

- Locate Checkout process block. Here you can set if you want to enable guest checkout, and to enable using force secure checkout.

- You can see the Checkout pages block below. Here you can set the pages to show as a cart page, checkout page and terms and conditions page. Just select the necessary page from the dropdown list to set it as the required one.

- Use Checkout endpoints block to make changes in the pay, order received, add payment method or set default payment method text for the endpoints. Keep in mind, that the texts should be unique.

- Let’s view the list of payment gateways. Here you can view the methods of payment available for the customers. Use drag-n-drop method to change the order in which they are displayed on your site.

- When you’ve finished Checkout block customization, click on Save changes button at the bottom of the screen.
This tutorial is based on TechnoFix Tech Repair Company Responsive WordPress theme.


