


Users spend a lot of time enhancing their websites. We care how they look, perform, integrate with browsers, and search engines. In a word, we are ready to do everything to make our site comfortable for visitors. As every new visitor is a potential client. And, no matter, what is your unique selling proposition, a service, product, or subscription, any way you need a loyal audience. So, pay attention if your page provides a working user-friendly contact form. Stylish and effective contact forms are not a problem nowadays due to the many tools that make them accessible.
Contact form 7 is the most popular WordPress contact form plugin. It allows you to organize communication with your website’s visitors. You don’t need to know HTML to work with the plugin. With it, contact forms can be implemented by copying a special shortcode to any page of a site. The tool also lets you add an unlimited number of custom fields and integrate with other plugins.
The Contact Form 7 plugin is easy to install and enables users to:

- Create and manage contact forms.
- Easily customize the required fields in a contact form.
- Paste a contact form anywhere using the shortcode.
- The plugin supports antispam filters and is based on Ajax and CAPTCHA technologies.
- There is also a great number of extensions.
And now, follow this guide to learn how to add Contact Form 7 custom fields. Let’s go!
Adding Contact Form 7 Custom Fields
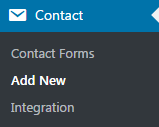
- First, let’s log in to Administration panel (Dashboard). Enter your login credentials and navigate to the Contact tab on the left. Here you can view all the existing contact forms on your website. To add a new contact form click on Add New tab.
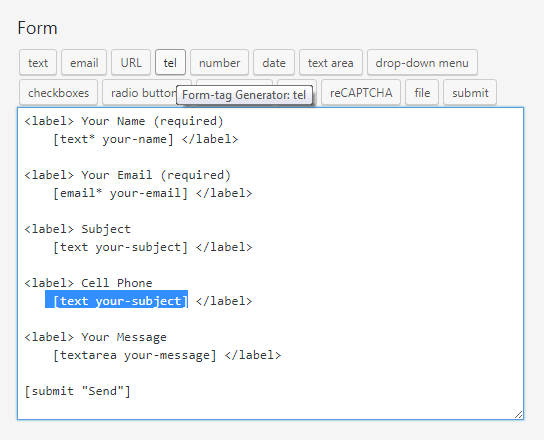
- You will see a sample form with few basic fields, such as Name, Email, etc. Here we need to add a new field (e.g., Cell Phone).
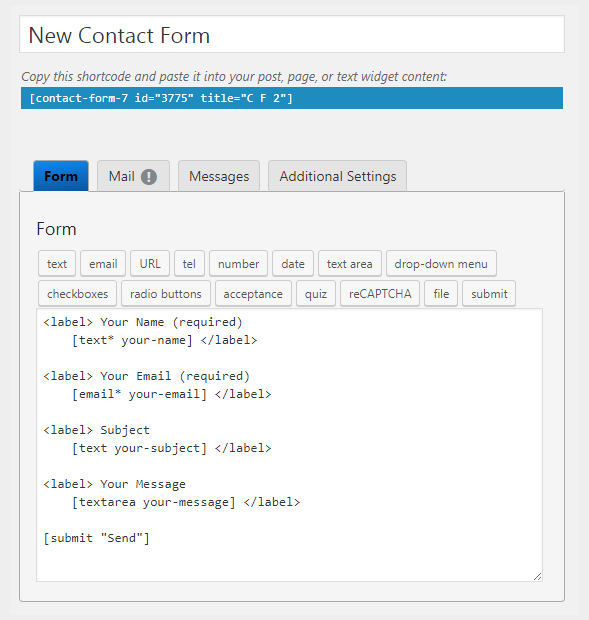
- Let’s copy the code from the other field and paste it to preserve the layout of the copied field.If you need to create custom layout for your contact form, please, feel free to proceed to reading How to Create Custom Layout for Contact Form.
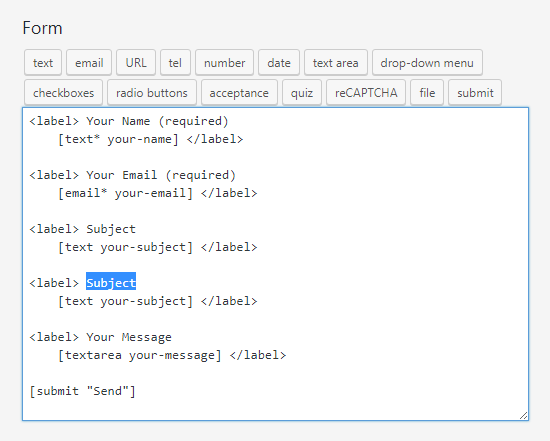
- Rename the field. You can replace the text, that is not included into the code “[]” brackets with your own text.
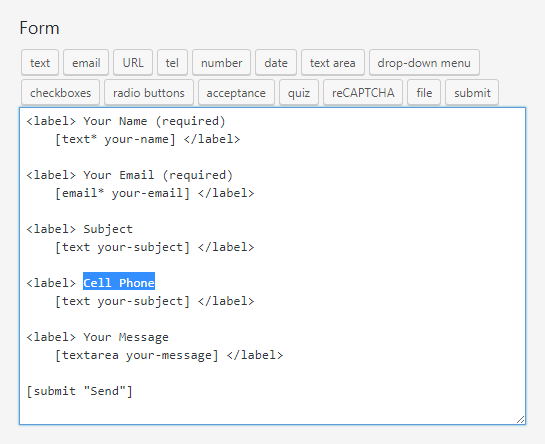
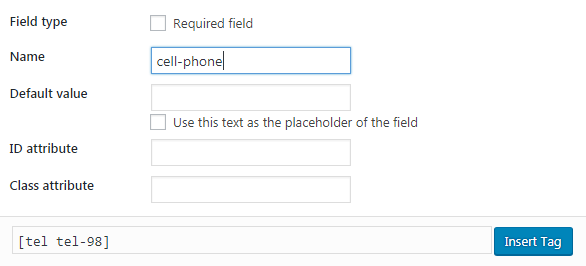
- Now you need to paste the code for the cell phone. Click on the tag you want to add. In our case, it is tel.
- Enter the name of the code in the Name field and click on Insert Tag button.
There are several options available for you in the Form-tag Generator popup window. Let’s overview them.- Field Type – here you can choose, whether the field will be required, or optional.
- Name – type in the name of the field you’re creating.
- Default Value – here you can set the default value for the tag. Check Use this text as the placeholder of the field to give the user a hint on what information he needs to provide, and in what format it should be.
- ID attribute/Class attribute – here you can specify the class or ID for the tag to use the specific CSS class or ID style.
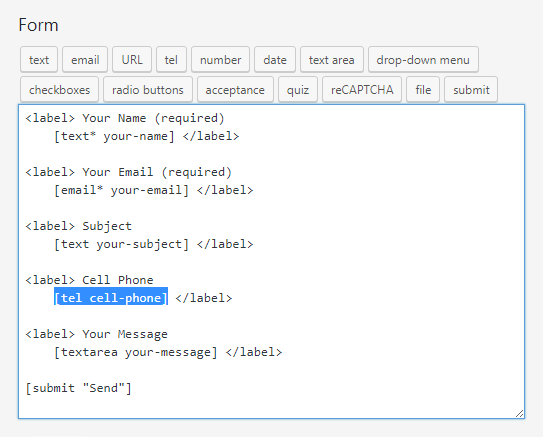
- You should replace the code copied from the other field by the new one you’ve created.
- When you’ve added all the necessary fields to your new form, input the title for the contact form and click on Save button to save it.
- Now you can paste the shortcode of your new contact form to your website’s pages and posts. Please, feel free to read Creating a Contact Form with Contact Form 7 Plugin tutorial to get more detailed information about creating contact forms.
Conclusion
Contact forms are obligatory for every WordPress website. Especially they are a must for people that want to stay in touch with their customers. At the same time, contact forms help limit the number of malicious messages and spam. That’s why today we’ve told you how to add Contact Form 7 custom fields. This WP plugin is the best-known of its kind and boasts of 5 million installations. So, stay tuned and very soon we’ll share more useful stuff with you. Many thanks for your attention!

