Obviously, manage the product filter on the collection page in an online store is important for several reasons:

By allowing customers to easily filter and find products based on specific criteria, you improve the user experience on your site. Of course, this can lead to increased customer satisfaction and higher conversion rates.
When customers can filter products based on their preferences, they can save time searching for products. This helps customers find what they are looking for quickly and efficiently.
Manage the product filter on the collection page also allows you to customize the filters based on the specific products you offer. This means you can tailor the filters to your customer base, making it easier for them to find products that meet their needs.
By making it easier for customers to find products they want, you can increase their likelihood of purchasing. Definitely, this can lead to increased sales and revenue for your online store.
Overall, managing the product filter on the collection page is important to creating a user-friendly and effective online store that meets your customers’ needs. We will show you how you can do it quickly and without the help of specialists.
A few steps on how to manage the Product Filter on the Collection Page
Vendy Pro theme allows you to set different filter layouts for the best customer experience in your store to locate the needed products easily.
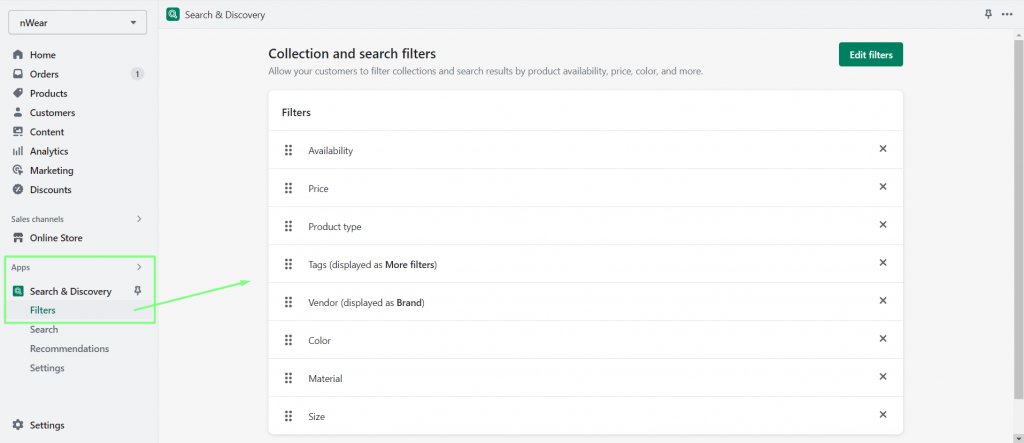
Please, refer to the official documentation to manage the options displayed in the filter.
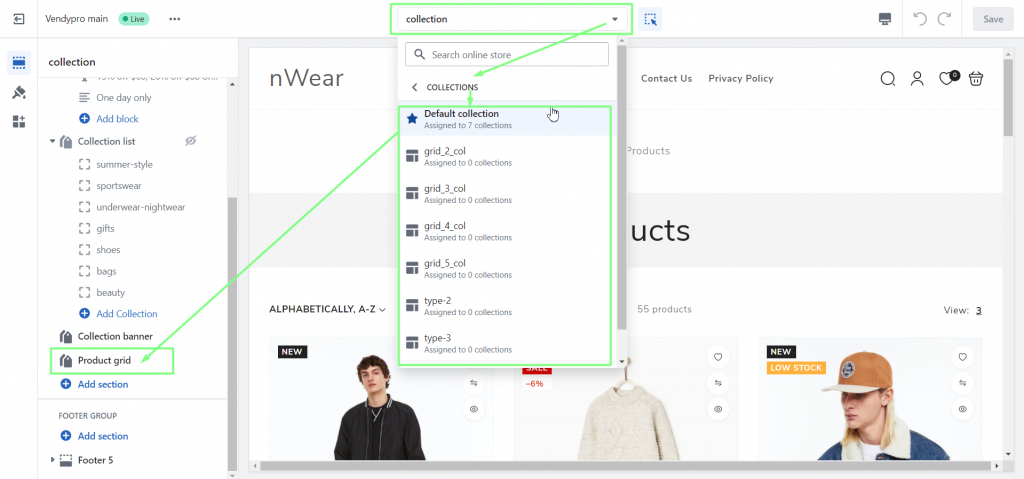
In order to adjust the filter display, log in to your Shopify admin panel and navigate to Online Store > Themes > Vendy Pro > Customize.
Next, select the needed Collection page template from the top dropdown and press on the Product grid section:
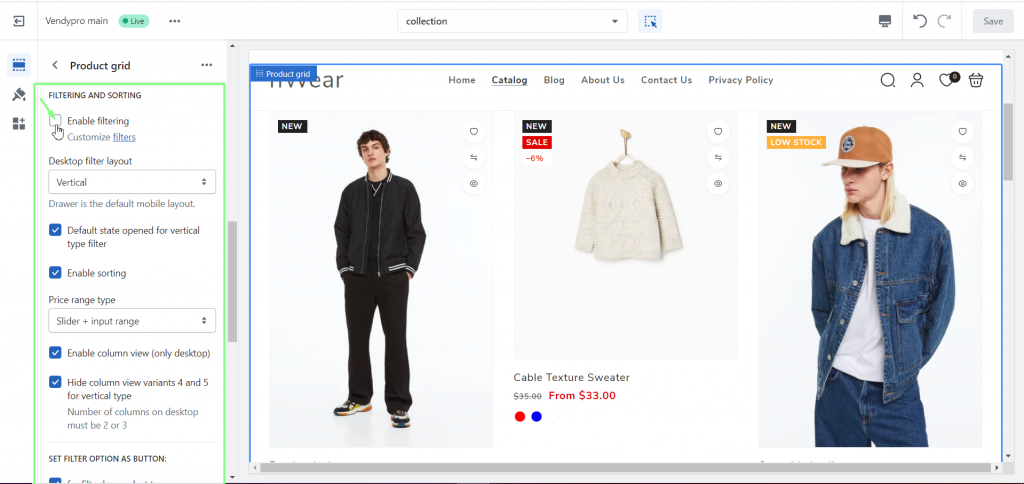
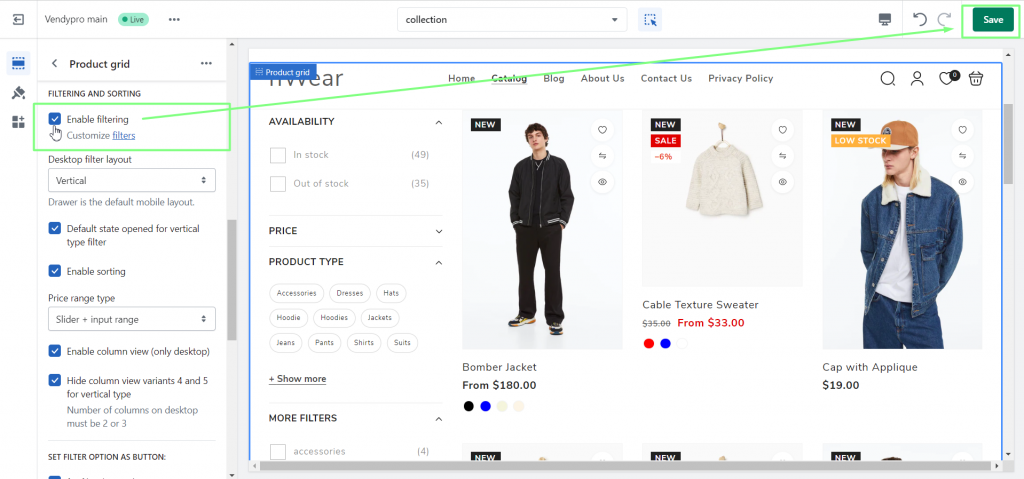
Scroll down to the FILTERING AND SORTING area. Select Enable filtering and save the changes (if it is not enabled, if enabled – proceed to the next step).
Filtering and Sorting
Select Enable sorting if you want the following sorting options to display:
- Featured.
- Best selling.
- Alphabetically, A-Z.
- Alphabetically, Z-A.
- Price, low to high.
- Price, high to low.
- Date, old to new.
- Date, new to old.

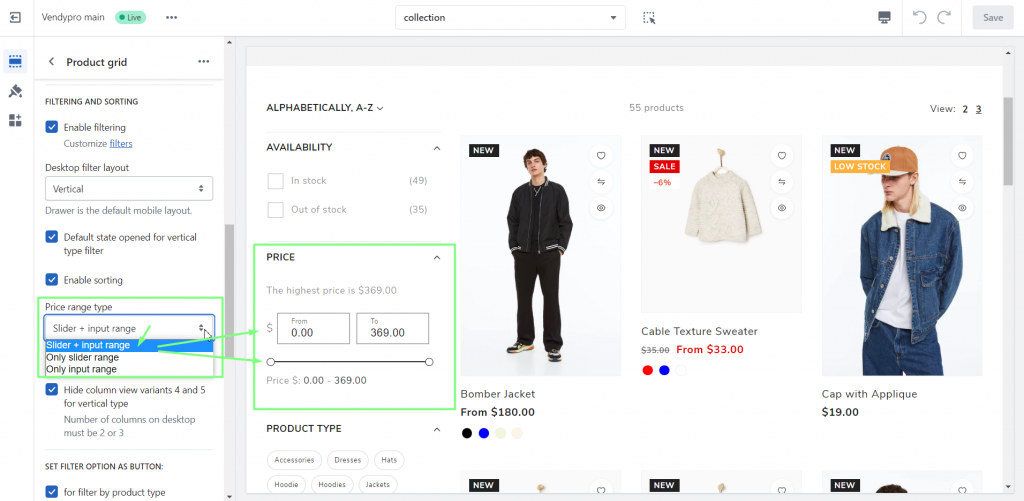
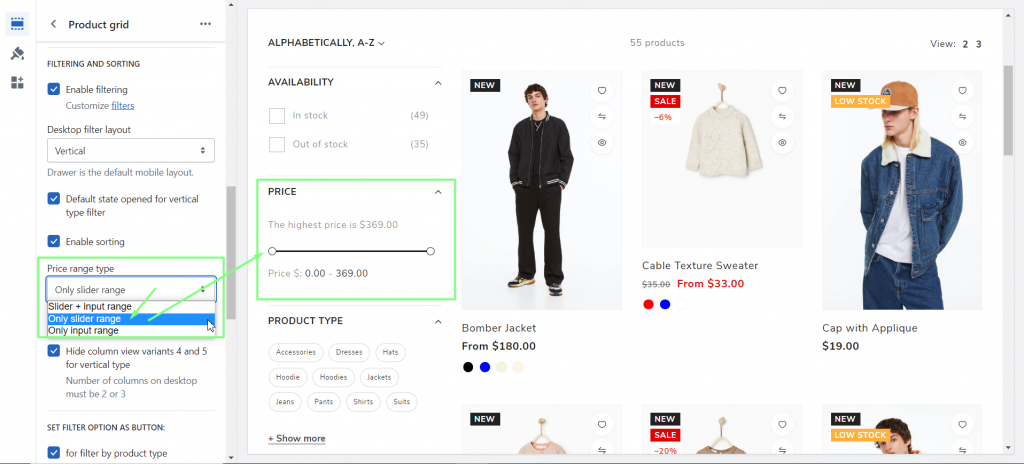
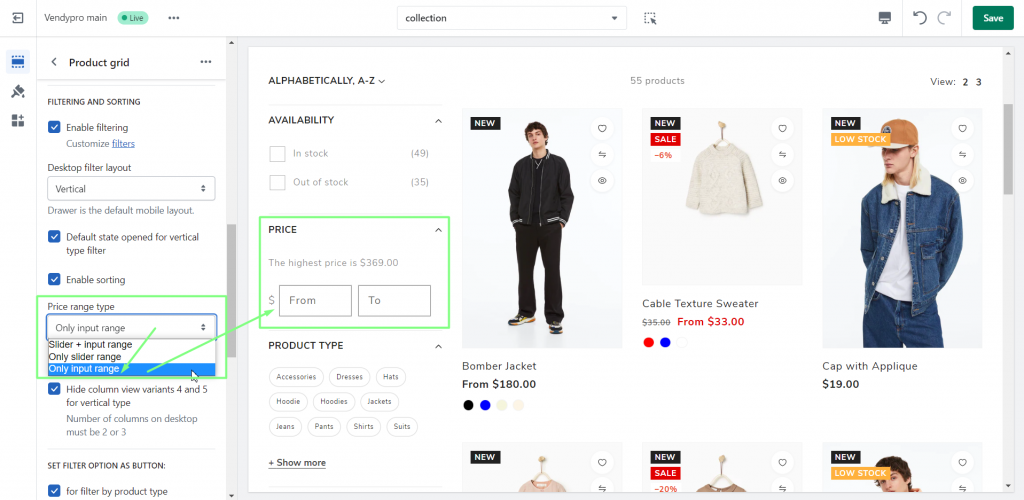
You can select the price filter displayed in the Price range type area:
– Slider + input range – will display as input fields for the buyer to set minimum and maximum price values. You can also set the price slider to select a price range for products:
– Only slider range – will display the price slider to select the price range for products (minimum and maximum price values):
– Only input range – will display input fields for a customer to set minimum and maximum price values:
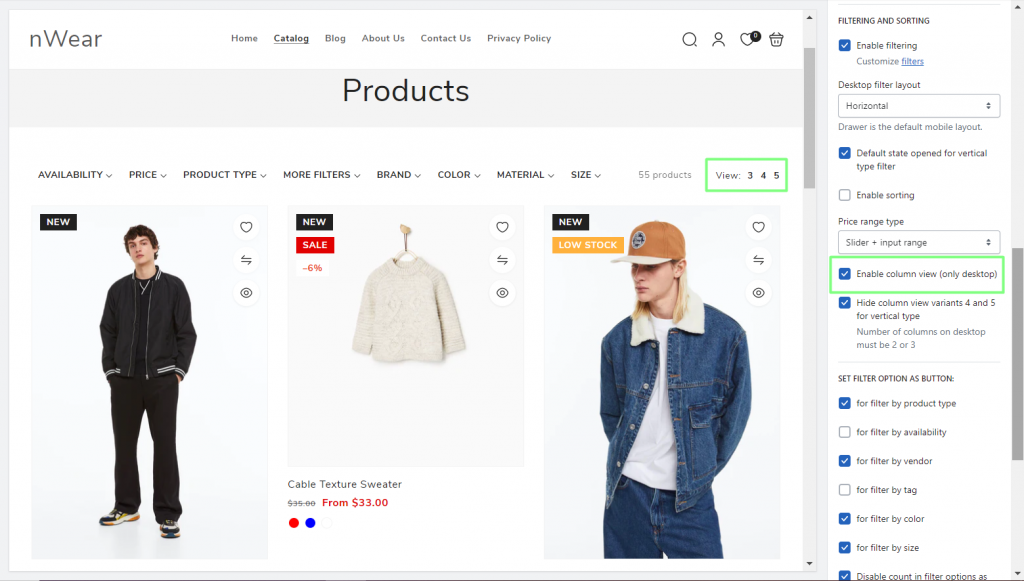
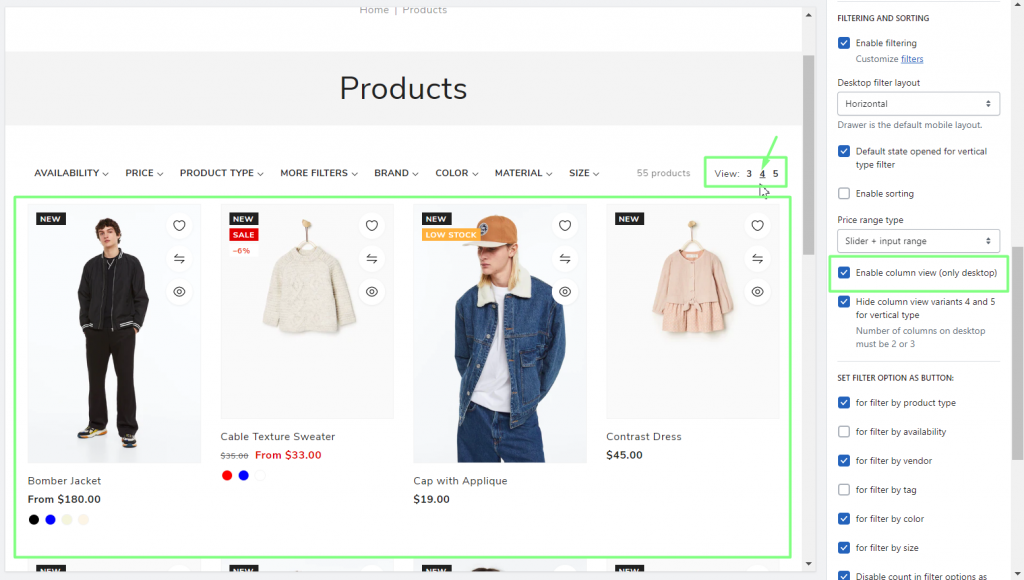
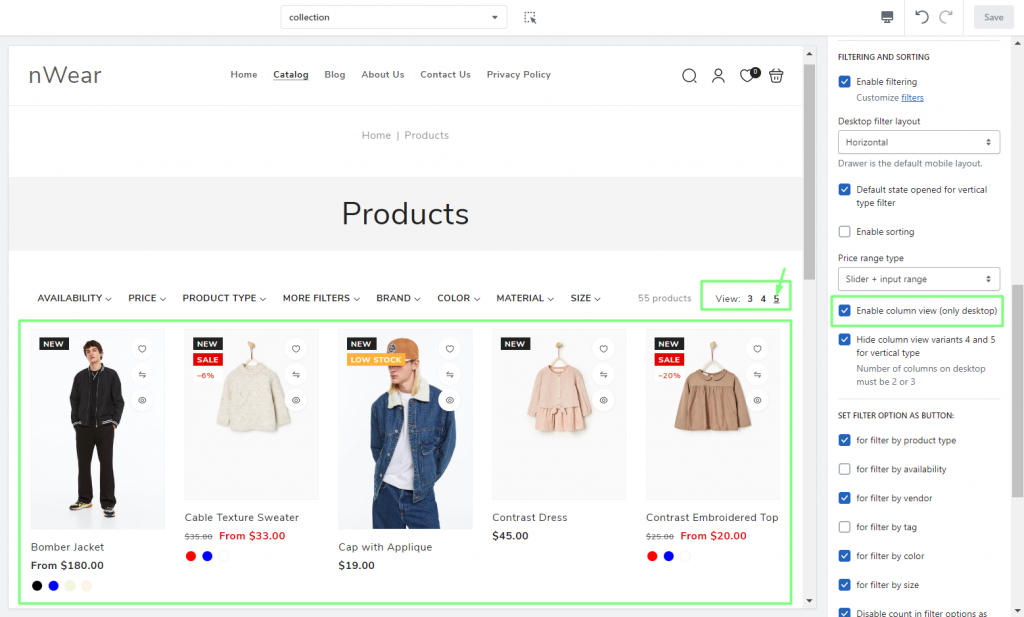
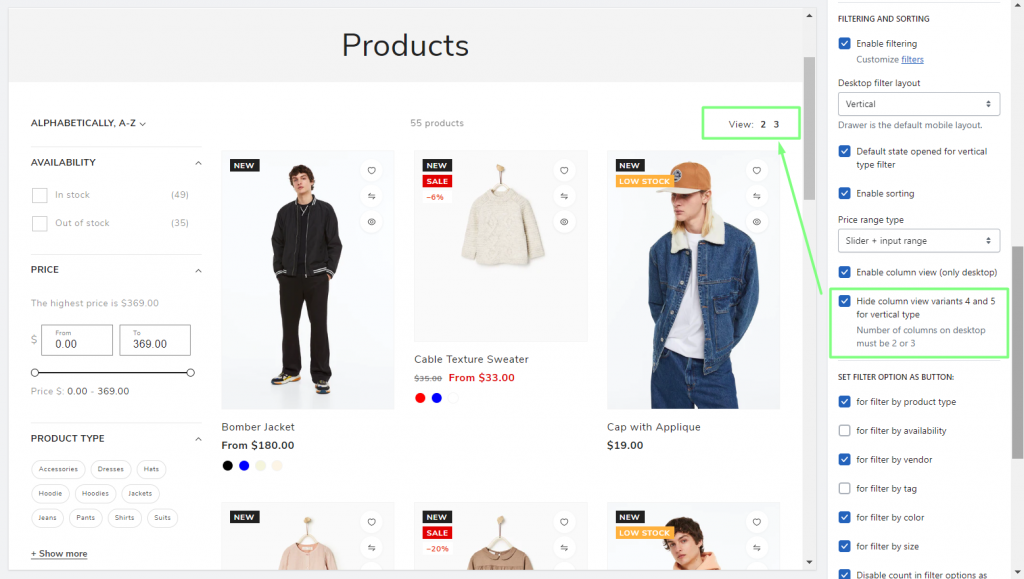
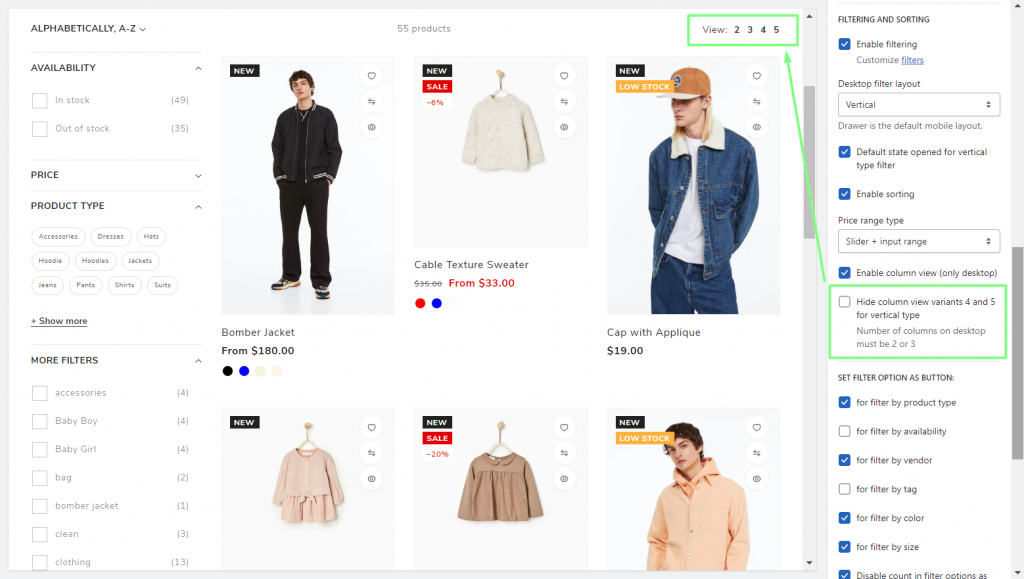
Choose to Enable column view (only desktop) if you want to add the possibility to change the number of columns for product listing on desktop screens:
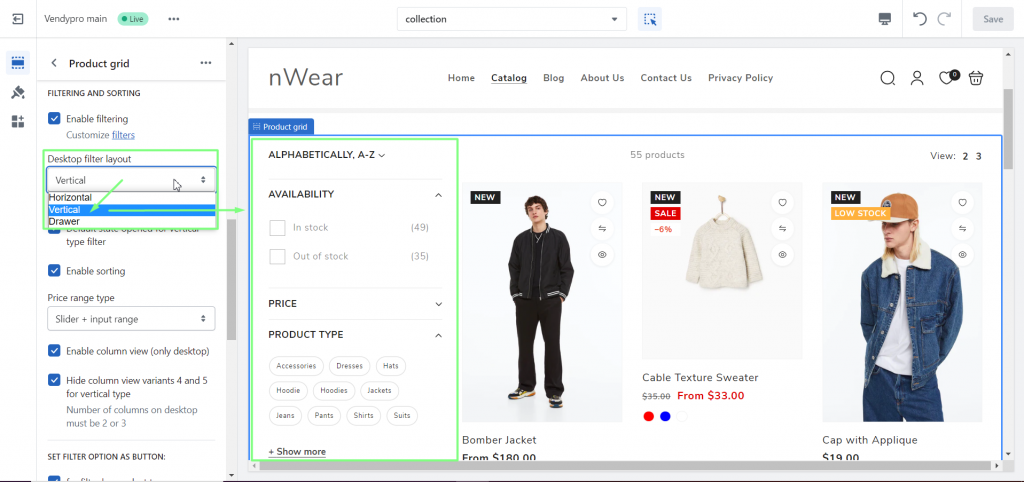
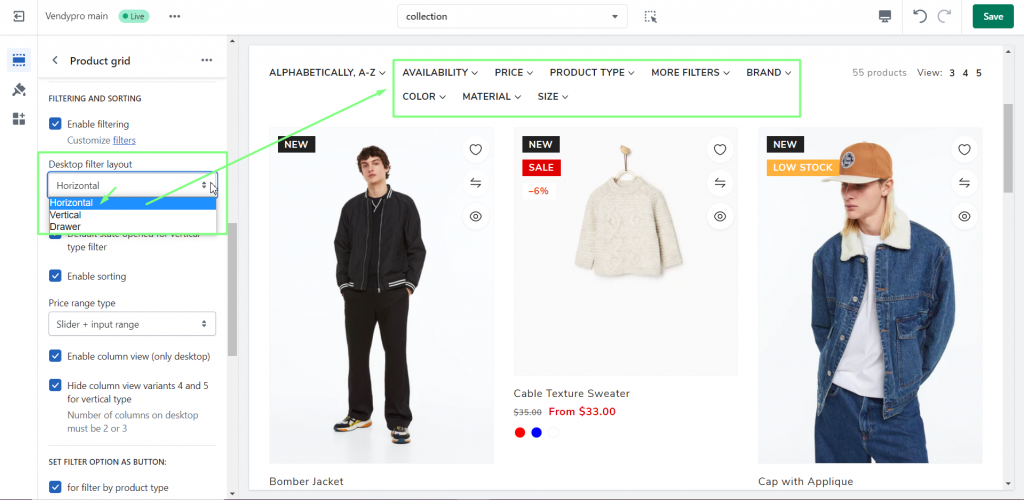
In the Desktop filter layout, there are 3 display options:
– Vertical – displays filter options in the sidebar:
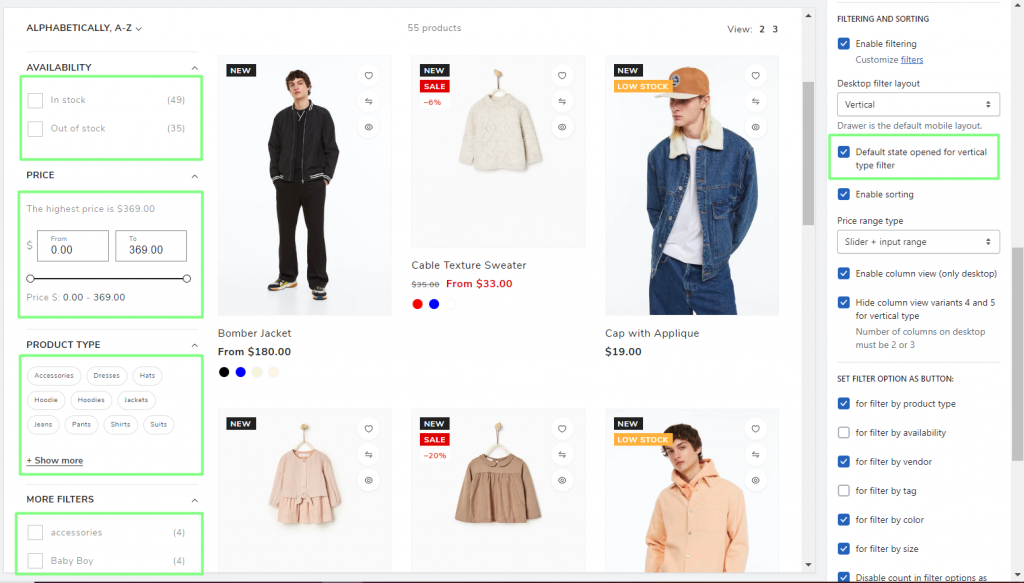
This type of display includes the following configuration options:
– Default state opened for vertical type filter – enable/display for all filters to be opened by default:

– Hide column view variants 4 and 5 for vertical type – if enabled. The Number of columns on the desktop can be either 2 or 3, 4- and 5-column layouts will not be used.
– Horizontal – horizontal display of the filter above the product listing:
– Drawer – displays a filter drawer on the side of the screen that you can open and close:
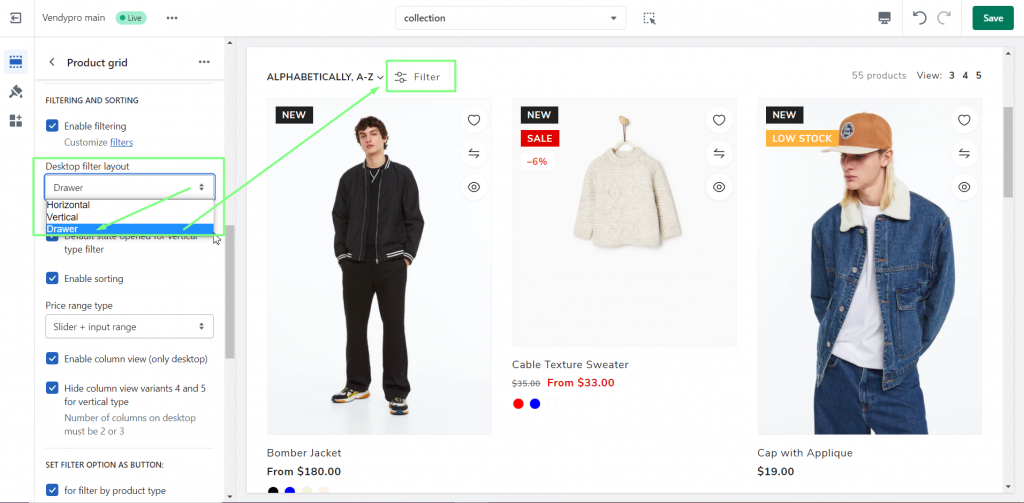
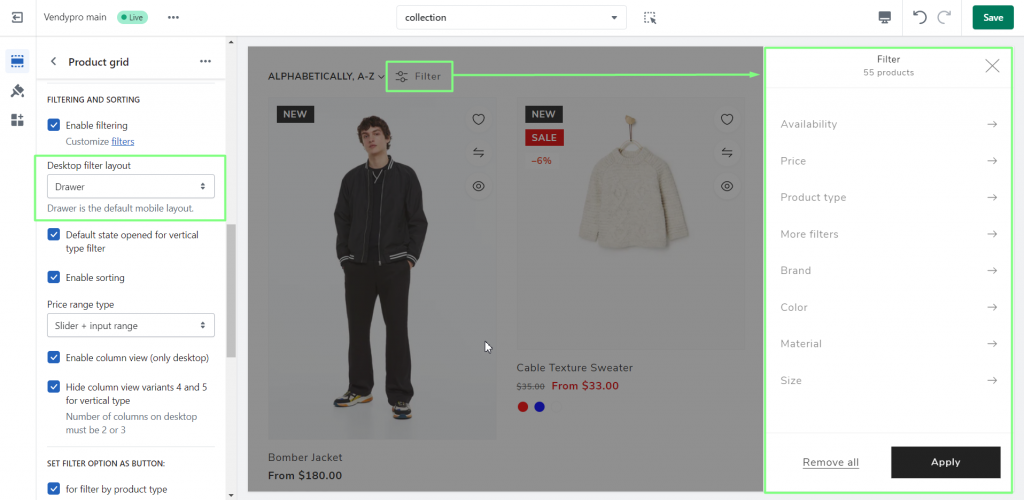
The Drawer is also the default mobile layout.
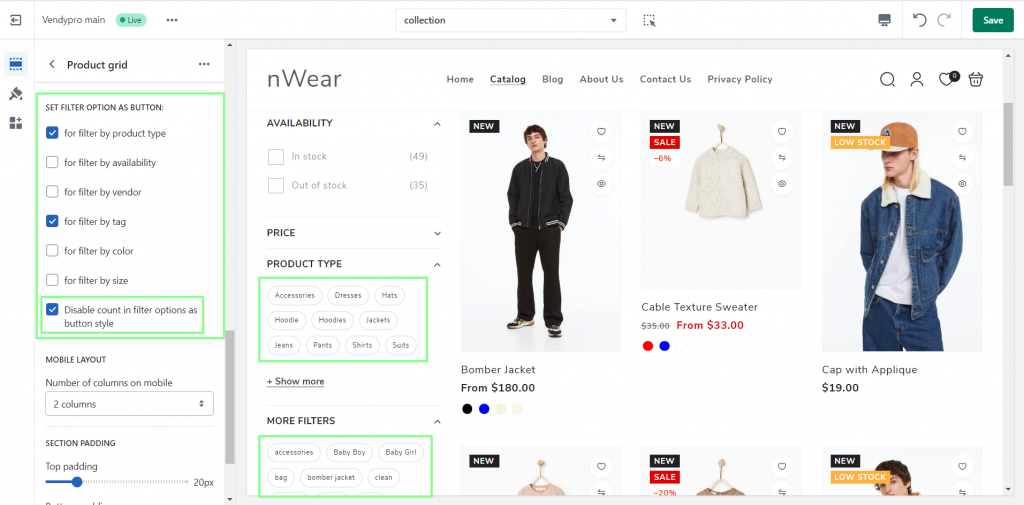
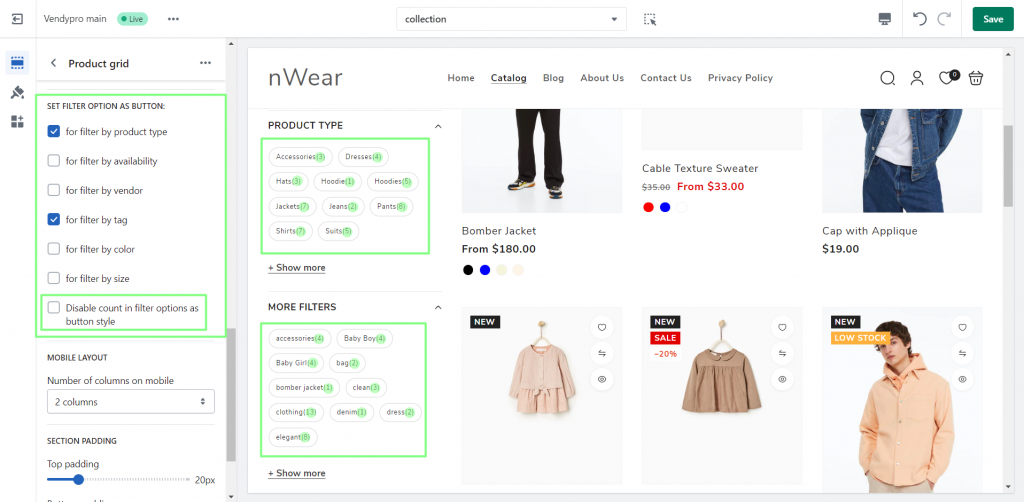
You can choose how the filter options are displayed
This can be in the form of a drop-down list, or in the form of buttons in the “SET FILTER FILTER AS BUTTON” area for each product filter:
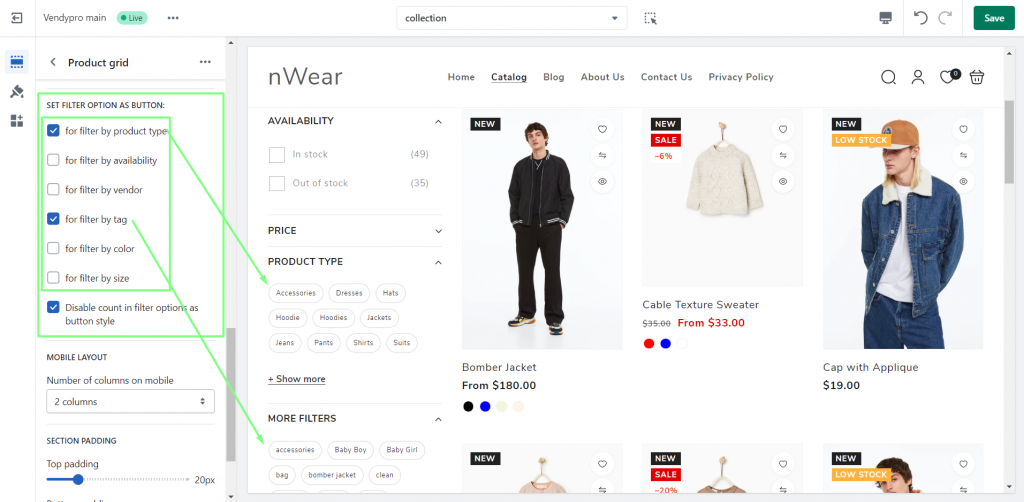
Disable count in filter options as button style feature allows to display/hide the number of products of each filter option inside buttons:
In addition, you can adjust the display of product filters according to your needs thanks to the customization options provided by the Vendy Pro theme.
Finally, you might also find it helpful to know how to add a page section to product tabs on the Shopify product page.
If you have any further questions, contact us.