Website visitor comfort and lead generation – is it possible to chase two birds with one stone and catch both? The task becomes more complicated when it comes to pop-ups. This is a headache for Internet users: at best, they close the pop-up and move on. At worst, they leave, scolding the developers, and do not return to this site. We will show you how to edit the newsletter popup in Shopify. So you will use them on your site more effectively and it will positively reflect on your conversion.
Follow these simple steps
Let’s start editing the newsletter popup in Shopify.
The newsletter popup in Shopify can be customized in the Online Store > Customize > Theme Settings tab:
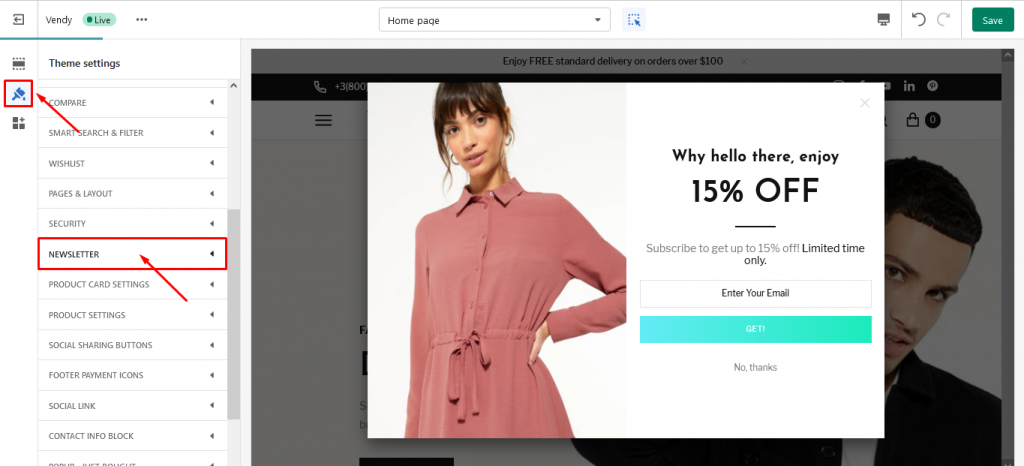
In the Newsletter tab, the user can enable or disable the popup, and set the expiration date for disabling the popup. Here you can also choose the style of the newsletter popup (if the template includes multiple layouts). Next, you can edit the contents of the popup window:
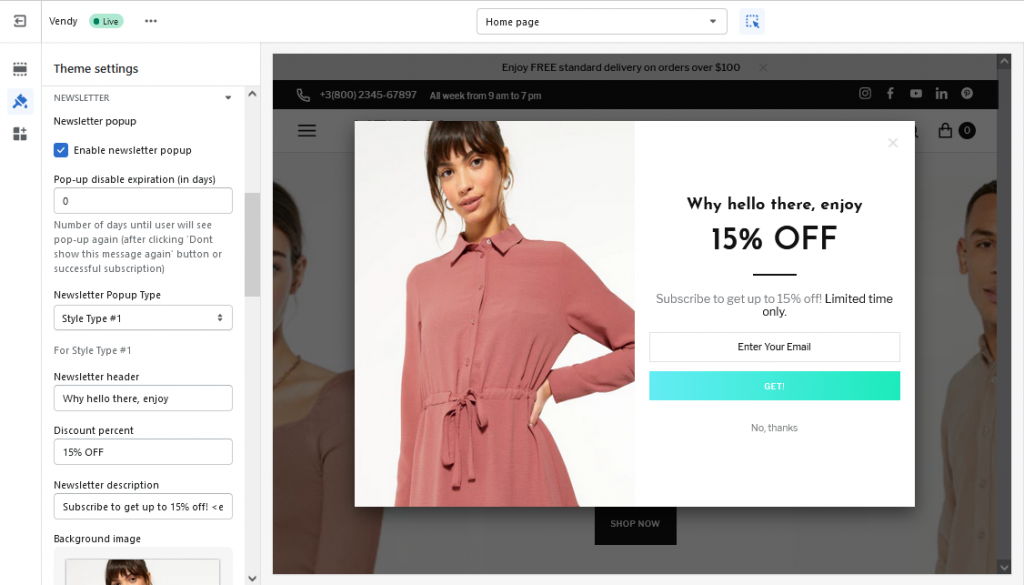
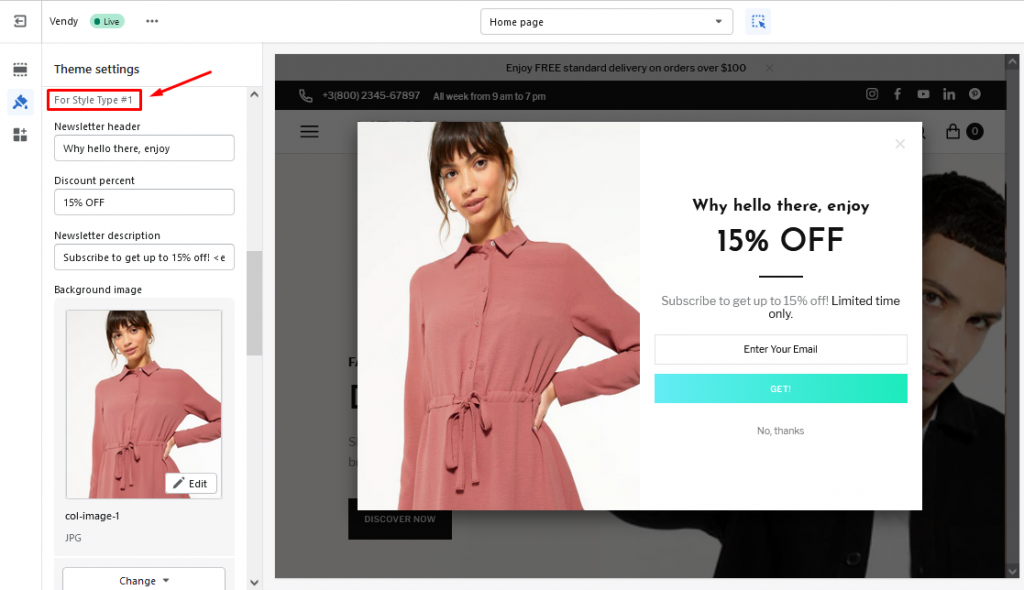
Below the general popup settings, the user can set a custom popup title, description, and background image. In addition, if you include more than one newsletter layout in a template, each layout will have a separate settings section:
NB! The work of the newsletter is related to the Shopify store configuration, not the theme itself.
You will use the store email used for newsletters in Shopify by default. You can change it in the Settings > Store details tab, Contact information section, Store contact email, or Account email field, as described in the Shopify documentation.
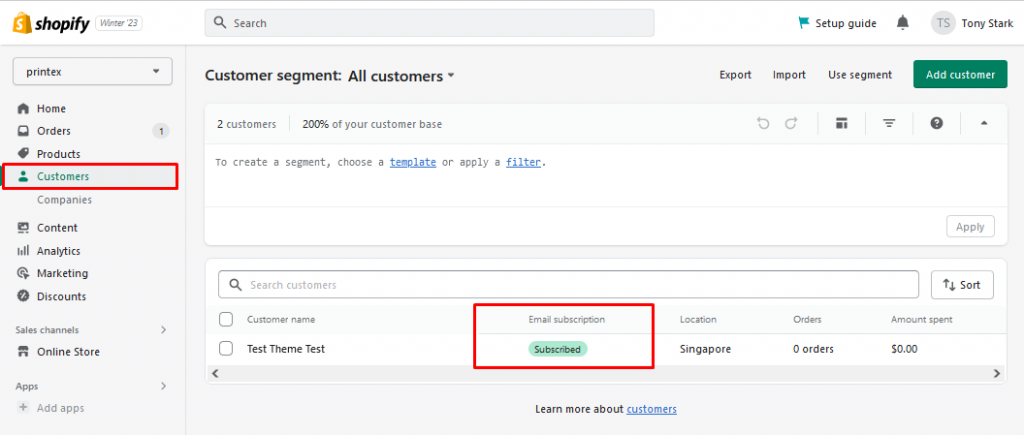
You can see the list of subscribed users in the “Clients” tab:
We hope you have found the answer to your question here. Finally, if you still encounter difficulties working with a ready-made Shopify theme, you can always ask the support team.
This tutorial can also be useful How to work with Shopify 2.0 “sections everywhere”.
Getting Stuck? Feel free to contact our Dedicated Support Team for further assistance.


