Without a doubt, the design of an online store affects the behavior of visitors and, ultimately, their desire to make a purchase. Images of products in the store are necessary and without them, it isn’t easy to imagine an excellent online store. They help to attract the attention of buyers and give an idea about the goods they purchase. In addition to visual appearance, images determine the weight of your site’s pages and affect how fast they load.
A beautiful and convenient product gallery is essential for every store. You will learn how to set it up here, just take a few minutes to study the detailed instructions.

Adding a Product Media Gallery to Shopify OS 2.0: What Should You Do?
Shopify Online Store 2.0 allows adding different media types to the product gallery: images, videos, and 3D models. The most common file type for the images is PNG, but Shopify also accepts images in JPEG, GIF, PNG, PSD, HEIC, and other formats. You can upload videos as files (.mp4 or .mov) or import them directly from YouTube or Vimeo. 3D models can be added as GLB or USDZ files.
1) Scroll down to the Media section on the product editing page:
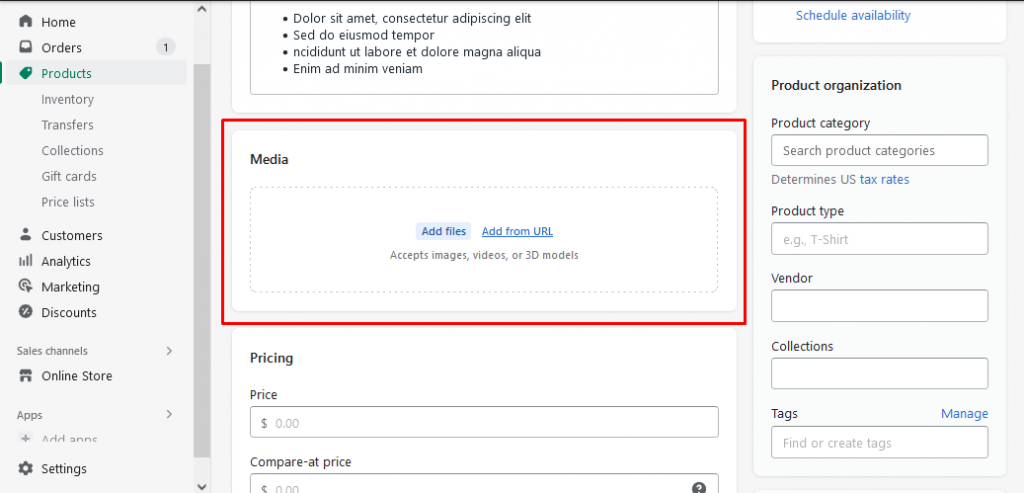
2) There are two ways of importing media for the product: uploading from your device or adding via a direct URL.
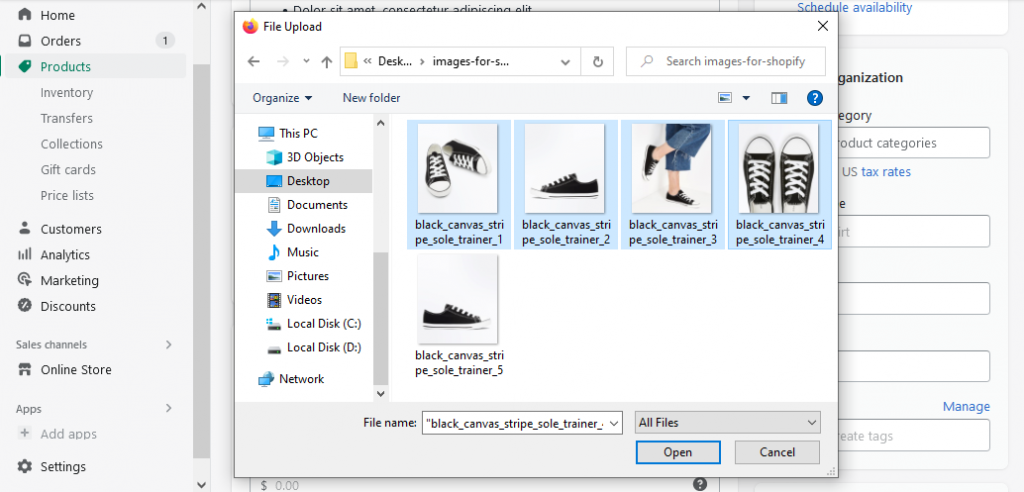
In order to upload an image, video, or 3D model, please, click the Add files button. Shopify allows selecting as many files for import at once as needed:
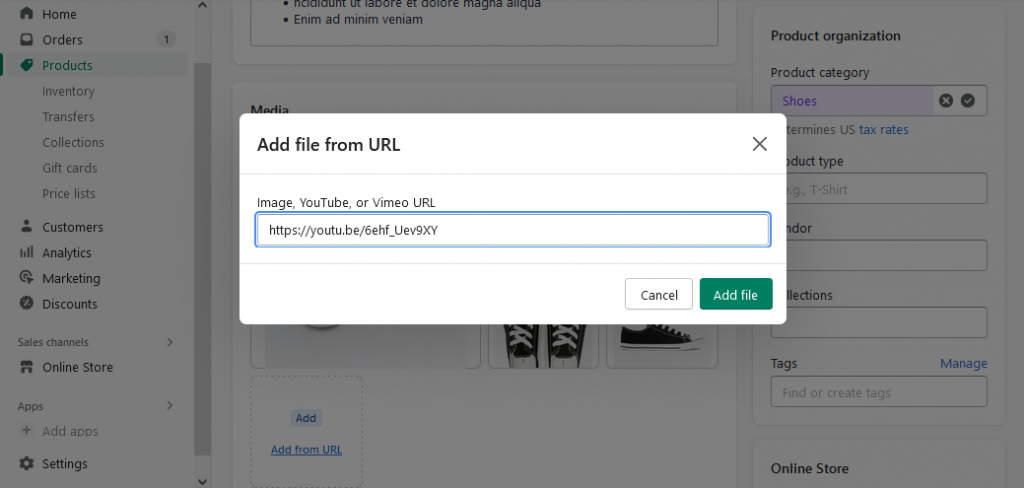
Pressing the Add from URL button opens a popup with an input field for an image URL, YouTube, or Vimeo link:
NB! – the required image size is anything up to 4472 x 4472 px, 20 MB. The requirements for the uploaded videos are up to 1 GB in size and 10 minutes in length. For YouTube or Vimeo embedded videos, Shopify has no requirements.
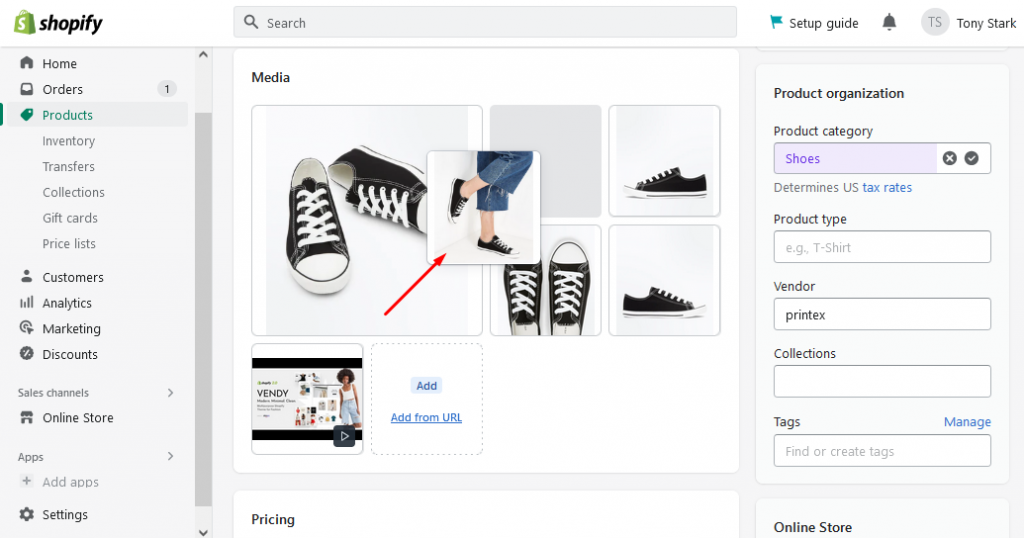
3) The first file added to the Media section (it’s the biggest one in the gallery) is considered the main product media item.
Shopify allows rearranging the files manually after uploading. To change the order of the file, just drag and drop it to the required place:
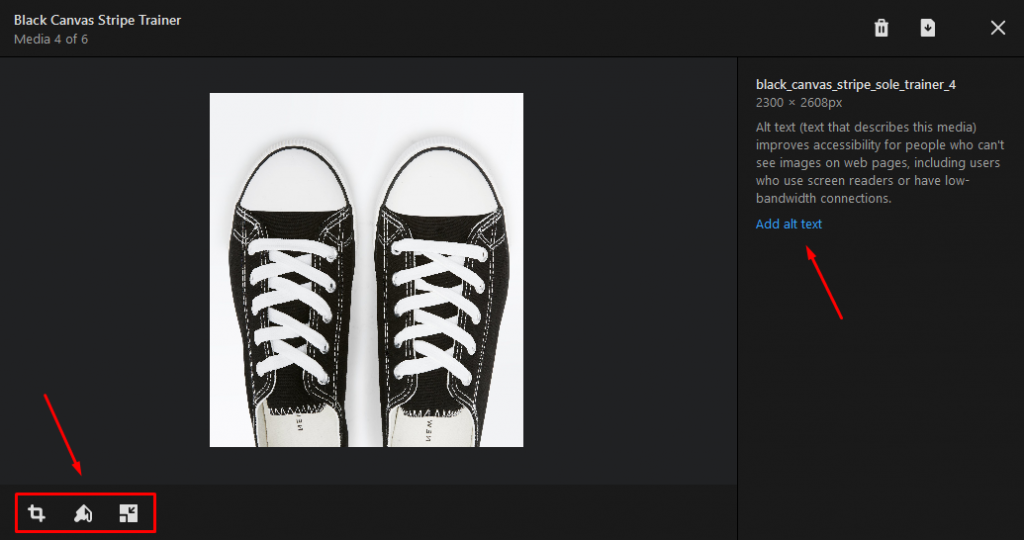
4) Shopify also has an inbuilt graphic editor, which allows resizing images, cropping or rotating them, and adding a drawing.
If you need, you can add alternative text in the same interface. You can open the editor by clicking on the image in the “Media” section:
5) If the product is newly added, do not forget to click the Save button after adding the product data, including the media.
In case the product was already saved earlier, the changes made in the media section are saved automatically.
You might find it helpful to read more on how to add dynamic checkout buttons on Shopify.
Official Shopify resources with more information about product media.