[notice type=”warning”]We strongly recommend you to make the complete backup of your web store and its database manually, before proceeding to the update. That will help to restore the website if the update will be unsuccessful.
Database backup
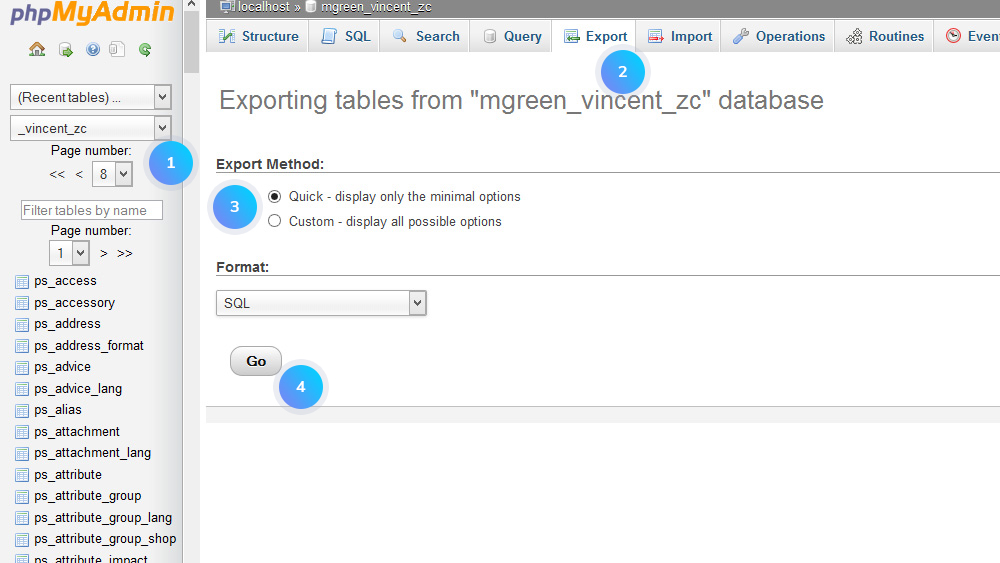
- Log into cPanel with the username and password your hosting provider gave you. Find phpMyAdmin tool to export data from your MySQL database. Once, you get into phpMyAdmin, select your store database there. Click Export at the top.
- Under Export Method choose the option you need. At the bottom of the page click Go button:
- You will be prompted to save a file on your computer. Once you do, the backup will be created and saved. You can keep the backup and re-import it anytime to restore your database, on this server or any other MySQL server.
Website backup
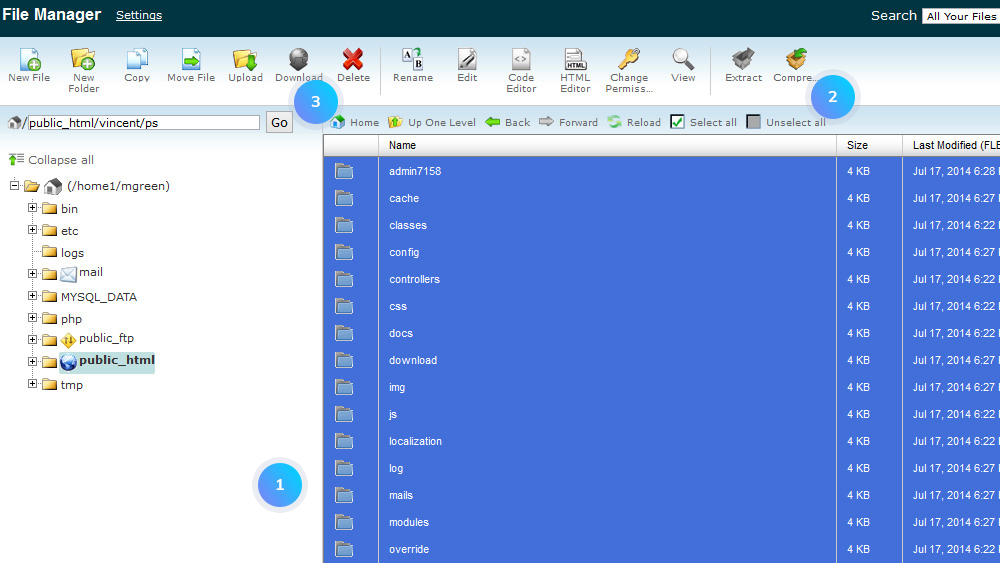
- In your hosting cPanel find the File Manager tool and click it. There open the folder with your PrestaShop installation. Select all files and folders and click Compress button:
- Download the .zip file, that you get, to your desktop. You can keep the backup and re-upload it anytime to restore your website files on the server.
Updating PrestaShop
- In your PrestaShop admin panel go to Modules and Services -> Modules and Services. In the search field type 1-Click Upgrade to find the module and Install it:

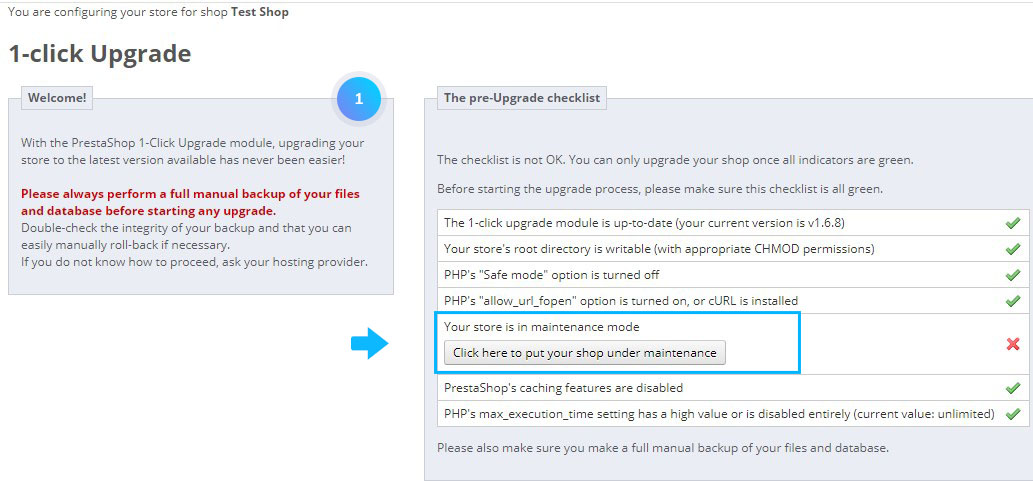
- After the successful installation, click the Configure button to set the module settings. Put your store under maintenance:
- Uncheck back up options. Save settings:
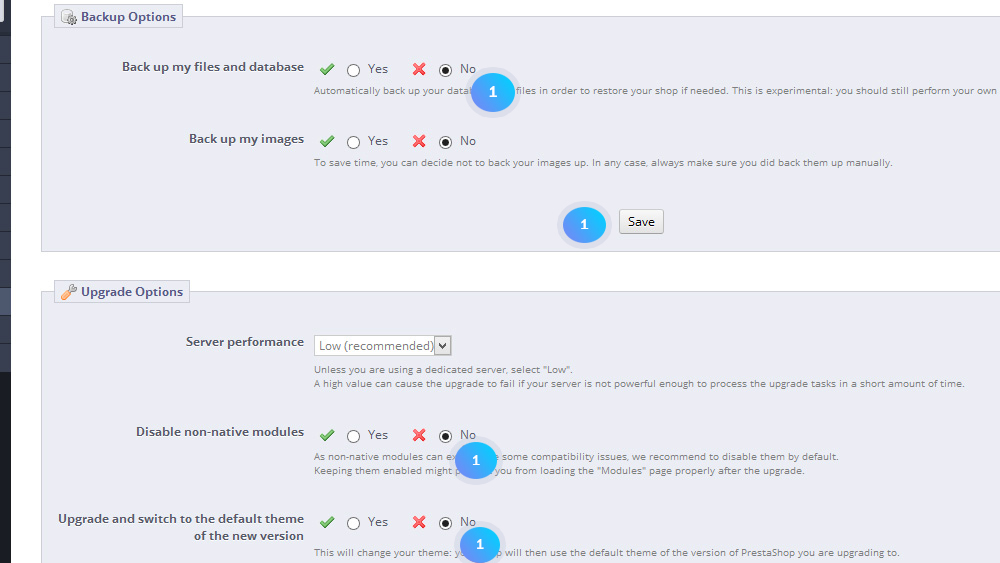
- In Upgrade options, you need to set Disable non-native modules and Upgrade and switch to the default theme to No. Click Save button:
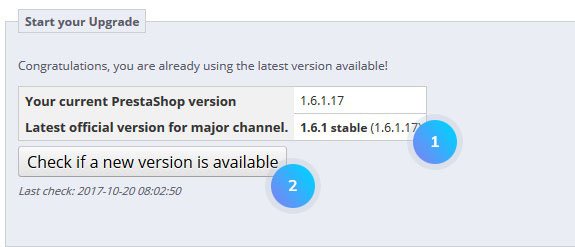
- Make sure that you have made a backup of all PrestaShop files as well as a database backup and then click the Upgrade button. Please do not interrupt the update process.
- The update is complete. Clear browser cache and cookies.
- Go to Preferences -> Maintenance section and enable the store:

Hopefully, this tutorial was helpful for you.


