


Today we are going to introduce to you one of the greatest modules included in our OpenCart templates – Jetimpex Layout Builder. Let’s learn how to create and manage layouts using this module.

Firstly, it is worth mentioning this module allows creating absolutely unique layouts by adding desired modules and using drag-and-drop to sort them in any sequence. Let’s start building with the help of this module together!
- Navigate to Extensions ->Extensions tab in your OpenCart dashboard – at the appeared screen choose “Modules” from the Extension type drop-down, so all the modules appear.
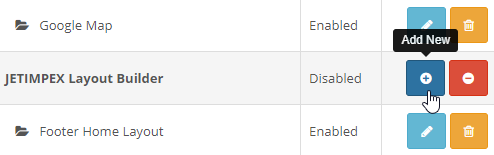
- Look for the module called Jetimpex Layout Builder. In order to add a new module, click “+” sign next to the module name. Once it is done, you will have Layout Builder interface appeared in front of you.
- By the first look, you can already say it includes multiple options and the functionality is really great. One of the most important features is that you may apply different layouts for specific store views – choose the desired store from the drop-down at the upper section of the screen.
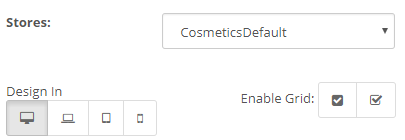
- You may also choose among four main resolution: Wide screens, Desktop, Tablets, and Phones. Besides, you are allowed to add new modules “on-the-fly” by using “Modules Manager” button at the right-hand side of the screen – install/create new modules and add them directly to your new layout while staying in Builder editing interface.
- At the lower part of the screen, you will see large blue “+” sign – this is where you may add a new row to your layout. Once the row is added you will be also able to add/delete new column(s) and configure the row itself by duplicating/editing it.

- You also have a great possibility to change added column size (width) simply by reducing/increasing column box width, just like you do to any opened window on your machine.
- Now finally, when the column is added and configured, you may add desired modules to it by clicking the “Add widget” button – choose among all the available modules in your dashboard to add desired ones to the respective column. When you have several columns with modules (widgets) added, you are able to drag-and-drop them to set modules in the desired order.
- Overall, the interface is quite intuitive and you should not have any troubles while using Builder. Once you finish creating your great layout, click “Save” (in case you want to apply changes and leave Builder interface) or “Save and stay” (if you want to continue working with Builder) button.
So, now you have created your exclusive layout with desired modules set to specific positions and configured the way you like.
But how can you add this layout to a specific position of your store certain page? We are about to describe the process!
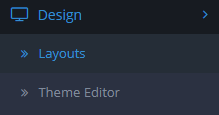
- Navigate to the Design ->Layouts tab – the list of all available layouts/pages, such as Home, Product, Category, Contact etc. is displayed right in front of you.
 Let’s say, you would like to add recently created builder layout to the Home page of your store.
 - Click the “Edit” icon next to the Home layout title – you will see the Home page structure at the appeared screen, with all the available positions displayed and modules assigned to them.
Each position has a drop-down with the list of available modules and “+” sign next to it right under position name – this is where you may add specific modules to respective positions.
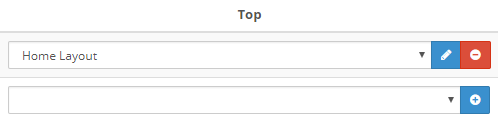
- Look for the Jetimpex Layout Builder module from the list and choose your newly created module by clicking on its title.
- Then click the “+” sign next to the added module and look for the “Save” icon at the upper right corner of the screen – click the icon to apply performed changes.
So, you have now added your personally designed layout to a specific position of your store homepage.
Navigate to the Home page and enjoy the layout you have designed yourself – no doubts it looks great!
That’s it! We have learned how to create and manage layouts using Jetimpex Layout Builder module.
We wish you happy editing with the Builder!
