Magento 2. How to Add Custom Product Tab? — Advanced

This tutorial provides step-by-step instructions on how to add a custom tab to the Product Details Page of your Magento 2 store.

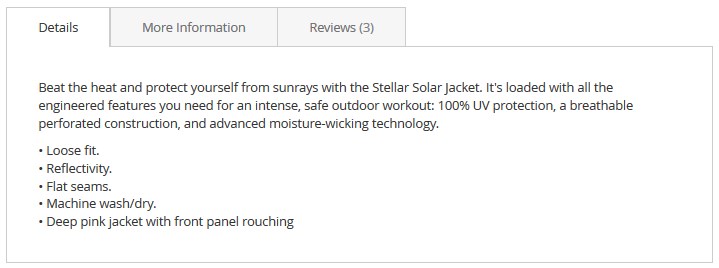
By default, there are three navigational tabs on all product pages and they are:

zemez wordpress themes
  • Details shows product description.
  • More Information displays data from product attributes.
  • Reviews. Product reviews by customers.


We will add “Ask a Question”  form as another tab to the Product Details Page.

Add an Attribute

The first thing we have to do is create an attribute and attribute set.

1. Switch to your Magento store Dashboard.

2. Navigate to Stores section and tab Products under the Attributes section.

3. Click the Add New Attribute button.

4. Specify the Default Label for the attribute.

5. Expand the Advanced Attribute Properties tab and move to the Attribute Code option.

Enter your own attribute code in lowercase characters and without spaces.

Make sure to remember the value from Attribute Code field.

In case you leave the field black the system will create the attribute code on the basis of Default Label.

So, if you enter the Ask a Question the attribute code will be ask_a_question after you save the Attribute.

6. Remember to Save the attribute.

You can see the Attribute Code indicated in the table on the Product Attributes Management page.

[notice type=”warning”]Note, you can NOT change the attribute code after you save the attribute.

 Add an Attribute Set

1. Go to Stores section and click Attribute Set.

2. Tap Add Attribute Set.

New set can be based on any of the existing attribute sets.

You also can add an attribute to any in-store attribute set.

4. Open to edit the set you have just added, the previously created attribute (ask_a_question) will be visible under the Unassigned Attributes tab.

5. Drag the attribute to the Product Details folder you can see in the Groups column and save the changes.

In case your indexers are not updated by scheduled crone jobs, run the following command from Magento installation directory:

php bin/magento indexer:reindex
view raw .php hosted with ❤ by GitHub

or

If your Magento engine is 2.2.2.+, you can use the following method to reindex your store data.

Add a Handler

Now we have to add a simple handler which will be responsible for the attribute display on the Product Page.

1. Add app/code/{Vendor}/{NamespaceModule}/registration.php file with the following content ():

<?php
\Magento\Framework\Component\ComponentRegistrar::register(
\Magento\Framework\Component\ComponentRegistrar::MODULE,
'Vendor_NamespaceModule',
__DIR__
);
view raw .php hosted with ❤ by GitHub

2. Create app/code/{Vendor}/{NamespaceModule}/etc/module.xml file with the following contents:

{Vendor} – your vendor name

<?xml version="1.0"?>
<config xmlns:xsi="http://www.w3.org/2001/XMLSchema-instance" xsi:noNamespaceSchemaLocation="urn:magento:framework:Module/etc/module.xsd">
<module name="Vendor_NamespaceModule" setup_version="1.0.0"></module>
</config>
view raw .xml hosted with ❤ by GitHub

3. In this step we are adding template file which is going to call attribute value and contact form.

Create app/code/{Vendor}/{NamespaceModule}/view/frontend/templates/product_tabs.phtml file with the following contents:

Get currently-viewed product:

<?php $product = $block->getProduct();?> //get current product
view raw .phtml hosted with ❤ by GitHub

Get attribute by its code:

<h6 class="custom_tab"><?php echo $product->getData('code'); ?></h6> //attribute code in getData parameter
view raw .phtml hosted with ❤ by GitHub

4. Add contact form by pasting the following snippet into product_tabs.phtml file underneath previous code:

<form class="form contact"
action="<?php /* @escapeNotVerified */ echo $block->getFormAction(); ?>"
id="contact-form"
method="post"
data-hasrequired="<?php /* @escapeNotVerified */ echo __('* Required Fields') ?>"
data-mage-init='{"validation":{}}'>
<fieldset class="fieldset">
<legend class="legend"><span><?php /* @escapeNotVerified */ echo __('Contact Us') ?></span></legend><br />
<div class="field note no-label"><?php /* @escapeNotVerified */ echo __('We’ll get back to you as quickly as possible.') ?></div>
<div class="field email required">
<label class="label" for="email"><span><?php /* @escapeNotVerified */ echo __('Your Email') ?></span></label>
<div class="control">
<input name="email" id="email" title="<?php /* @escapeNotVerified */ echo __('Your Email') ?>" value="<?php echo $block->escapeHtml($this->helper('Magento\Contact\Helper\Data')->getPostValue('email') ?: $this->helper('Magento\Contact\Helper\Data')->getUserEmail()) ?>" class="input-text" type="email" data-validate="{required:true, 'validate-email':true}"/>
</div>
</div>
<div class="field comment required">
<label class="label" for="comment"><span><?php /* @escapeNotVerified */ echo __('Question') ?></span></label>
<div class="control">
<textarea name="comment" id="comment" title="<?php /* @escapeNotVerified */ echo __('Question') ?>" class="input-text" cols="5" rows="3" data-validate="{required:true}"><?php echo $block->escapeHtml($this->helper('Magento\Contact\Helper\Data')->getPostValue('comment')) ?></textarea>
</div>
</div>
<?php echo $block->getChildHtml('form.additional.info'); ?>
</fieldset>
<div class="actions-toolbar">
<div class="primary">
<input type="hidden" name="hideit" id="hideit" value="" />
<button type="submit" title="<?php /* @escapeNotVerified */ echo __('Submit') ?>" class="action submit primary">
<span><?php /* @escapeNotVerified */ echo __('Submit') ?></span>
</button>
</div>
</div>
</form>
view raw .phtml hosted with ❤ by GitHub

5. To display the module in product tabs, we have to create app/code/{Vendor}/{NamespaceModule}/view/frontend/layout/catalog_product_view.xml file with the following XML markup:

<?xml version="1.0"?>
<page xmlns:xsi="http://www.w3.org/2001/XMLSchema-instance" xsi:noNamespaceSchemaLocation="urn:magento:framework:View/Layout/etc/page_configuration.xsd">
<body>
<referenceBlock name="product.info.details">
<block class="Magento\Catalog\Block\Product\View" name="code.tab" template="Vendor_NamespaceModule::product_tabs.phtml" group="detailed_info">
<arguments>
<argument translate="true" name="title" xsi:type="string">Ask a Question</argument>
</arguments>
</block>
</referenceBlock>
</body>
</page>
view raw .xml hosted with ❤ by GitHub

6. Register your new module by executing the following command from Magento installation directory:

php bin/magento setup:upgrade
view raw .xml hosted with ❤ by GitHub

Log into Magento admin area, navigate to Catalog > Products, open any product for editing.

Update the product with the new attribute set and flush Magento cache.

Review product store-front page with the new custom tab.

monster one