All our templates for Magento 2x include the Mega Menu extension which allows organizing your navigation in the most convenient ways and includes multiple useful features.
Among these features is a possibility of adding a static block into the menu drop-down.
In this guide, we will show you how to achieve it.

1. First of all, create a static block in the Content > Blocks section (click Add New Block button on the top right.)
Alternatively, you can use any of the existent blocks.
Usually, the templates include some default blocks for the Mega Menu (e.g. menu_block).
- Type the Block Title, Identifier and assign it to the desired store view.
- Add the actual content of the block in the editor. You can enter some text, upload an image or add any link (including the internal CMS links of the store), depending on your needs.
- Press the Save Block button to keep the changes.
2. Select a category under which you want to display the newly created (or already existent) static block and access it in Products > Categories section.
3. Make sure the Megamenu is enabled for this category.
Click Yes next to Enable Megamenu for this Category to activate the Mega Menu for the category.

4. The static block can be assigned to a column in a row, so you need to create a row first.
Then add as many columns as you wish in case there are none.
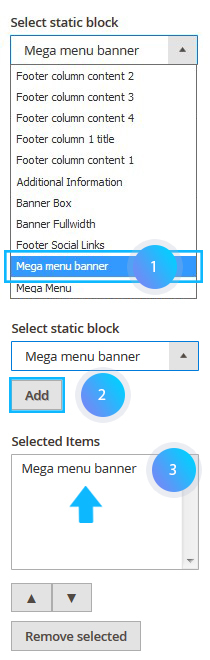
5. In the Select static block drop-down (which is the 4th option from top) pick the necessary block, then scroll down and press Add to select it.
6. Save the applied changes by clicking the Save button on top right.
![]()
7. Make sure to clear the Magento cache in case you are not able to see the changes on site frontend.