


Create banners for the Magento 2 store with Promo Banner Magento 2 extensions. The Promo Banner offers to display images and cms-blocks banner types.
With Promo Banner widget, you will be able to show banners on the home page, product pages, category pages, cart or specific product page etc.
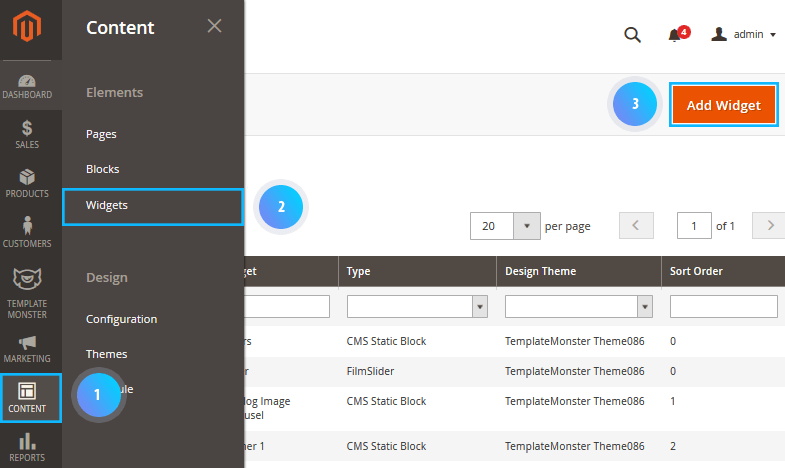
Create new Promo Banner widget
Navigate to Content > Widgets section and press the Add widget button.

Storefront Properties
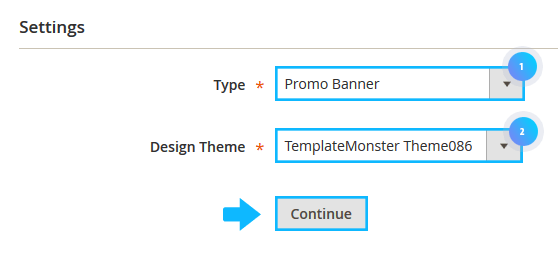
1. In the Settings section in the Type field, select the Promo Banner.
2. Choose the theme from the Design Theme option dropdown.
3. Press Continue.
Settings section
1. Enter an appropriate name for the promo banner.
The name won’t be visible on the frontend.
2. Select the store(s), where your promo banner should be available for.
3. Set the widget Sort Order. The option can be useful when several widgets are displayed in the same position.
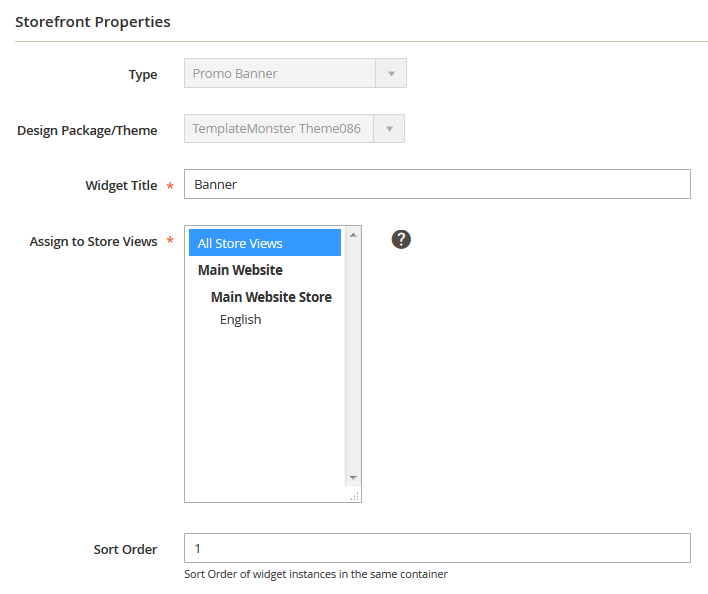
4. The widget with the lower integer value will be displayed at the top. E.g the widget with the sort order set to 1 will be displayed before the widget with the sort order set to 3.
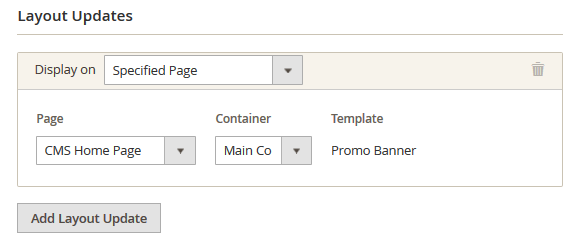
5. Then specify the place, where you want to display the module in the Layout Updates section.
Widget Options section
1. To set up the widget, go to Widget Options section on the left.
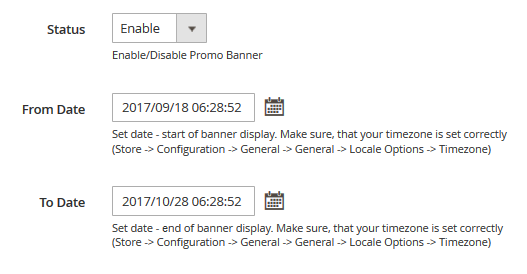
2. You can enable or disable a banner in the Status field.
3. Here you can see two options: From Date and To Date. With the help of these options you can apply a time interval, when a promo banner is activated.
4. Select a month and a year from dropdowns, pick a day on the grid. You are also able to select Hour, Minute and Second using the UI sliders.
Select the Banner Type
1. The extension offers two types of promo banners.
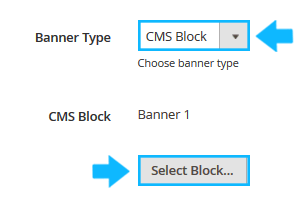
Choose whether to use Image or CMS Block you want to use for your banner.
Image type
1. Simply upload a picture of any format. Click on the Insert image… button.

2. Then press the Browse… button and find the image you want to use for your banner. Then click on the Insert File button.
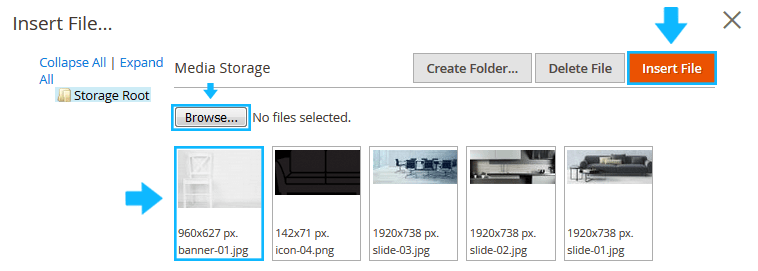
3. You will see the image tag in the field below the Insert image… button.

4. To replace the banner image you should first save the widget settings (click on the Save and Continue Edit button to stay in the widget settings interface).

5. Now you can change an image by clicking the Insert image… button again > browse the needed image file > press the Insert File button.
CMS Block
1. Choose from available (press the Select Block… button. Note, the CMS Block type should be selected) or create a new CMS block for your banner.
Cookie Expiration Time option
Specify the amount of time to wait before the banner shows up again after the banner was closed (in minutes).

Banner Timeout option
Specify the amount of time to wait before the banner shows up after the page was refreshed (in seconds).

Save the widget (tap Save).

Clear the Magento cache to see the banner on the store frontend.
