


From this tutorial you’ll learn about adding language switcher in one of the menus using WPML plugin in order to make it easy for the site visitors to switch your website from language to language.

Adding WPML Language Switcher to Menu
- You can add a language switcher to menu right from your WordPress Dashboard. To do it, please, navigate to WPML > Languages tab on the left.
Here scroll the page down and locate Manu language switcher block.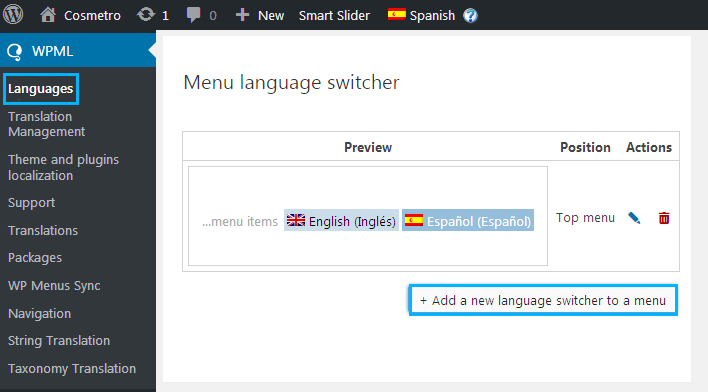
- Let’s add a new language switcher to your website. To do it click + Add a new language switcher to a menu.A new popup window displaying New Menu Language Switcher settings will open.
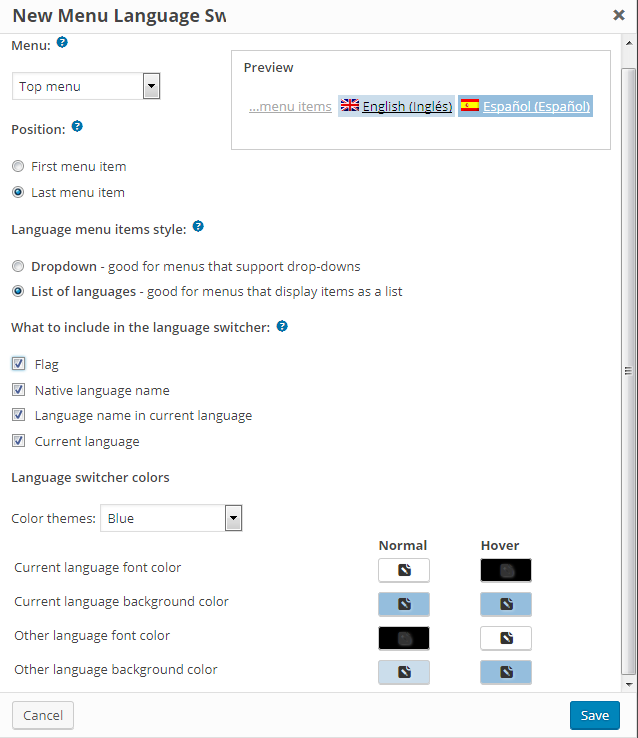
- In Menu block select a menu where you want to display a language switcher (it depends on the menus and menu locations available in your theme; in our case, we’ll be adding a language switcher to Top menu).
- Select the menu position. To do it check First menu item or Last menu item in order to display the language switcher as the first or as the last item of the menu.
- Select the Language menu items style to make the language switcher look at the same style as the other menu items. You can choose from these two styles:
- Dropdown – good for menus that support dropdown.
- List of languages – for menus that display items as a list.
- Let’s proceed to What to include in the language switcher block. Here you can select, which elements you want to display in the language switcher menu. Here is the list of the elements:
- Flag;
- Native language name;
- Language name in current language;
- Current language.
- Navigate to Language switcher colors block, where you can select one of the available color themes for the language switcher (gray, white or blue). You can also customize the colors of the language switcher:
- Current language font color;
- Current language background color;
- Other language font color;
- Other language background color.
This way you can make a language switcher use the same colors your theme uses.
- If you are not satisfied with the color scheme you created, then choose Clear all colors in Color themes menu. All colors will be set to default ones.
- On the right you can see Preview block, where you can see how your language switcher menu looks.
- After you’ve set the language switcher menu, please, click Save button in order to save the changes.
Here you can see the example of how language switcher might look on the frontend. 

