


The newer Cosmetro versions are powered by Elementor page builder plugin, that’s why Cosmetro v.1.0 is incompatible with Cosmetro v. 2.0 or higher. As a result, all website’s content is built with Elementor, so you’ll lose your previously existing content when making updates unless you’ll create a backup version of your WooCommerce products and website’s posts.
Every other data will be lost when updating Cosmetro v. 1.0.

Creating WooCommerce Products Backup
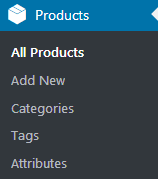
- First, you need to log in to WordPress Dashboard and navigate to Products tab. Here select all the products from the list and click on Export button at the top of the page.

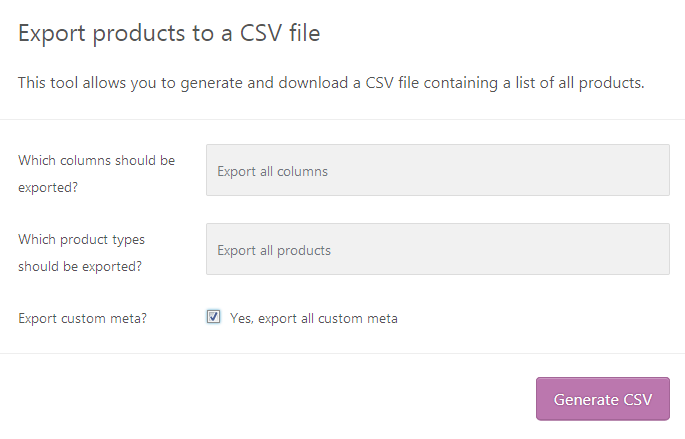
- Export products to a CSV file window will open. By default, you’ll be exporting all columns and product types. If you need to export your custom meta, check the corresponding option. Then click on Generate CSV button to start exporting.
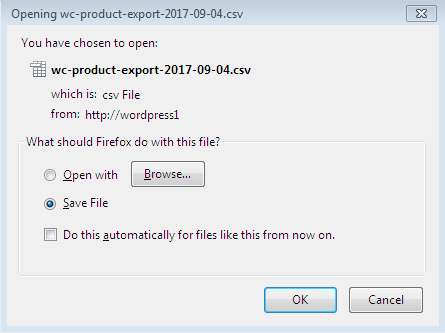
- Browse the location to where you want to save the backup of your store products. Then click Ok to save the CSV file.
Exporting Website’s Posts
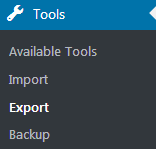
- Now, let’s export your website’s posts. To do it you’ll need to navigate to Tools > Export tab on the left of WordPress Dashboard.
- A page with the list of the data one can export will open. Select Posts in the Choose what to export block. You’ll see additional fields where you can select which post categories you want to export. There are also options allowing to export posts by authors, date and status. If you want to export all the posts, then select All in all the dropdown menus and leave the start and end dates unspecified.
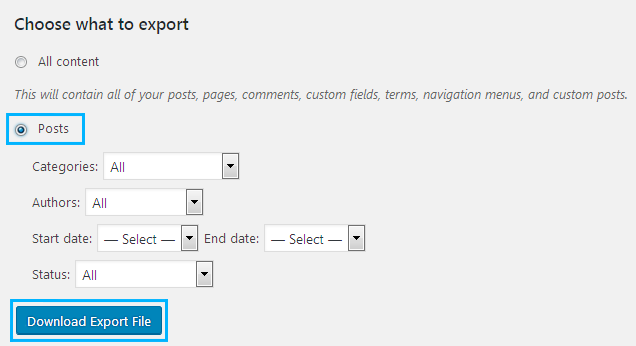
- After that hit Download Export File button at the bottom of the page.
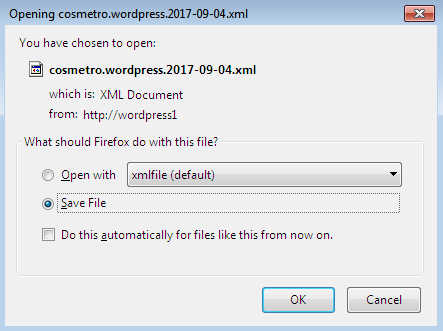
- Select Save File in the newly opened popup window, and click on Ok button.
Updating Cosmetro
- If you’re set with updating Cosmetro, let’s do it. After that, you’ll need to import WooCommerce products and website’s posts.
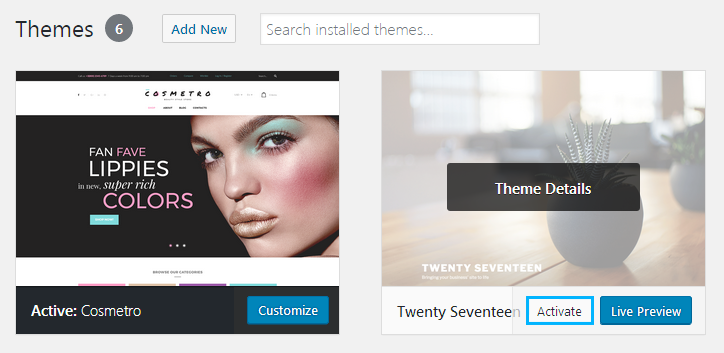
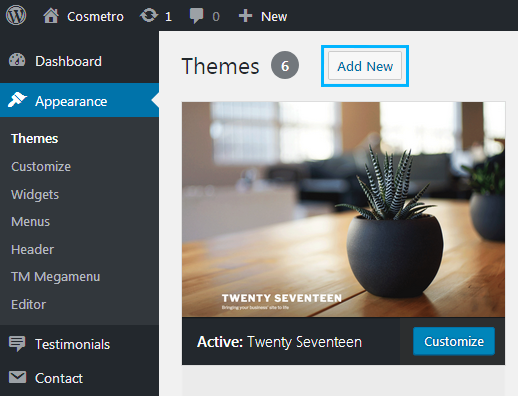
First, navigate to Appearance > Themes tab on the left of the Dashboard.
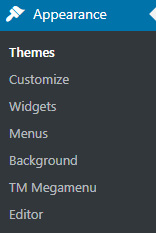
- Here you can see all the themes available for you to apply to your website. Select the default Twenty Seventeen theme and click Activate button to activate it.
- Download the latest Cosmetro theme version to your hard drive.
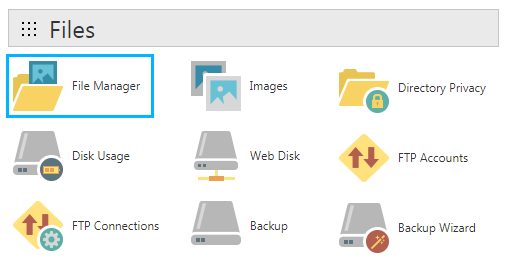
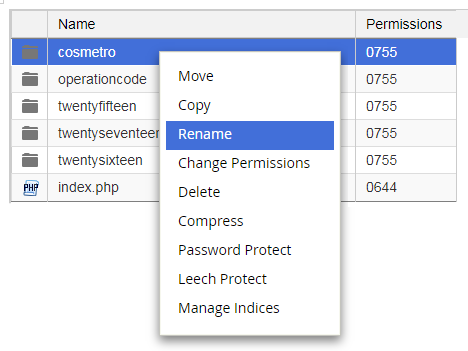
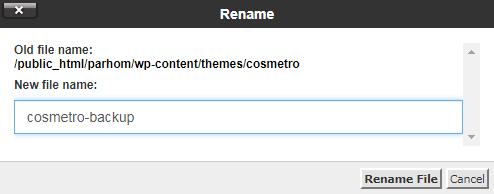
- Before uploading the theme navigate to your hosting server cPanel and open File Manager tool. Here locate wp-content/themes/cosmetro folder. You need to rename it (e.g. cosmetro-backup).
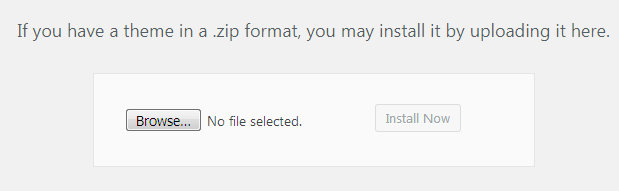
- Return to Appearance > Themes tab in the left column of your website’s Dashboard. Click on Add New button at the top of the page.
- Click on Upload Theme button to upload an archive containing new Cosmetro theme version.
 You can also upload an archive which includes new Cosmetro version to wp-content/themes folder. After that, you need to extract it.
 - You’ll see a new Cosmetro theme in the Appearance > Themes page. Hover on the new theme image and click on Activate button.

- Congratulations! Now you’ve installed the new Cosmetro version!
- If you want to add the sample data created with Elementor page builder, feel free to install it using Cherry Wizard. Navigate to Template Installation with Cherry Wizard tutorial to learn how to import demo content and install all the necessary plugins before uploading exported products and posts backups.
Just locate the Plugin Wizard tab in the left column of the Dashboard and follow the steps that are necessary to be accomplished. It will run data importer automatically after the plugins will be installed.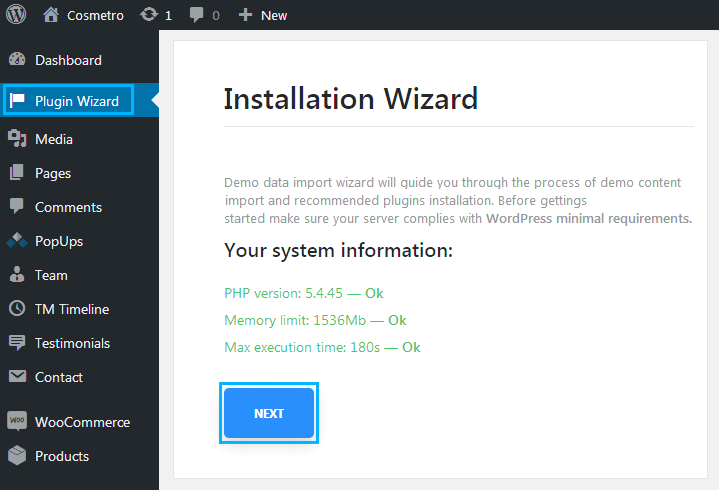
Uploading Products Backup
- When the new version of Cosmetro theme is installed, and all the required plugins are active, it is time to import the previously exported data.
First, navigate to Products > All Products tab on the left. - On the top of the page click on Import button.

- Browse the CSV file you’ve previously downloaded to your hard drive.
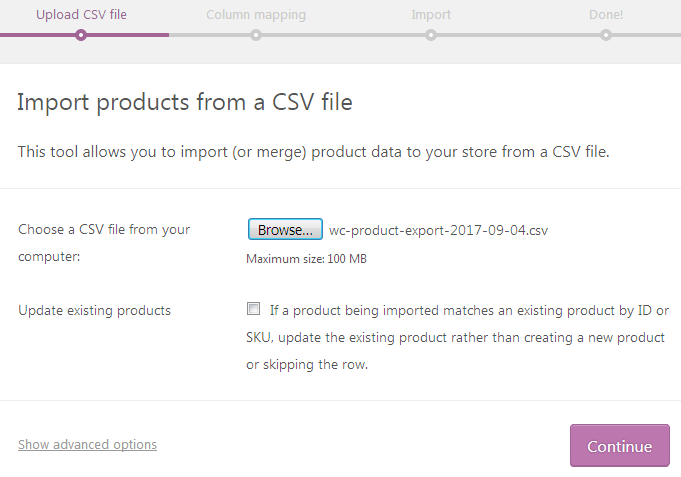
- Then click on Continue button to import the products back to the website.
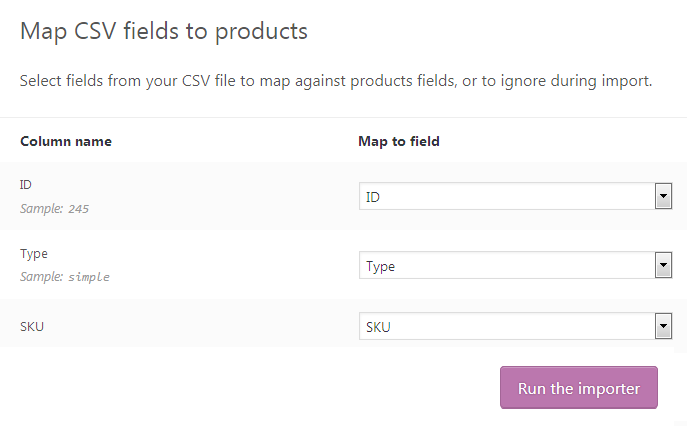
- In the Column mapping block select the corresponding columns from the dropdown list to fit the column name. Then click on Run the Importer button.
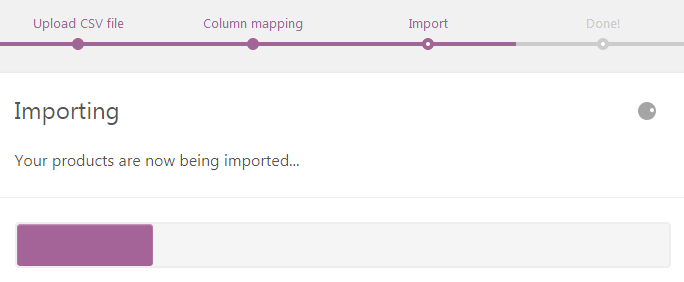
- When the importing starts you’ll see Your products are now being imported notice and the progress bar resembling the process of import.
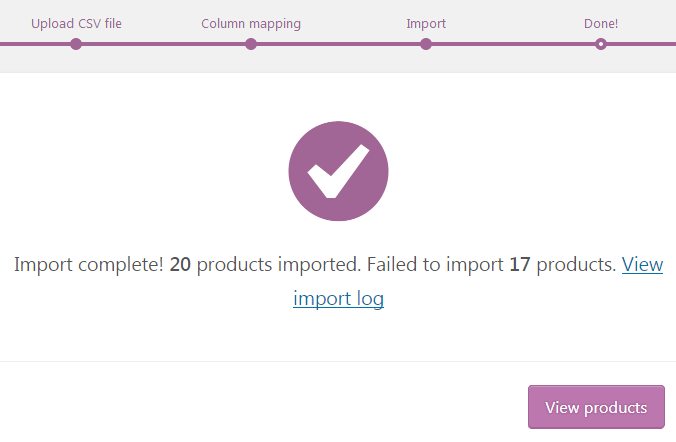
- At last, you’ll see the Import complete! notice informing you of the number of products that were successfully imported. Click on View products button to see the products on your website.
Uploading Posts Backup
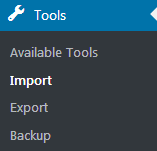
- Navigate to Tools > Import tab and select the tool you want to use to import your posts backup. In our case, we’ll use WordPress importer.
- If you haven’t installed it previously, click on Install option. Then click on Run the Importer option to begin importing the XML files.
 In our case, we’ll use WordPress importer. If you haven’t installed it previously, click on Install option. Then click on Run the Importer option to begin importing the XML files.
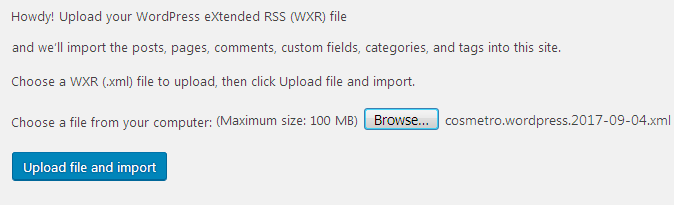
 - Browse the posts backup on your hard drive and click on Upload file and import button.
- Now you can import the previous post author. If you don’t want to do it, create a new user (define his login name in the required field). You can as well assign the posts to one of the existing users on your website.
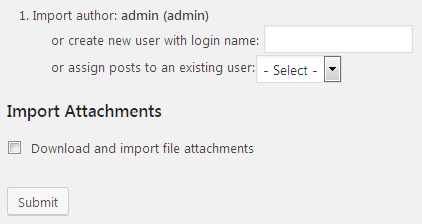
- Check Import Attachments option to download and import file attachments.
- Hit Submit button to start importing.
- If the process is successful you’ll see the All done notice.


