This tutorial will guide you on how to create virtual downloadable products in WooCommerce. To add Virtual products to your site you need to perform 2 simple steps.

Configure products set up
This tutorial assumes that you are already logged into your WordPress Dashboard. Navigate to the WooCommerce > Settings > Products > Downloadable Products section in your site dashboard. 
Here you need to select the File Download Method. There are several options available:
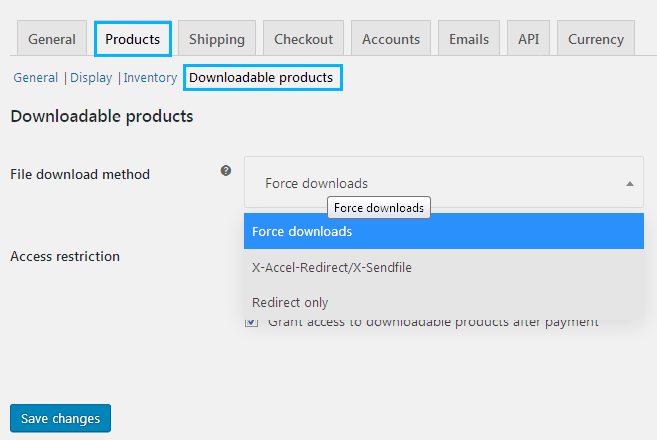
- Force Downloads can be used in case you wish to ensure files are protected from direct linking. Files are managed by PHP. This method doesn’t allow to use big files. Files download could be finished with timeouts. We strongly recommend that you contact your hosting provider or use the redirect method instead.
- Redirect only option allows to download product directly from the product link.
- X-Accel-Redirect/X-Sendfile. This method is handled by the server. You need to make sure that you server has X-Accel-Redirect/X-Sendfile module installed and enabled. Files are protected by the .htaccess file. This is the most secure file download method.
Specify Access Restriction settings. Check Downloads require login box to enable restriction. This setting does not apply to guest purchases. Your site visitors have to be logged into their accounts to be able to download files.
Also you can grant access to downloadable products after payment. Check the corresponding option to enable this option.
Adding Virtual products
Do the same process as usual – open Products > Add Product page in your admin panel. Enter your product details: description, image, price, etc. 
Now you can make your product downloadable:
![]()
- Locate Product data section. Tick one of the options available:
- Virtual – products are intangible and unshipped.
- Downloadable – provide access to the files upon a purchase.
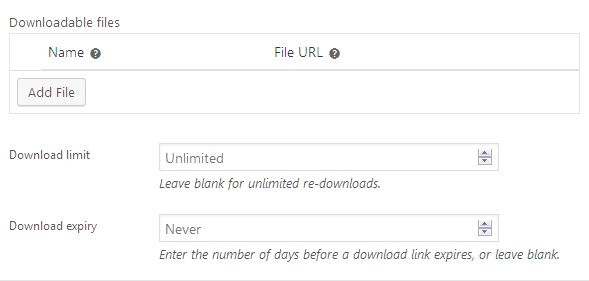
- After the product type selection you will see several additional fields:
- Downloadable files. Click on ‘Choose file’ next to File paths line. Upload a file from your computer.
- Download limit allows to specify time frame limit for download link staying active. Once the limit is settled, users can no longer download the file. Leave blank for unlimited re-downloads.
- Specify the number of days till the download expiration under the Download expiry section.
- Download type field allows you to select product download type. This section has several options available: Standard product, Music and Application/Software.
- Once you change all the settings, click on Publish. You have created a downloadable product.