From this tutorial you’ll learn how to backup WordPress database automatically.
Setting Automatic WordPress Database Backup
- To backup database automatically we’ll need to use WP-DB Manager plugin. You can download it from the official WordPress website.
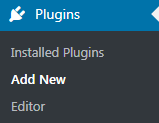
- Now log in to WordPress Dashboard and navigate to Plugins >Add New tab to upload and install the plugin. Click on Add New button and browse the ZIP archive containing the plugin. Install it to WordPress and activate it. If you don’t know how to install plugins manually, please, feel free to read the Manual Plugins Installation tutorial.

- When active, the plugin will run the script to create backup-db folder in the wp-content directory. Navigate to your hosting server cPanel file manager and locate the newly created folder. If you don’t have the folder, please, create it in the wordpress/wp-content directory. It has to be writable in order for you to create backups in it.

- Open backup-db directory and locate htaccess.txt and index.php files from wp-content/plugins/wp-dbmanager directory to wp-content/backup-db folder. Sometimes the files are already there. In this case, you shouldn’t move them anywhere.If you’re utilizing IIS, then move web.config.txt file from wp-content/plugins/wp-dbmanager directory to wp-content/backup-db folder.
- Now let’s navigate to WordPress Dashboard and open Database > DB Options tab in the left column. Here you need to configure automatic backup schedule.

- Locate Automatic Scheduling block. Here you need to specify Automatic Backing up of DB. Set the frequency of automatic backups (e.g., every 1 day, or every 2 weeks, every 5 minutes, etc.).

- In the Gzip dropdown menu define, if you want to save the backup in gzip compression format.
- After everything is set click Save Changes button at the bottom of the page. Then save the changes. As a result, the backups will be created automatically.


