


Each time an order from your shop is validated, an invoice is sent out to the customer. You can download the invoices for a single order from the orders page.

The “Invoices” page under the “Orders” menu enables you to download a selection of invoices from past orders in PDF format, all at the same time (in the same PDF file): 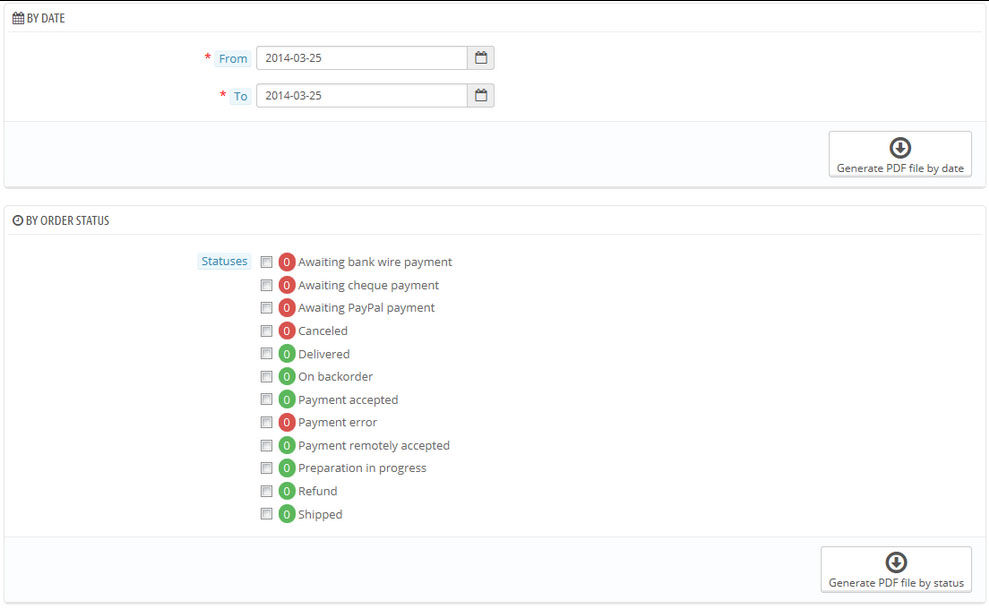
You can get a PDF file containing several invoices depending on two main criteria:
- By data – useful when you need to print all invoices for a given month or a given quarter. Select the start and end date, and click on the Generate PDF file by date button in the top bar.
- By order status – a must-have when you need to print precisely which orders are canceled, refunded or on back order.
The invoices are generated into a single PDF file, each with their own pages. You cannot get a single PDF file for each invoice of the given period or statuses using this page. If you want to customize the look of your store’s invoices, you should edit its template files.
PDF template files are located in the pdf folder. Open the invoice .tpl file and edit it. It is an HTML file with Smarty tags.
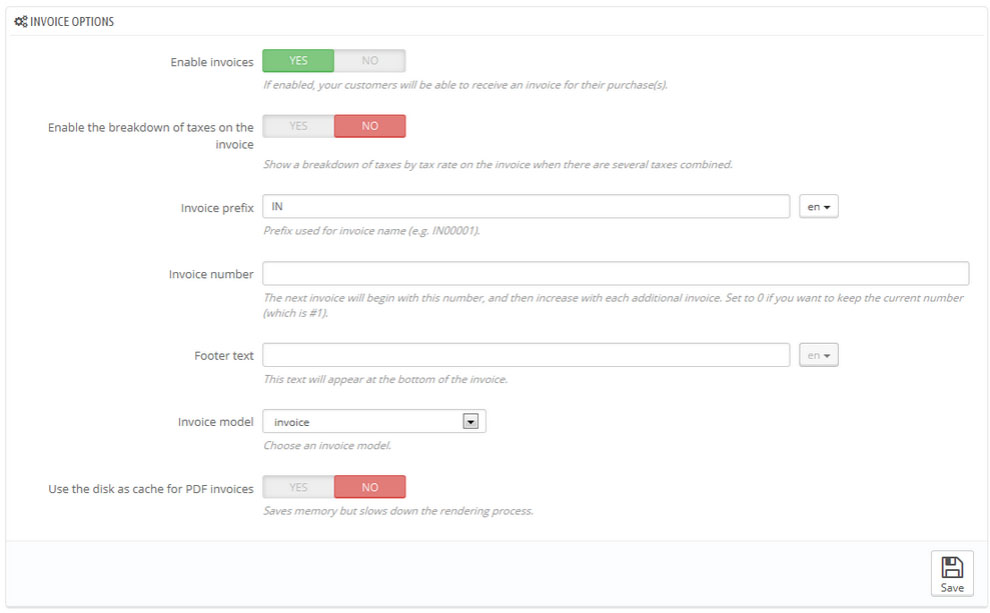
Invoice Options
You can set the following options:
- Enable invoices – when disabled, your customer will not receive an invoice after their purchase. You will be responsible for handling the invoices if your customers ask for one.
- Enable the breakdown of taxes in the invoice – when enabled, the invoice lists all the various taxes that were applied to the order, instead of just one percent.
- Invoice prefix – by default, PrestaShop has language-adapted invoice prefixes: “IN” in English, “FA” in French (for “Facture”), “CU” in Spanish (for “Cuenta”), etc. You could choose to have language codes instead: “EN”, “FR”, “SP”, etc. Of course, you can also choose to have a single prefix for every language or to not have a prefix at all. PrestaShop will generate the invoices number according to you settings: “#IN000001”, “#FA000002”, etc.
- Invoice number – you can choose this option to start your invoice number from a higher number in case your business has already had orders and invoices before you started using PrestaShop.
- Footer text – a custom text at the bottom of your invoices.
- Invoice model – you may use more than one style of invoice (it depends on your theme). You can add your own invoice models or edit the existing ones in the pdf folder of your PrestaShop installation.
- Use the disk as the cache for PDF invoices – you can choose to store generated invoices on PrestaShop server disk rather than in its server cache. While it saves on memory usage, it slows down the PDF generation itself, so use it reasonably.
Save the changes.
Hopefully, this tutorial was helpful for you.
