In this tutorial, we will show you how to display all the products of your store.
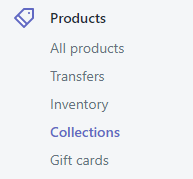
- First, you need to login to your admin panel by adding /admin to your Shopify website URL. Open Products tab on the left and select Collections tab below it. On the page top right click “Create Collection” button.

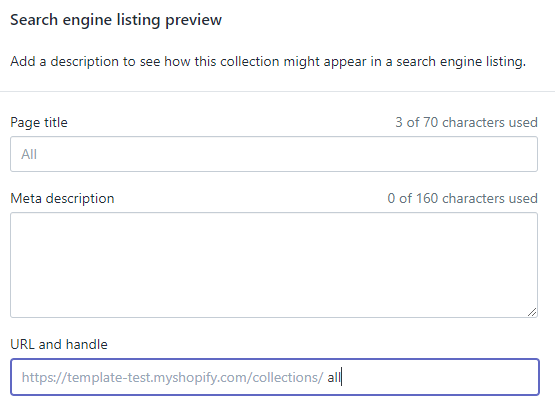
- Enter “All” in the Title field and add some custom description in the Description field if needed. You can add any name to a collection, but you need to scroll down a bit, find “Edit website SEO” button on the same collection page and click it. In the form that appeared, find the “URL and handle” field and set the URL as “all” only this URL displays all shop products, e.g.: our store URL is https://template-test.myshopify.com/, thus the collection URL will be https://template-test.myshopify.com/collections/all only.

[notice type=”warning”]IMPORTANT: There is basically no need to create the category, you can use /collections/all URL to display all products of your store, you can add the URL to any part of your store: main menu, footer menu, the link of a banner, etc. - Below, you see Conditions section, select Automatically select products based on conditions and Products must match: all conditions.
- If you want all the products (both in and out of stock) to be displayed, set the product condition ‘Product price is greater than 0’. If you want only in-stock products to be displayed, set the product condition ‘Inventory stock is greater than 0‘.

- You can set your own conditions by choosing them from the drop-down as well as have more than one condition by simply clicking on Add another condition button.
Click Save button on top right.
We are happy to let you know a little bit more about Shopify.


