


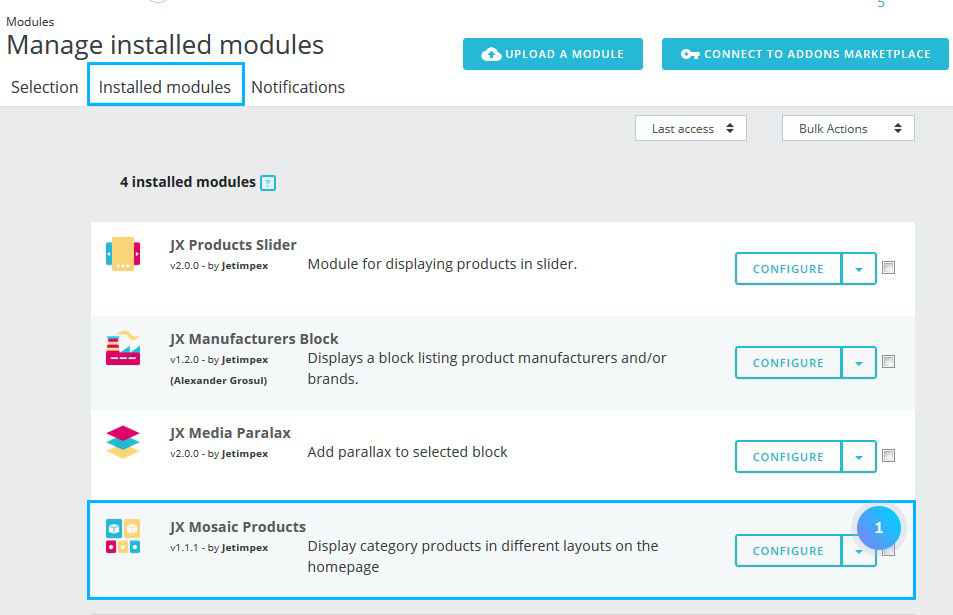
- In your PrestaShop admin panel go to Modules -> Modules and Services section. Choose Installed modules tab and find JX Mosaic Products module. Click the Configure button:
- You can see the main menu of the module with the required blocks with category products, banners, video, HTML content, and sliders.
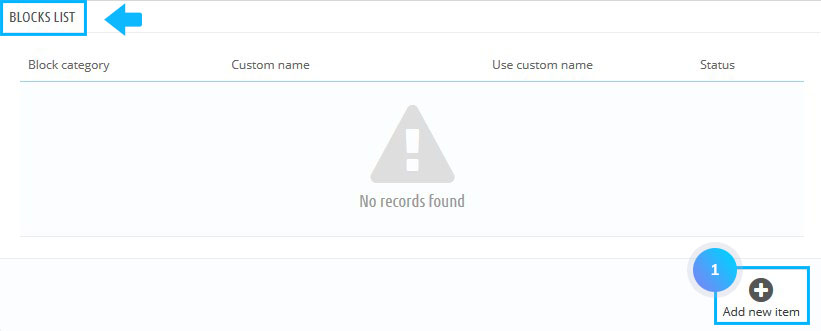
Adding a block
- To add a new category, click the Add new item button:
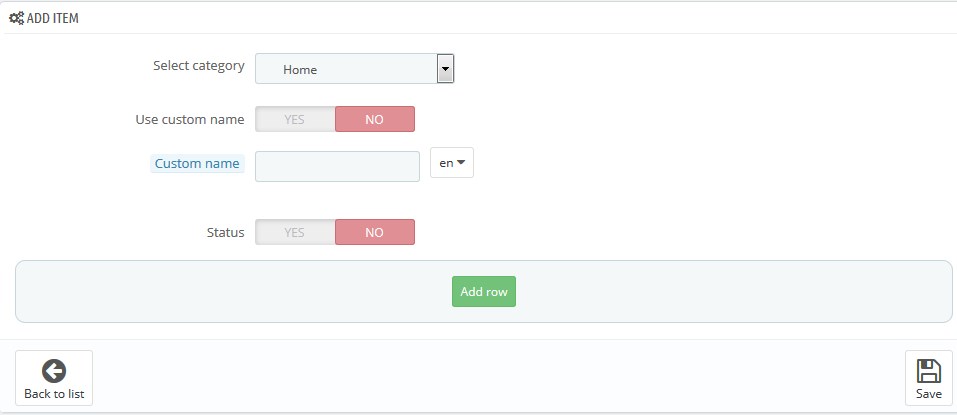
- Set the following options:
- Select category – choose a category to add products, banners, video, HTML content, and slider to.
- Use custom name – custom category status.
- Custom name – category title.
- Status – item status.
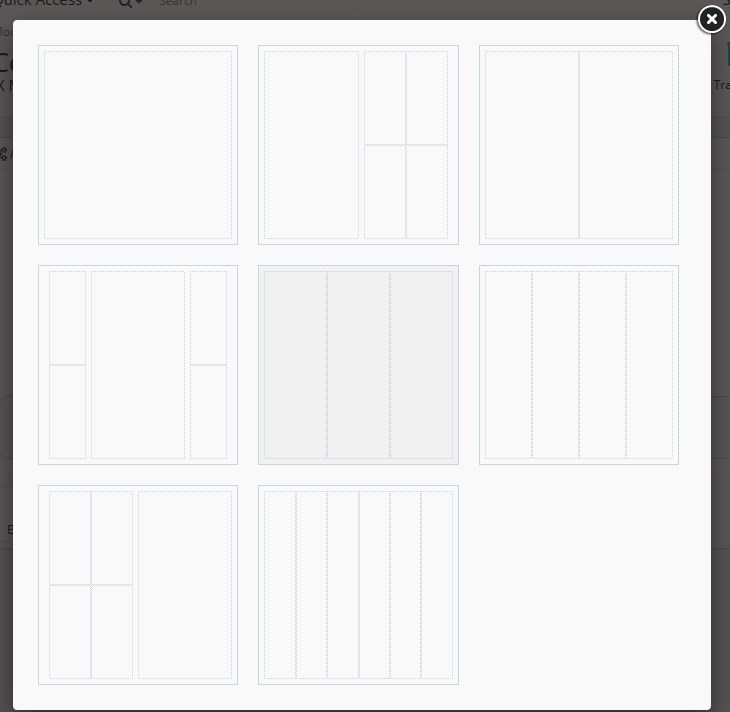
- Click ‘Add row‘ button to add a new row. Choose the layout you want:
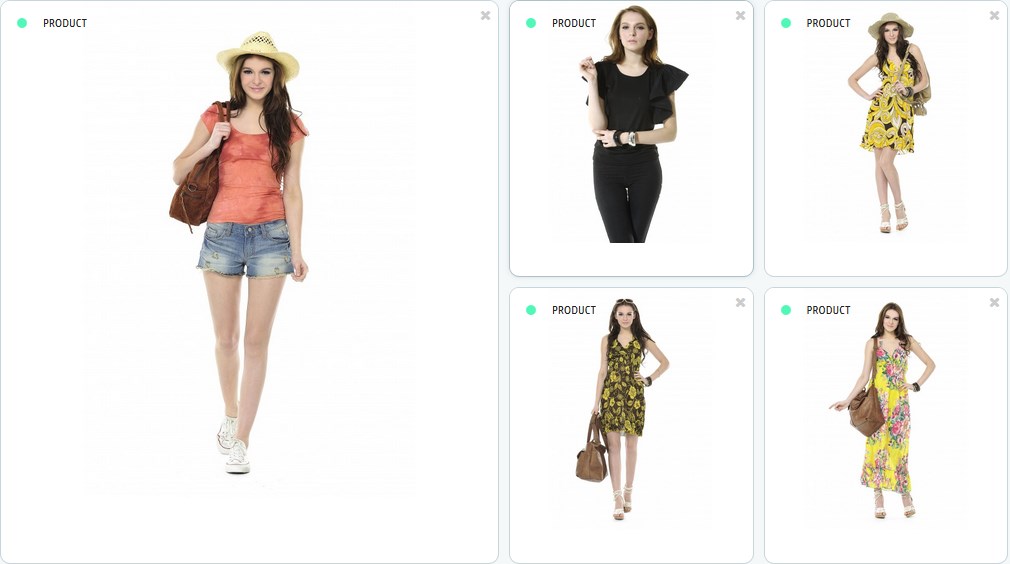
- You may add product, banners, video, HTML content or slider to a particular section:
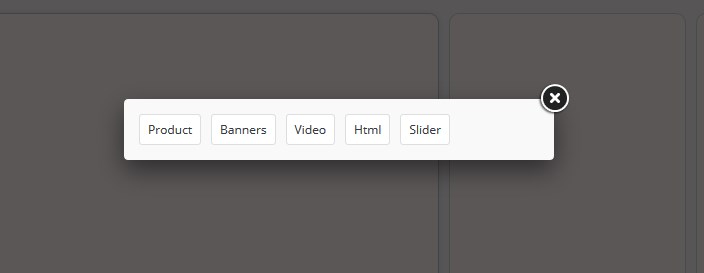
- You can fill in the layout with different blocks:
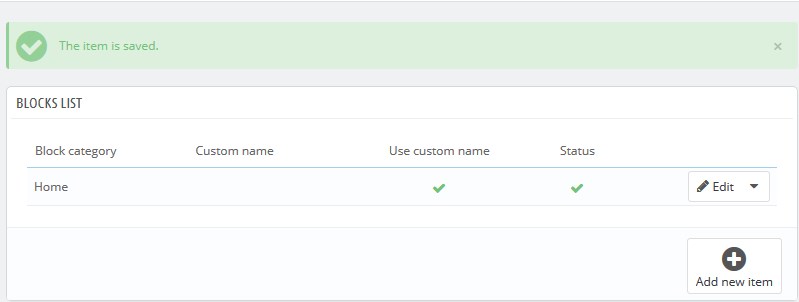
- The category with chosen layouts will be shown up in the blocks list. You can edit or delete it by clicking on the corresponding buttons:
Adding a banner
- To add a new banner, click Add new banner button:

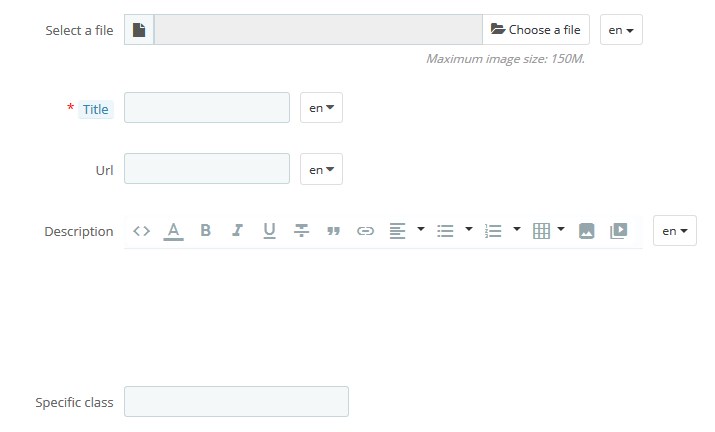
- Set the following options:
- Select a file – choose the image for your banner.
- Title – the name of the banner.
- URL – link path.
- Description – banner description.
- Specific class – custom CSS class.
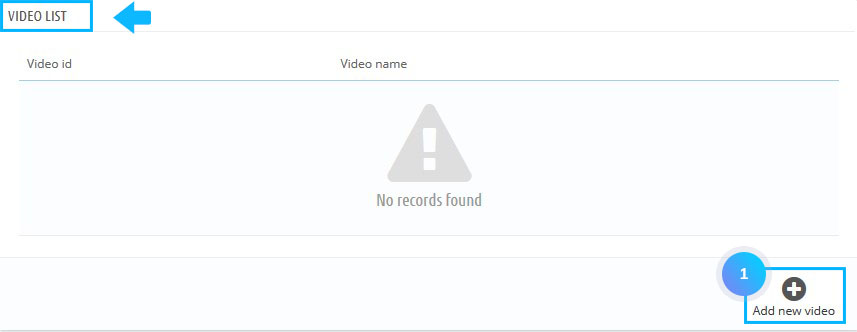
Adding a video
- To add a new video, click Add new video button:
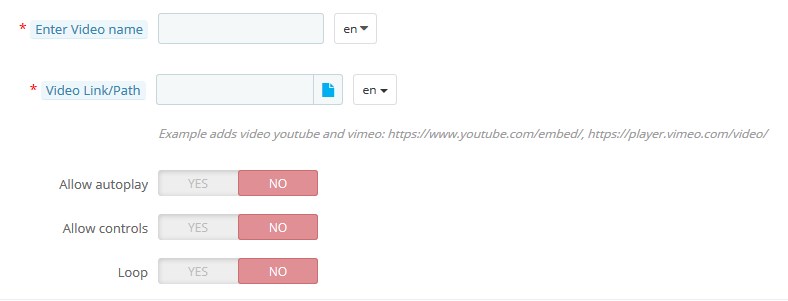
- Fill in the required options:
- Enter video name – the title of the video.
- Video Link/Path – link to the video (it can be youtube, Vimeo or custom videos).
- Allow autoplay – defines if the video starts automatically right after the player has been loaded.
- Allow controls – defines if player controls are displayed.
- Loop – defines if the video playback is in the infinite loop.
Adding HTML content
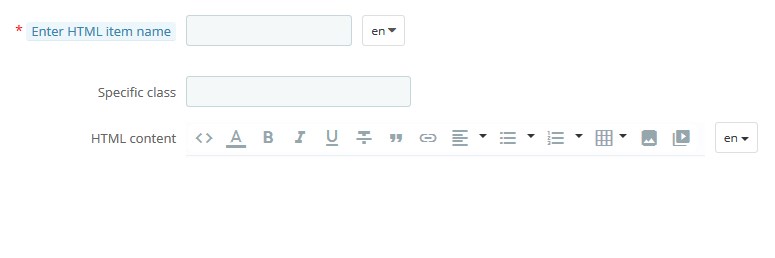
- To add new HTML content, click Add new HTML button:

- Set the following options:
- Enter HTML item name – the HTML content title.
- Specific class – custom CSS class.
- HTML content – the content.
Adding a slider
- To add a new slider, click the Add new slider button:

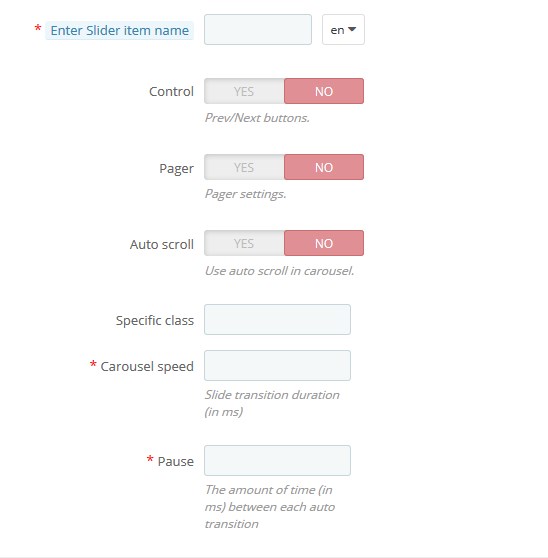
- Set the following options:
- Enter Slider item name – slider title.
- Control – show/hide slider navigation.
- Pager – show/hide slider pagination.
- Auto scroll – enable/disable slider autoplay.
- Specific class – custom CSS class.
- Carousel speed – slides transition duration.
- Pause – the period between slides switching.
Hopefully, this tutorial was helpful for you.

