


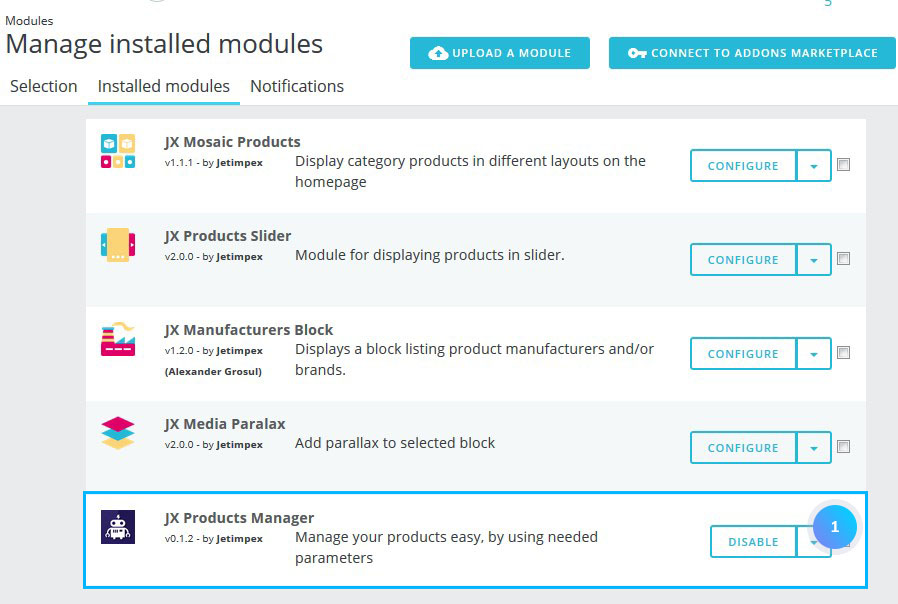
- In your PrestaShop admin panel go to Modules -> Modules and Services section. Choose Installed modules tab and find JX Products Manager module to check if it’s enabled:
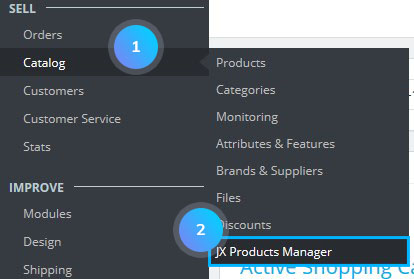
- Now, go to Catalog -> JX Products Manager section to manage the main settings of the module:
- You can see the main module panel that consists of two sections: Choose section and Choose option:
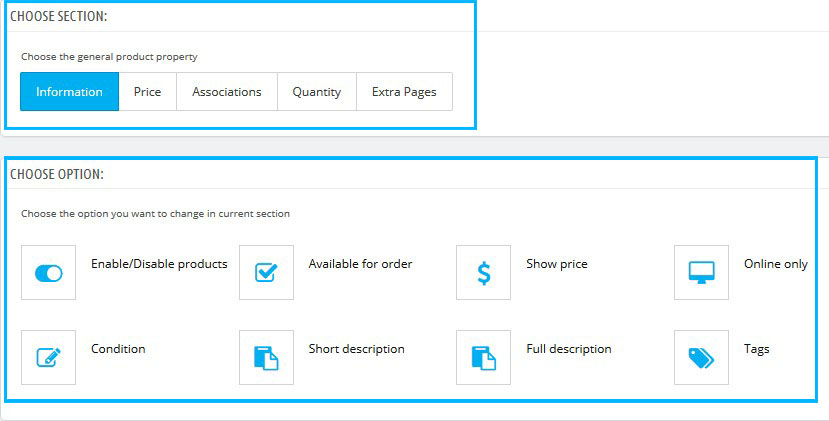
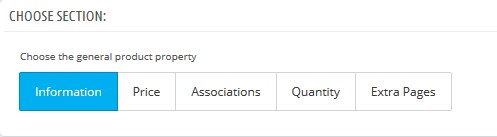
- In Choose section, you can select the following general product properties:
- Information – product availability and description options.
- Price – price and tax rules settings.
- Associations – ability to change brand, category or accessories of several products.
- Quantity – products’ quantity options.
- Extra Pages – the ability to add extra pages.
Information tab
By clicking Information tab, you will see the available options in this section. Hovering on one the option, you will see a hint (short description) for it on the right: 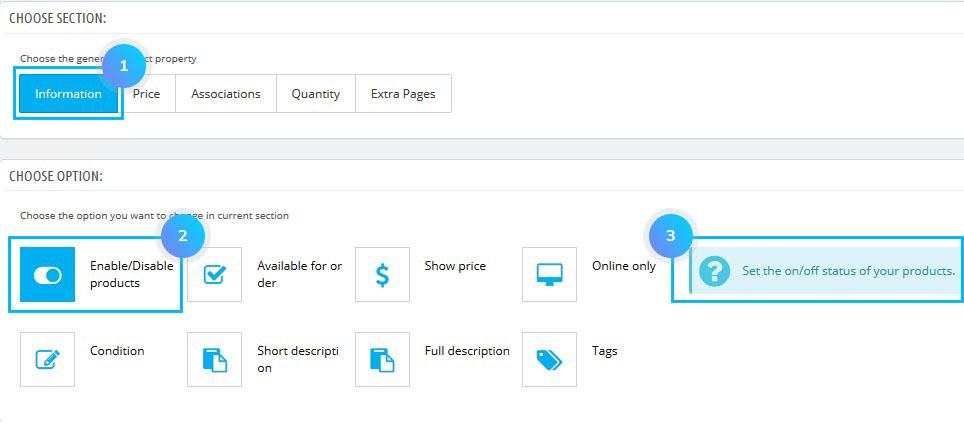

- In the Information section you can configure the following options:
- Enable/Disable products – enable/disable product status.
- Available for order – enable/disable product availability.
- Show price – show/hide product price.
- Online only – apply the “Online only” mark to the selected items.
- Condition – change the condition of multiple products.
- Short description – add a short description.
- Full description – add a full description.
- Tags – add more tags to the chosen products.
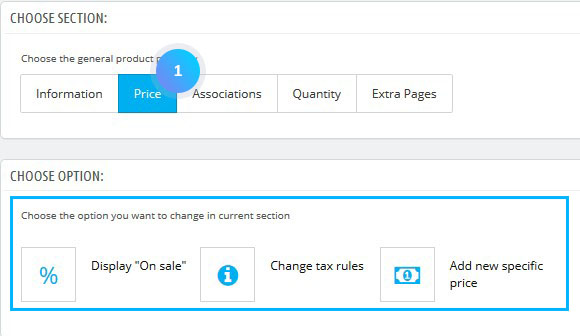
Price tab
- In the Price section, it is possible to configure the following settings:
- Display “On sale” – display the selected items with “On sale” mark.
- Change tax rules – choose the tax rules which will be applied to several products.
- Add new specific price – set the special price for selected products with the ability to add the price activation period.
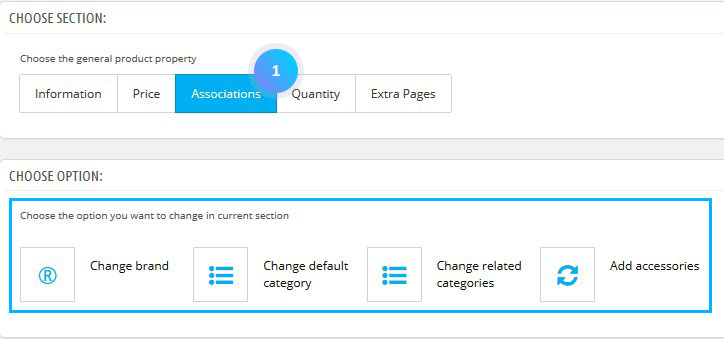
Associations tab
- In Associations tab you can change options connected with product relations:
- Change brand – change the brand of selected items.
- Change default category – choose the category which will be set as default for some products.
- Change related categories – set the related categories to multiple products with an ability to save or remove old relations.
- Add accessories – add accessories for the products.
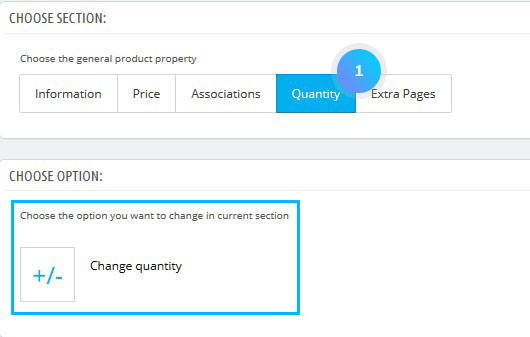
Quantity tab
- Quantity option allows setting the product quantity or increase/decrease current quantity by a certain amount.
Extra Pages
The option allows adding a new page. 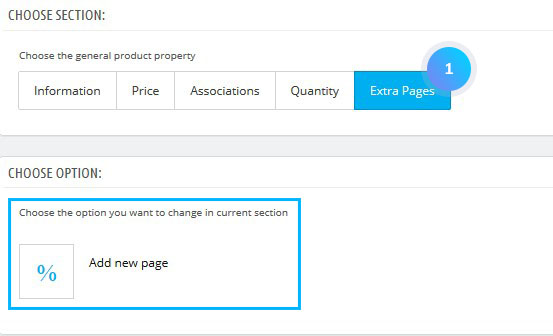
Filtering products
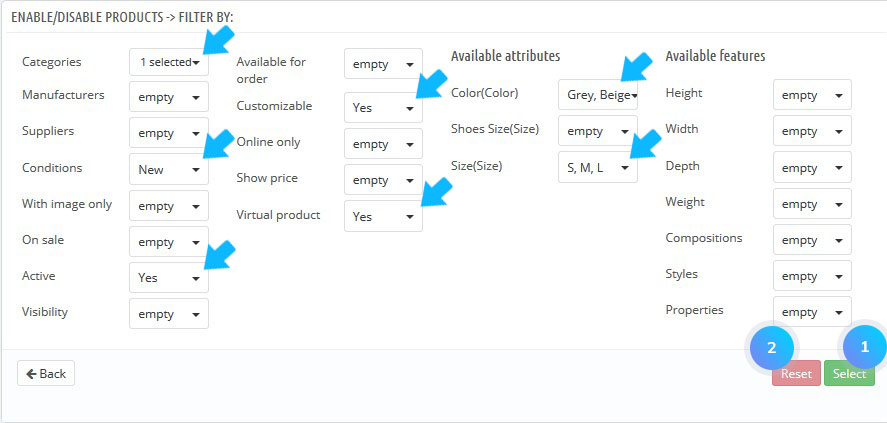
- To filter the products, choose the needed option and click it. Set the filtering options according to your needs and click the Select button. You can clear the selected filters by clicking the Reset button:
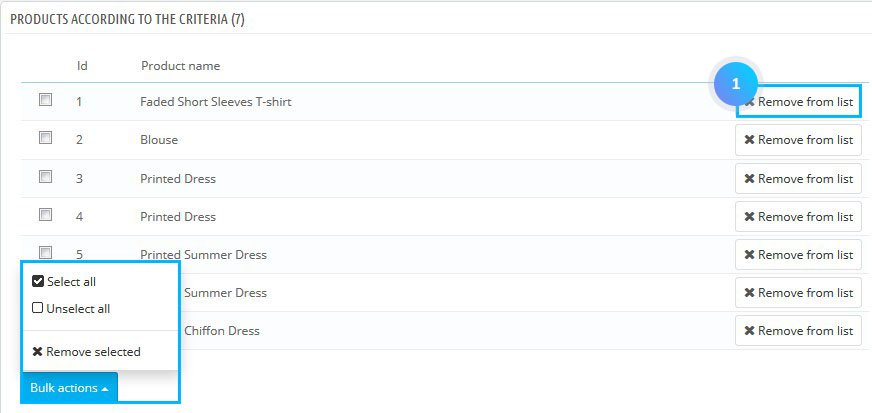
- In the Products according to the criteria section you can delete some products from the list separately by clicking Remove from the list button. You may also delete all products from the list by clicking Select all and then Remove selected buttons:
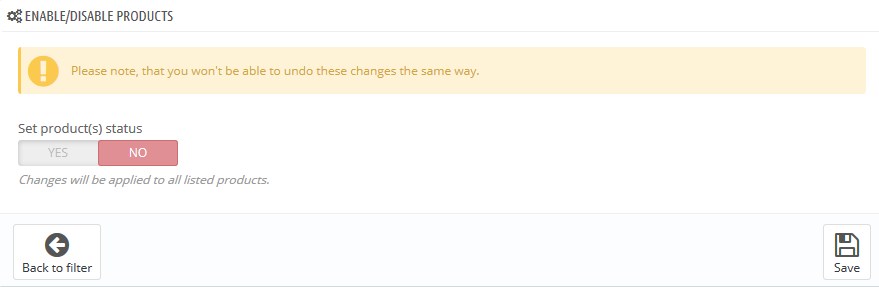
- When all the editings are completed, click the Process button.
- You can set the product’s status and click the Save button. But, if you need to make some changes in products list, click Back to filter button:
Hopefully, this tutorial was helpful for you.
