The order status allows you to keep your customers informed on the stage of the purchase, whether it’s Shipped, Awaiting payment or Delivered etc.
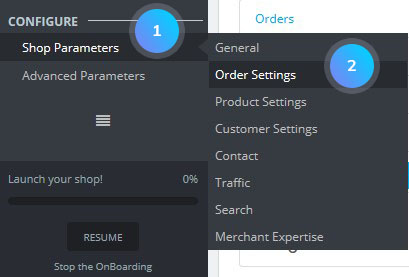
- In your PrestaShop admin panel go to Shop Parameters -> Order Settings section:

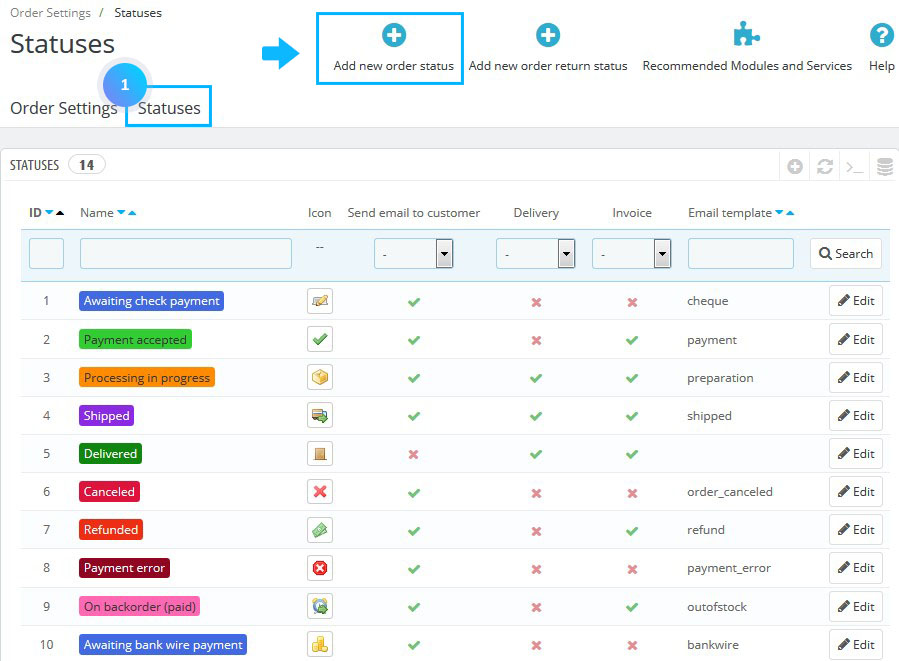
- Choose Statuses tab. You will see a list of predefined order statuses which can be adjusted to your needs. Each status has a distinctive color, icon, and a title. You can create a new status item by clicking Add new order status:

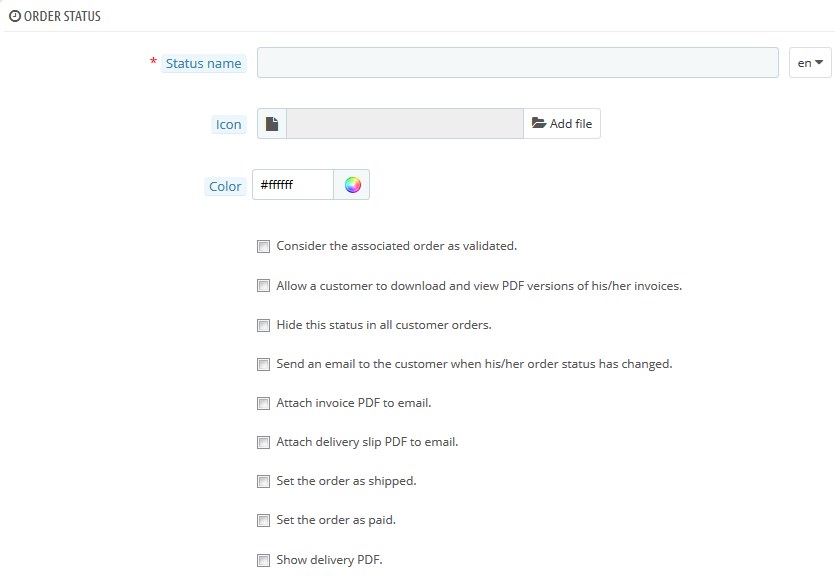
- Fill in the following options:
- Status – choose the title of your new status.
- Icon – the icon of the new status.
- Color – the color of the status.
- Consider the associated order as validated – if checked, this status marks all associated orders as “paid”, and puts them in this same status.
- Allow a customer to download and view PDF versions of their invoice – if unchecked, you will have to send customers their invoice yourself.
- Hide the state in all customer orders – this option enables you to create internal status, for you and your team. Customers will never see this on their order status page.
- Send an email to the customer when his/her order status has changed – when checked, a drop-down menu appears to let you choose which mail template to use.
- Attach invoice PDF to an email – send an email to the customer with the invoice in PDF format attached.
- Attach delivery slip PDF to an email – send an email to the customer with the delivery slip in PDF format attached.
- Set the order as shipped [notice type=”warning”]Note: Be careful: once an order is set as “shipped”, it cannot be set back to the previous status.
- Set the order as paid [notice type=”warning”]Note: Be careful: once an order is set as “shipped”, it cannot be set back to the previous status.
- Show delivery PDF – displays the delivery PDF.

- There is also a return status type which is much less informative (as it does not have any impact on the order) and contains only a specific color and a title.
Hopefully, this tutorial was helpful for you.


