Product packs are a versatile tool for the PrestaShop stores. Whether you want to increase the profits on cheaper items, or you are hoping to encourage customers to buy in bulk, product packs can be a great way to generate growth. Packs also allow customers to take the advantage of special prices and offers.
Start creating a pack of products
- To create a product pack, first, you need to add all the separate products that you want to include into the pack. The actual pack itself is added as any standard product.
- Once, all the products are created, go to Catalog – >Products section and click New Product button:

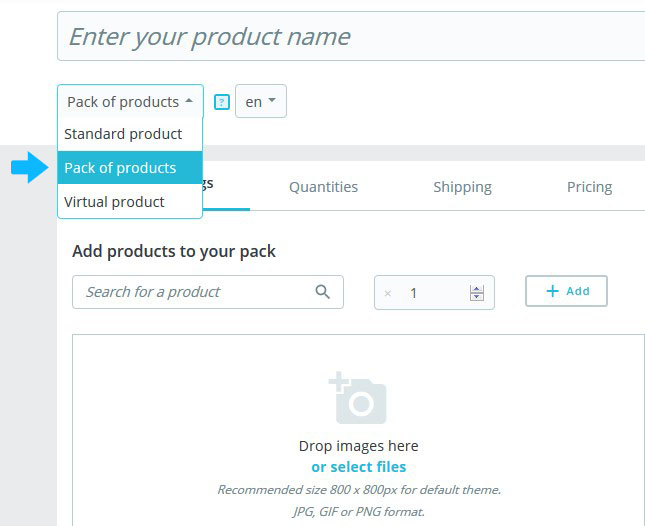
- From the Information tab on the left, you have to choose Pack of products type. After you will be able to configure Basic settings and Quantities options:

Add products to the pack
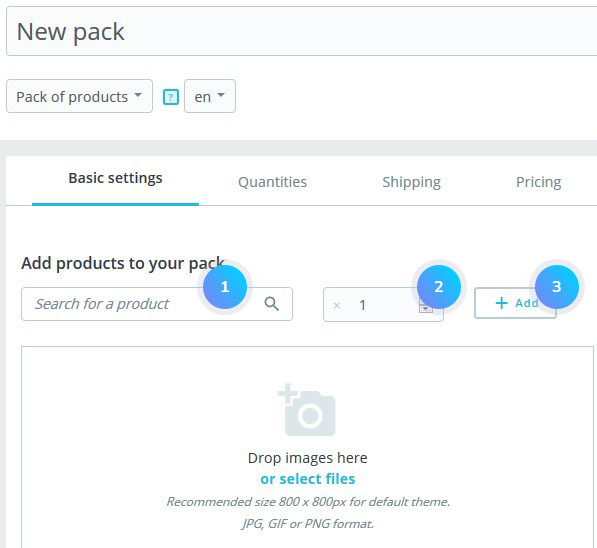
- Once you select product type as a pack, you will see two configuration fields.
- The first field is used to search the desired products you already have in the store. The second field is used to indicate the quantity of the chosen product that should be added to the pack. Click the Add button:

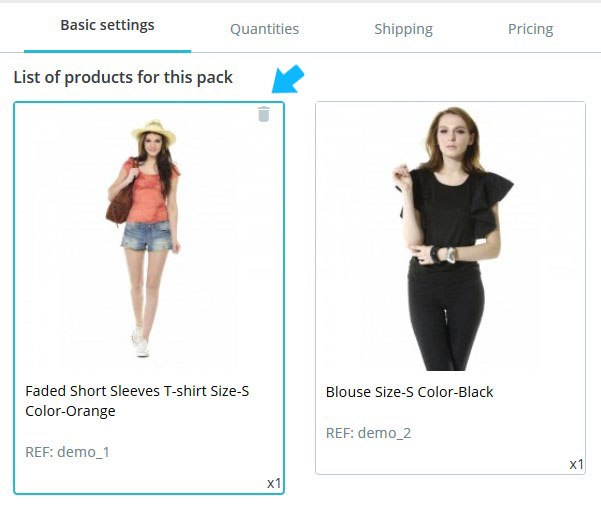
- You can add as many products to the pack as you wish. You can remove a product from the pack simply by clicking the trashcan icon when you hover over it:

Managing pack quantities
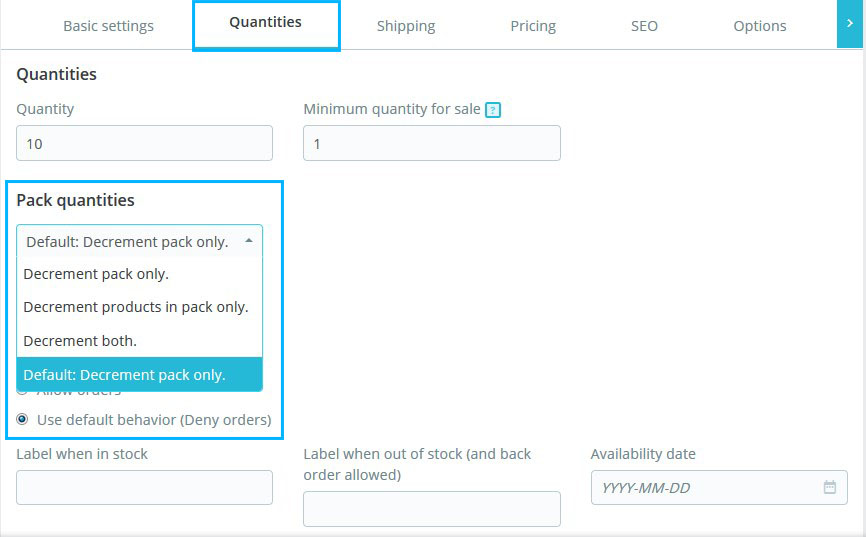
- After creating a pack of products you need to configure how stocks should be handled. In Quantities tab from the Pack Quantities option choose one of the following settings:
- Decrement pack only (default behavior) – when a pack is solid, only the stock for the pack will be impacted.
- Decrement products in pack only – when a pack is solid, only the stock for each product will be impacted.
- Decrement both – when a pack is solid, both the stock for the pack and stock for each product will be impacted.
- Default behavior – this is the default behavior as set at the shop level in your Product Settings.

By default you will have “Decrement pack only”, but it will change according to your choice.
Save the changes.
Hopefully, this tutorial was helpful for you.


