


This module provides the ability to add MotoPress Slider to your HTML page.
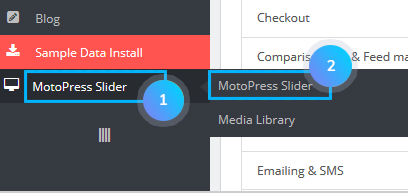
- In your PrestaShop admin panel sidebar click the MotoPress Slider tab to manage the module.
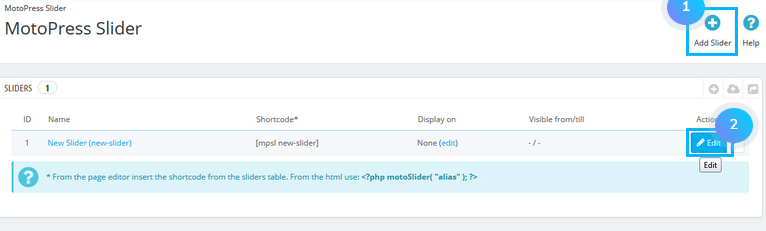
- You can edit the existing slider by clicking the Edit button or add a new one by clicking the Add slider button:
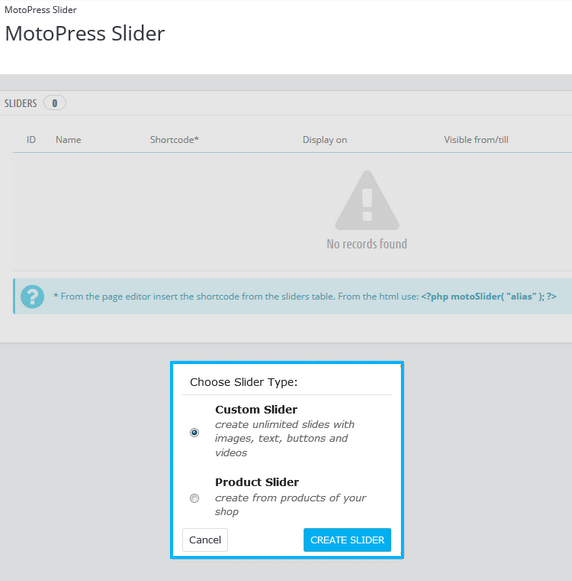
- You need to choose wheater to create a Custom Slider or Product Slider:
- Custom Slider – you can add as many slides as you wish, customizing them according to your needs;
- Product Slider – created from the products of your store.

You can set the following MotoPress settings.
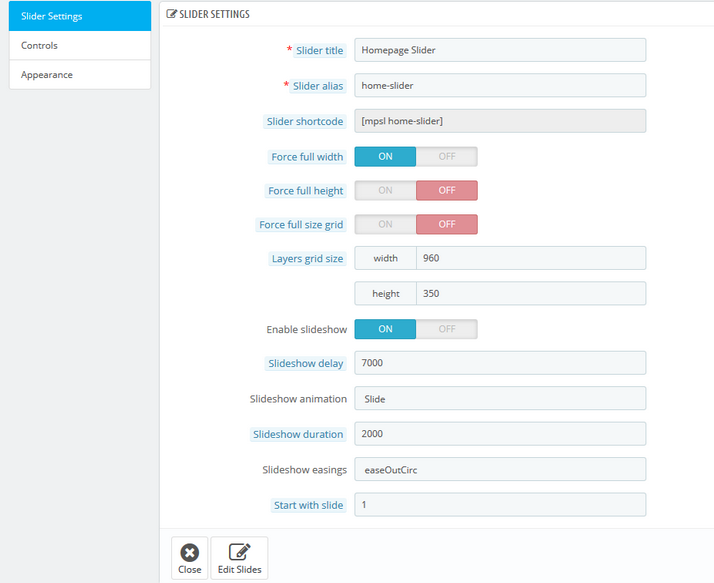
- Slider settings:
- Slider title – the title of the slider;
- Slider alias – the unique alias that will be used in shortcodes for embedding the slider;
- Slider shortcode – copy this shortcode and paste into your page;
- Force full width – make the slider stretch to full width;
- Force full height – make the slider full height;
- Force full-size grid – makes grid stretch to parent container;
- Layers grid size – set initial width and height of the layers;
- Enable slideshow – enable/disable the slideshow;
- Slideshow delay – the time one slide stays on the screen (measured in milliseconds);
- Slideshow animation – choose the animation for changing slides;
- Slideshow duration – animation duration in milliseconds;
- Slideshow easings – easings on slide changing;
- Start with slide – first slide index.
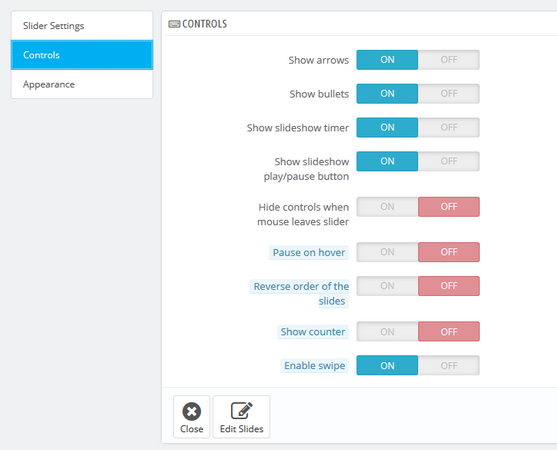
- Controls:
- Show arrows – show/hide arrows;
- Show bullets – show/hide bullets;
- Show slideshow timer – show/hide timer;
- Show slideshow play/pause button – show or hide play/pause button;
- Hide controls when mouse leaves slider – hide controls when mouse is not on slider area;
- Pause on hover – allows to pause slideshow while hovering the slider;
- Reverse order of the slides – animate slides in the reverse order;
- Show counter – enable to display the number of slides;
- Enable swipe – turn swipe on the desktop.
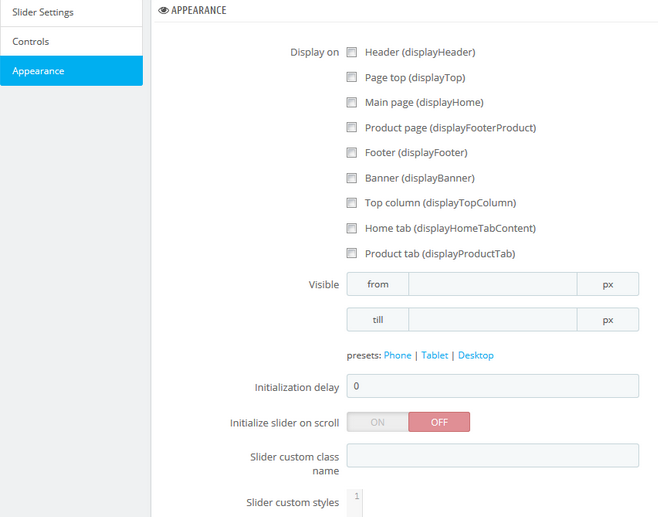
- Appearance:
- Display on – hooks where the slider should be displayed;
- Visible – min. and/or max. screen resolutions when the slider is visible;
- Initialization delay – the delay before slider initialization (should be set in milliseconds);
- Initialize slider on scroll – choose if you want the slider to be initialized on scroll;
- Slider custom class name – name of custom class which is used for slider;
- Slider custom styles – custom CSS styles can be added directly to this text area.
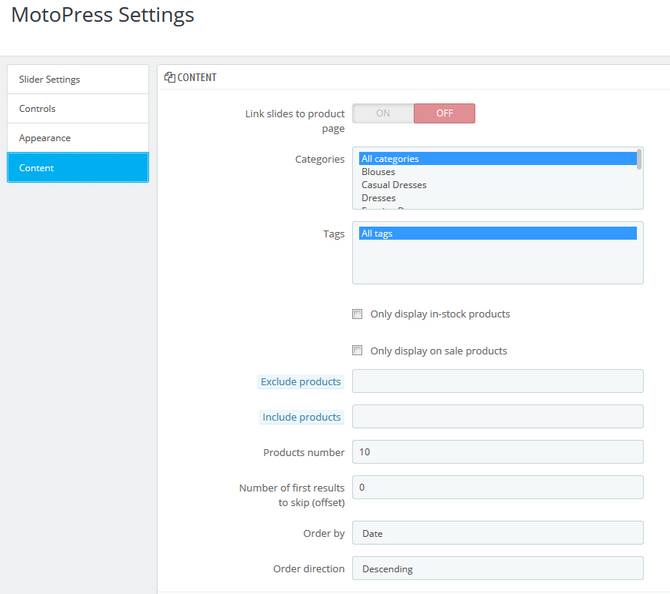
- Content (appears only for the Product Slider):
- Link slides to product page – enable if you want the product page to be opened after the click on the slide with the product;
- Open in new window – enable this option to open the product page in new window;
- Categories – categories with products to show in slider;
- Tags – tags to be included;
- Only display in-stock products – only products in stock will be displayed;
- Only display on sale products – only products on sale will be displayed;
- Exclude products – add Product IDs, separated by comma;
- Include products – add Product IDs, separated by comma;
- Products number – number of products to be displayed;
- Number of first results to skip (offset) – the number of first slides which will not be shown;
- Order by – type of order to be applied;
- Order direction – descending or ascending order direction.
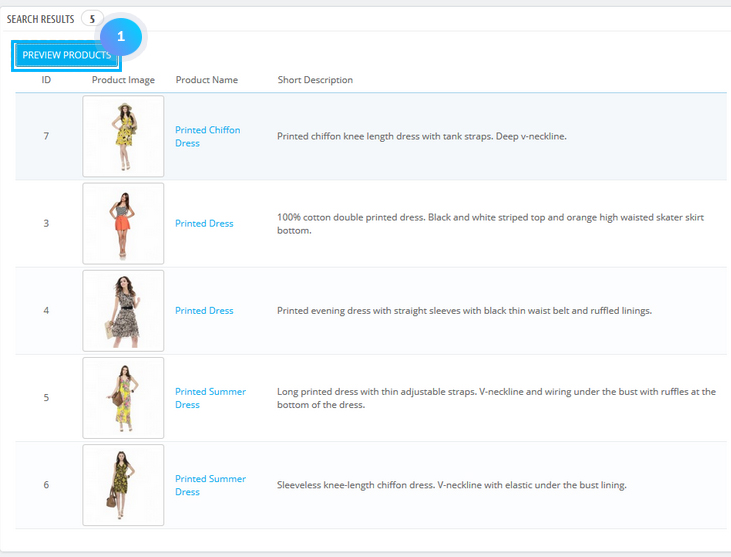
- There is a list of products to be displayed in the slider at the bottom. You can click the Preview products button when you make some changes:
- Click the Save button to confirm the action.
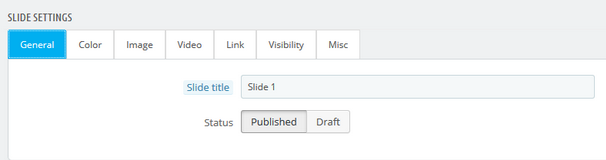
- To edit the slide you need to click the Edit button. There you will see the following options:
- General
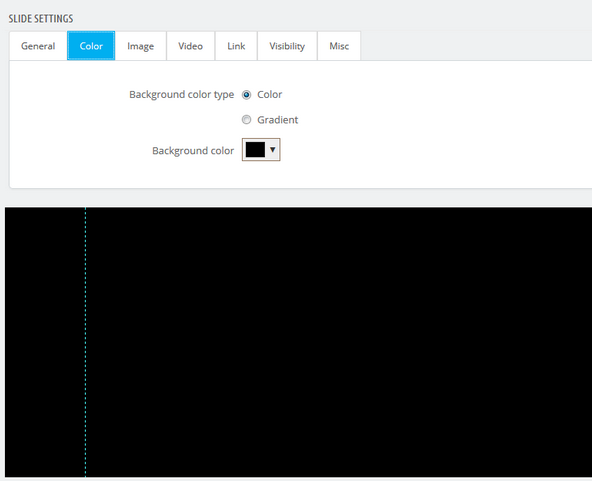
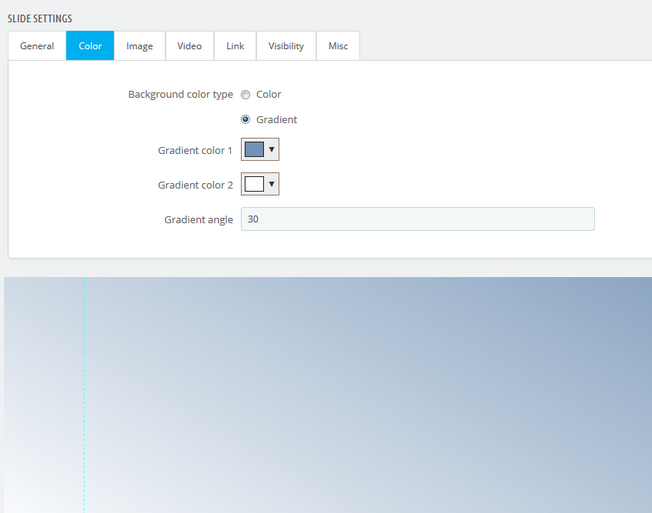
- Color
- If you choose a gradient, select gradient color 1, gradient color 2, and the gradient angle:
- Image
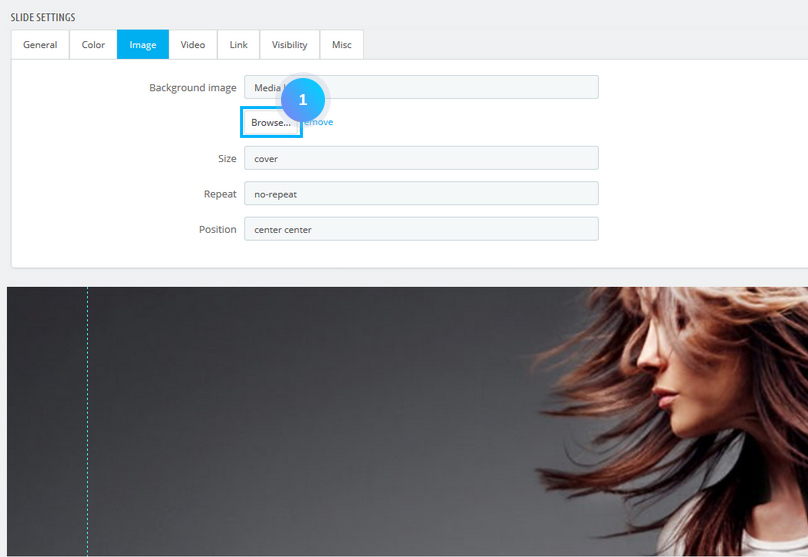
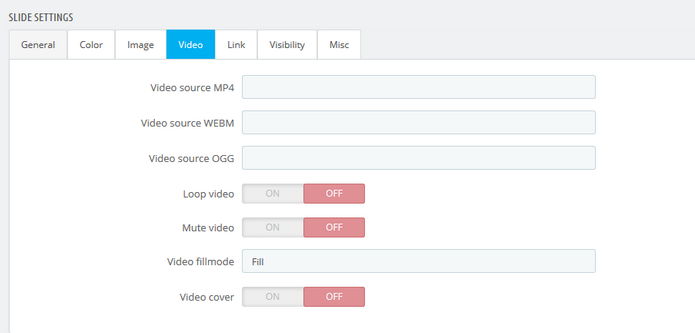
The background image can be attached from the Media Library or from the external URL.- Video (upload in MP4, WebM or OGG format and provide the video file URL in Video tab). Set the following options:
- Link
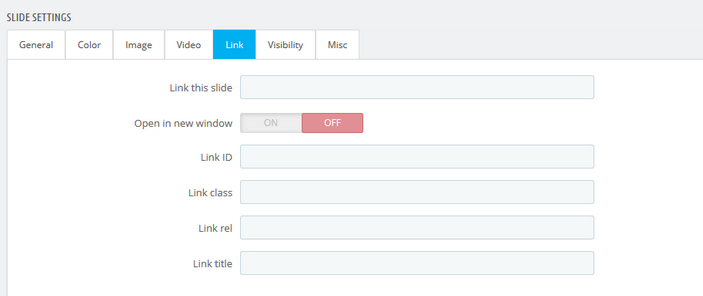
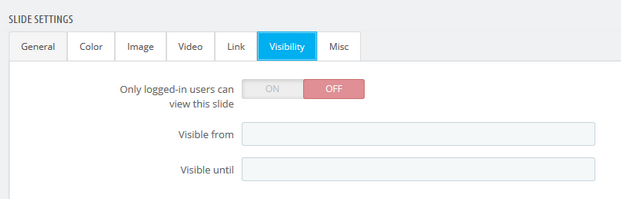
- Visibility
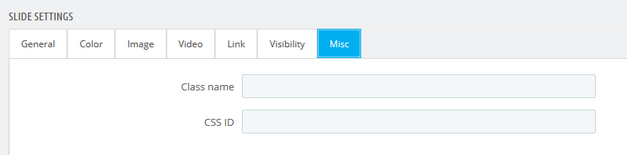
- Misc
- Click the Save button.
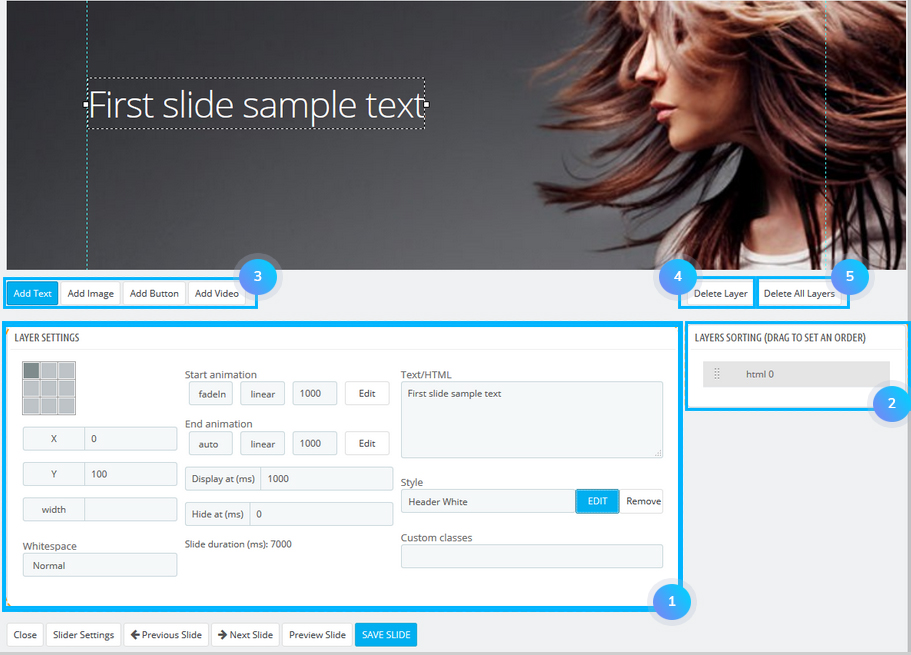
- Under the image, you can see the Content management. You can add texts, images, buttons, and video to the slide.It is divided into two sections:
- Layer Settings – area with four tabs for additing the needed content;
- Layer Sorting – set the order of the contents that are added as individual layers.
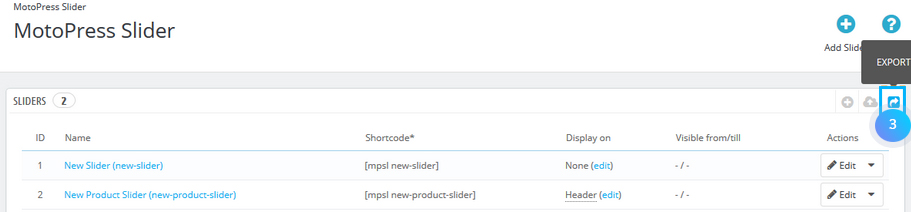
Export the slider
- In your PrestaShop admin panel go to MotoPress Slider section:
- Click the Export button:
- Select the sliders you want to export and click the Export sliders button:
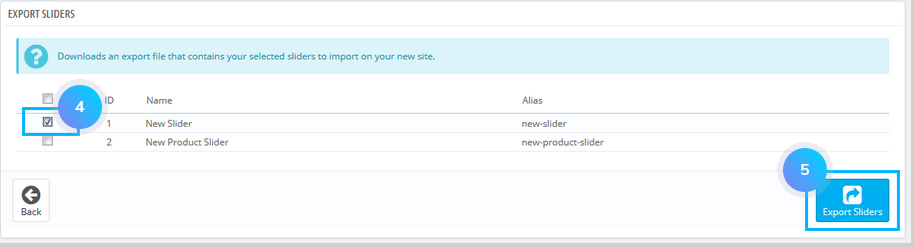
- Save the exported .json file to your computer.
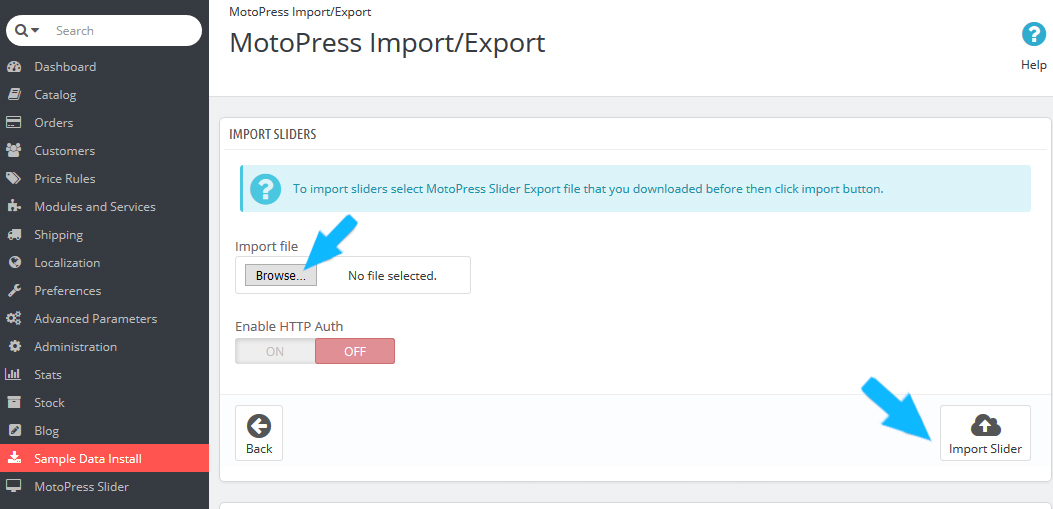
Import the slider
- In the MotoPress Slider section click the Import button at the top:
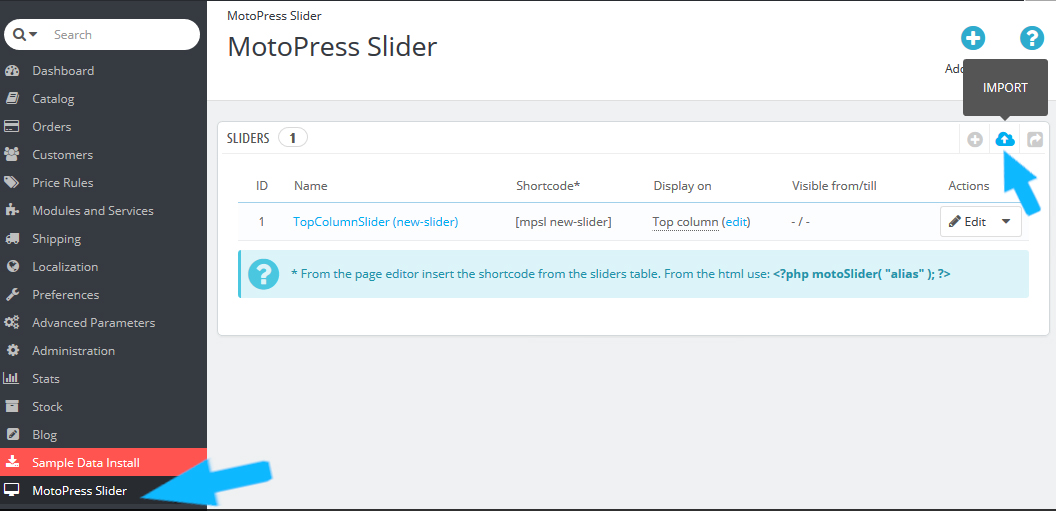
- Choose the exported .json file from your computer, click the Browse button and Import button:
Hopefully, this tutorial was helpful for you.
