


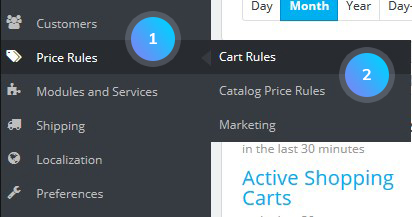
- In your PrestaShop admin panel go to Price Rules -> Cart Rules section:
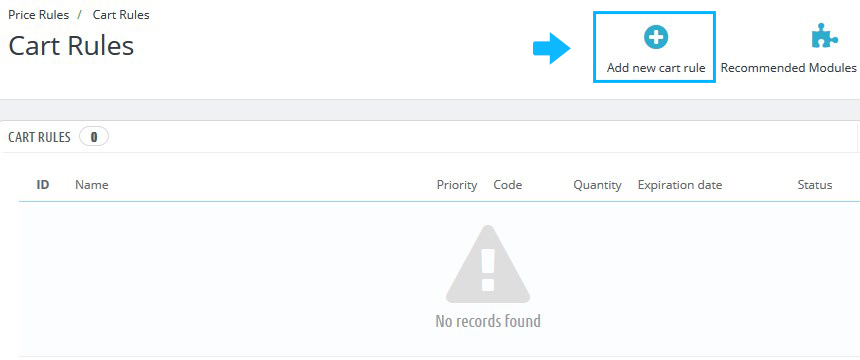
- Click Add new rule button:
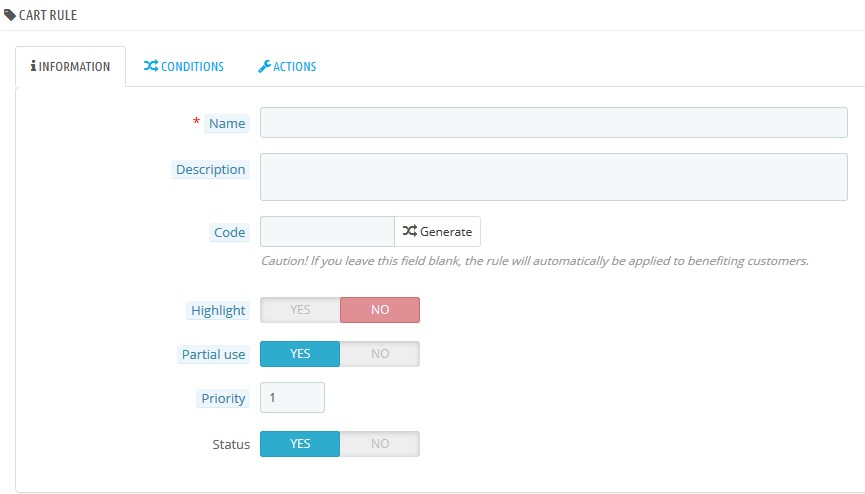
- The Information tab has the following settings:
- Name – the public name;
- Description – not public description;
- Code – you can create it manually or generate it by clicking Generate button:
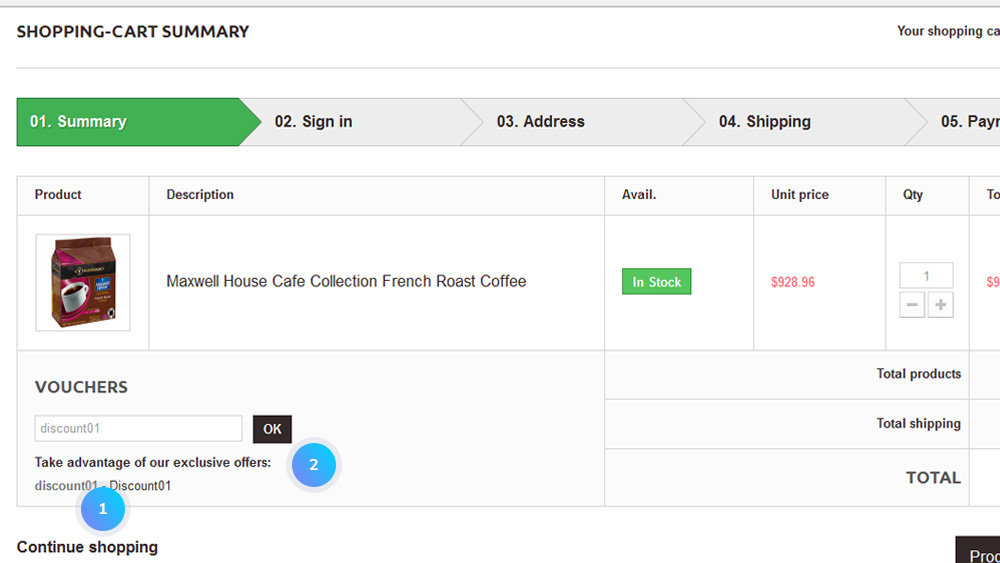
- If there is a code, then the customer has to enter it during the ordering process.
- If there is no code, then the rule is automatically applied to benefiting customers.
- Highlight – let the user know that a voucher corresponding to the items in the cart is available and can be added (if enabled);
- Partial use – a new voucher is created when the current one is not completely used (if enabled);
- Priority – if a customer is eligible for more than one voucher, or if more than one voucher can be applied to an order, then PrestaShop applies this voucher one by one in the alphanumerical order. You can change that order by placing a lower priority to your voucher. By default, they all have a priority of 1. If you set it to a higher number, the voucher will be applied after vouchers with a lower number;
- Status – enable/disable the rule.
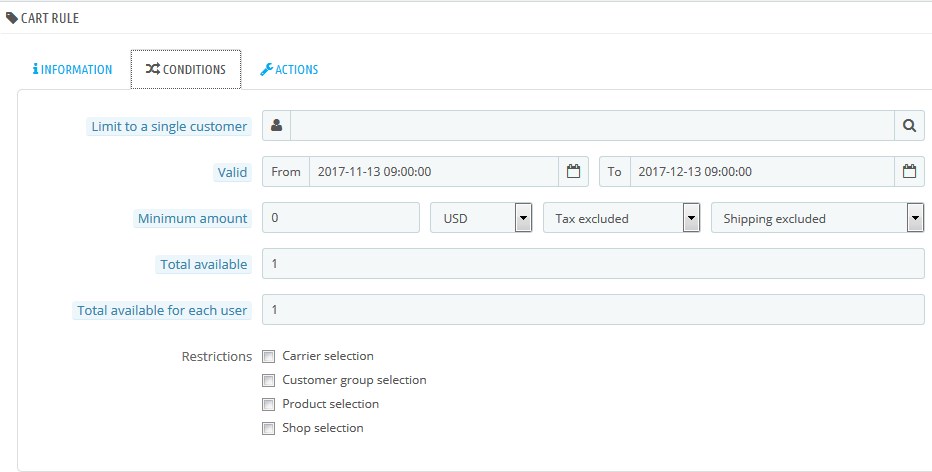
- Limit to a single customer – indicate that the voucher you are creating is for one customer only (if empty, PrestaShop will understand than any customer can use it);
- Valid – the default validity is one month, but you can reduce that to one week or even one day;
- Minimum amount;
- Total available – set a quantity of available vouchers: either “1” if it is intended for a single customer, or any number if the voucher is for whoever uses it first;
- Total available for each user – set the number of times a voucher can be used for each user;
- Restrictions:
- Carrier selection – the customer will have a discount if he or she chooses a specific carrier for the package delivery;
- Customer group selection – create discount that applies to a range of users, and build other conditions on top of that discount thanks to the cart rule creation tool;
- Product selection – enables to create automatic vouchers for the cart which contain specific products. This option brings a whole new form and enables you to create not only vouchers per-product, by also per-categories, per-manufacturers, per-suppliers and even per-attribute.
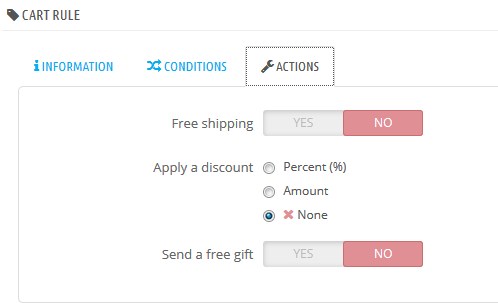
- Free shipping – treats benefiting customers to free shipping;
- Apply a discount:
- Percent (%) – a percentage of the order total;
- Amount – a monetary discount on the order total;
- None – any discount on the order.
- Send a free gift – offer a gift for some conditions (and skip the discount altogether).
- Click the Save button and refresh your website:
[notice type=”warning”]Note: if no code is set, the rule will apply to any customer fitting the other conditions:

The Conditions tab has the following settings:
You can fill in the following options for the Actions tab:
Hopefully, this tutorial was helpful for you.
