This module displays a category gallery on your store Homepage.
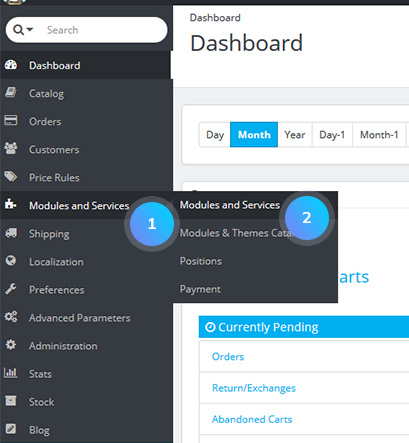
- In your PrestaShop admin panel go to Modules and Services -> Modules and Services:

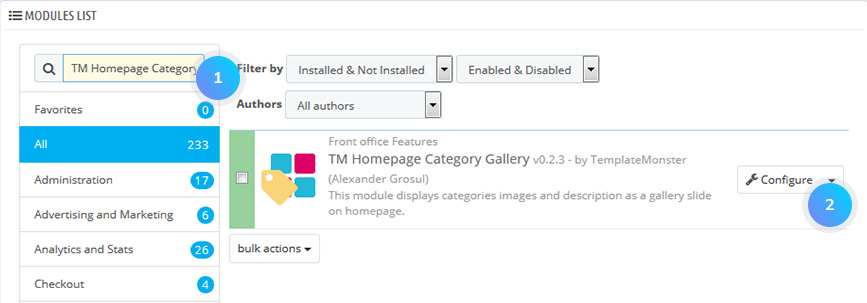
- In the search field type TM Homepage Category Gallery to find the module. Then, press the Configure button to manage it:

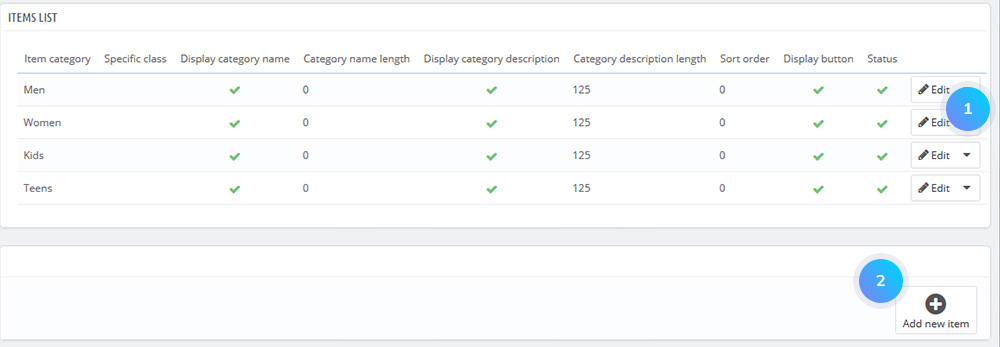
- You’ll see the list of the module items on the Configuration page. So you can edit the existing one or add some new items.

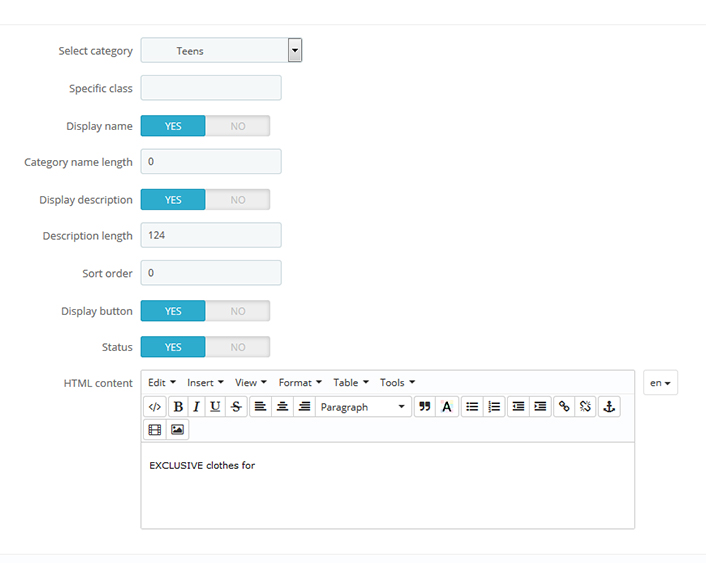
- If you want to add a new item to the module click Add new item in the bottom right corner. You will see a list of options:

- select category – allows to choose the category which should be displayed on your page;
- specific class – the specific class can be added to the module item;
- display name – option to show or hide the category name;
- category name length – maximum number of symbols to be displayed in the category name. If the name is longer – the ‘..’ symbol will be added after the number of symbols that has been set;
- description length – maximum number of symbols to be displayed in the description. If the description is longer – the ‘..’ symbol will be added after the number of symbols that has been set;
- sort order – the order of the item in the category gallery;
- display button – the option to show or hide the ‘Shop now’ button (button text can differ depending on the template);
- status – the option to show or hide the category;
- HTML content – the field where some HTML content can be added.
- Confirm the action by pressing the Save button and refresh your website.
Hopefully, this tutorial was helpful for you.


