- Go to the FTP or cPanel File Manager to edit the settings.inc.php file in the config folder. Find the following line of code, which specifies your database table prefix:

- Replace the value in the second quotation marks (in our case it’s ‘xyz_’) with ps_ and save the changes in the file.

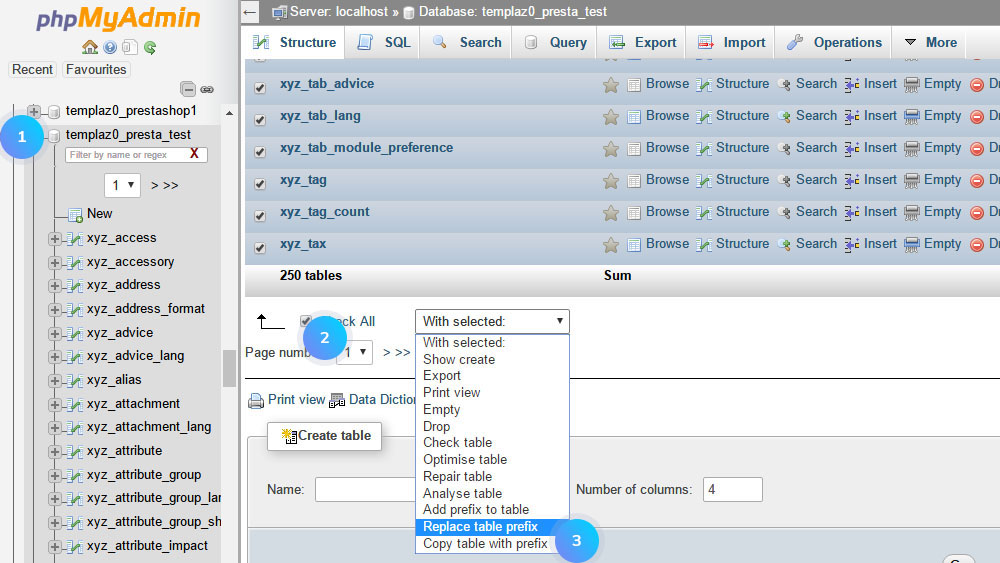
- Now, go to phpMyAdmin tool of your server. There you need to select your database on the top left (the name of the database is specified in the settings.inc.php file you edited previously). Then, click Check all to select all the database tables and choose Replace table prefix option in the drop-down menu on the right.

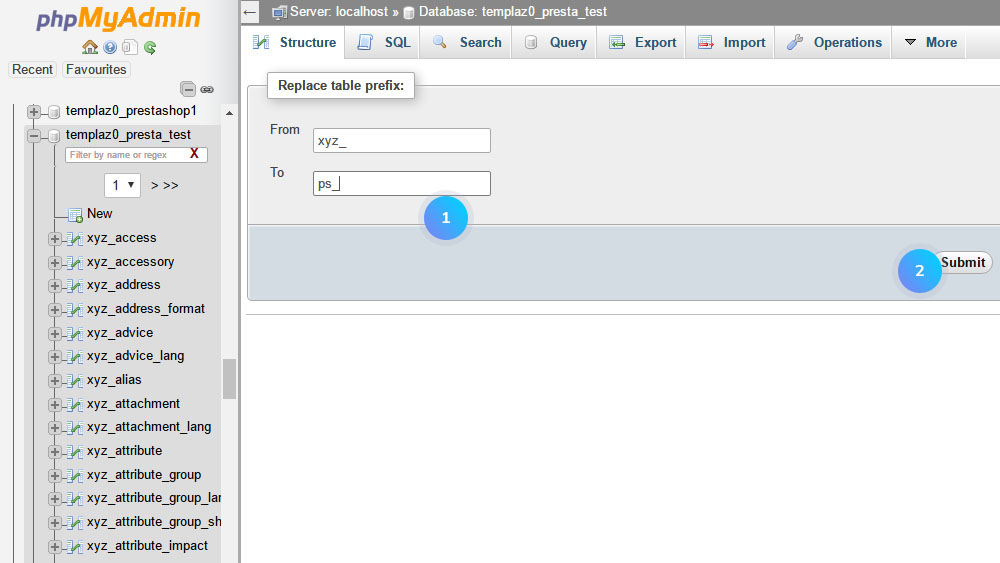
- The page with 2 fields will appear: From and To. In the From field you need to put an old database prefix, which, in our case, is equal to “xyz_” and in the To put “ps_”. Then click the Submit button to confirm the action.[notice type=”warning”]Note, that the operation should be repeated for each page of the database (you can select the page right below the Check all option from the previous step).

- You need to import the dump.sql file from the template package into PrestaShop database using the phpMyAdmin tool.
Hopefully, this tutorial was helpful for you.


