Here you can find the instructions on how to get the Access Token for your Instagram Feed module in your Magento 2 store.
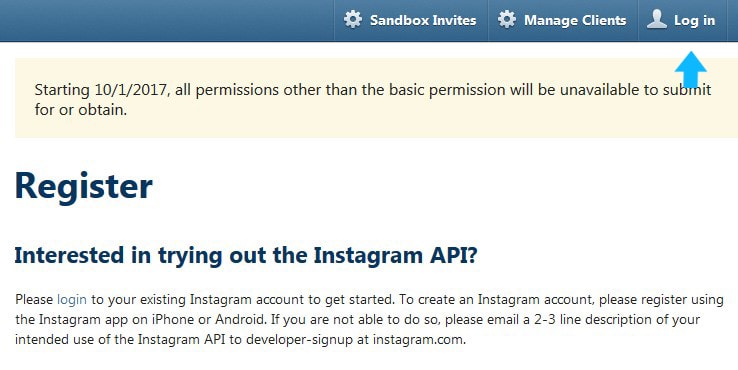
1. Visit the Instagram Developer Page and login to your Instagram account.
2. Press on the Manage Clients, then click the Register a New Client button.
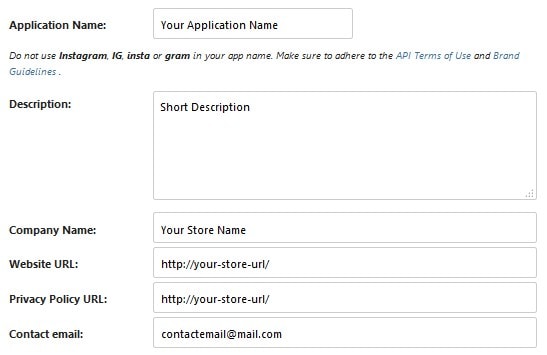
3. Complete the following options:
- Application Name – choose any appropriate name, which fits Instagram requirements.
- Description – add any short description.
- Company Name – specify your company name.
- Website URL, Valid redirect URIs – enter your store URL (e.g. http://www.store.com/).
- Contact email – add your contact email.
4. Move to the Security tab. Clear the Disable implicit OAuth and Enforce signed requests checkboxes.
5. Then enter the recapcha words and press the Register button.
6. Now you need to paste this URL into your browser address bar:
https://api.instagram.com/oauth/authorize?client_id=YOUCLIENT_ID_HERE&scope=public_content&redirect_uri=http://yourdomain.com/&response_type=token
7. Go back to the Manage Clients page and copy your Client ID.
8. Replace the YOUCLIENT_ID_HERE text with your actual Client ID (the one you’ve just coppied).
Note, the “client_id=” tag should be followed by your Client ID with no “+” sign at the beginning.
You should get something like this:
[notice type=”1111″]
https://api.instagram.com/oauth/authorize?client_id=932cf6b9d97440/…/496516440&redirect_uri=http://yourdomain.com/&response_type=token
9. Paste your store URL instead of http://yourdomain.com/ text and press Enter.
10. Click on the Authorize button.
11. After the page loading is complete, move to the address bar again.
You’ll see your store URL link with your access token indicated after the #access_token= tag.
[notice type=”1111″]E.g. http://yourdomain.com/#access_token=3105625247.932cf6b.abbc/…/cc3a56f8b588fed
12. Copy your Access Token and paste it into the Access Token option text field.
13. Tap Save Config and clear the Magento cache.


