Here you can find the instructions on how to manage the Newsletter Pop-up extension.
➤ 1. In order to configure this module, you should navigate to Magento admin panel and choose the Stores > Configuration section in the left side menu.

2. Then choose the TEMPLATEMONSTER > Newsletter Pop-up in the left side menu to go to the module settings interface.
The module has 2 sections, and each one contains a specific set of options:
- General
- Social Settings
General section includes main module settings, and Social settings section serves for social icons display setup in the pop-up window.
General
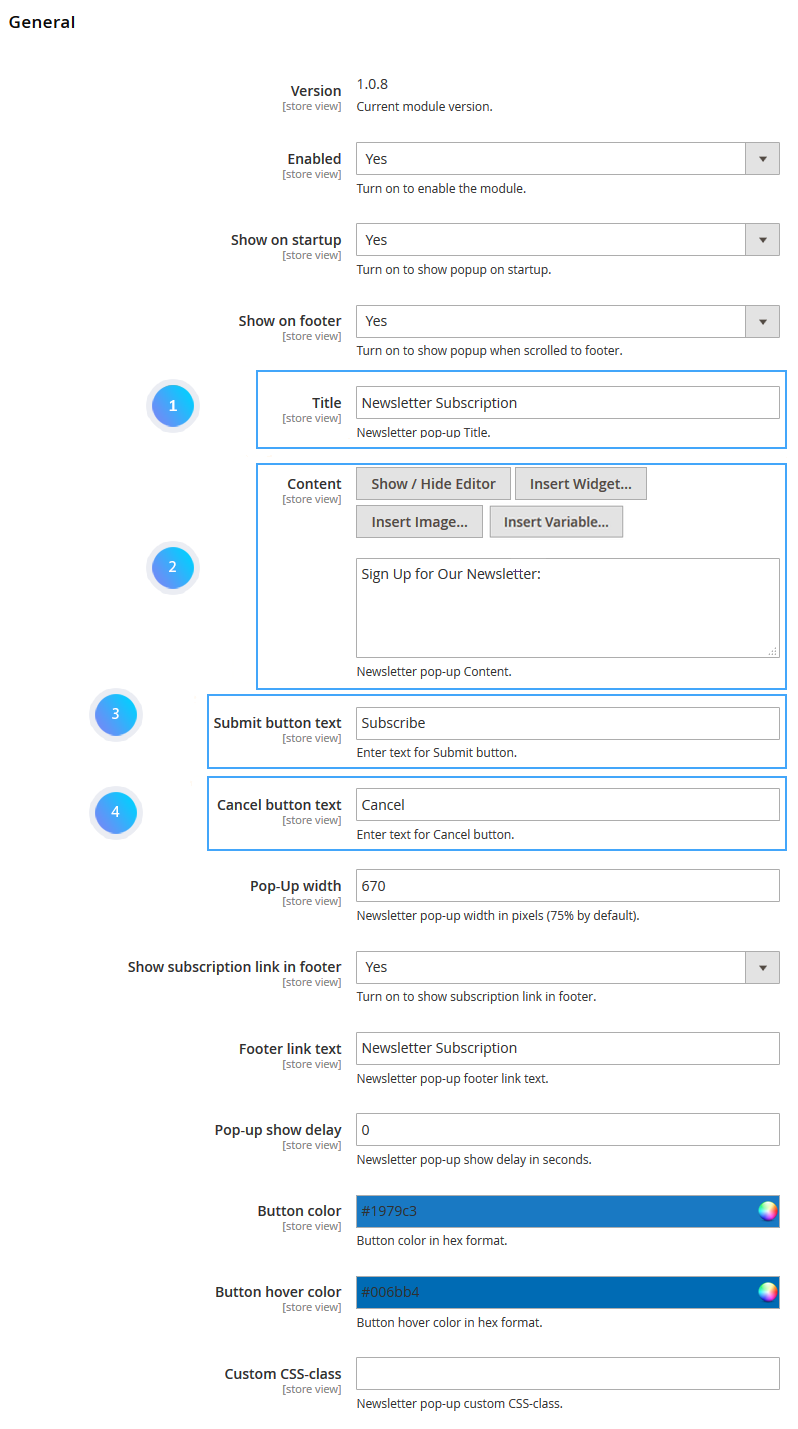
As stated above, this section includes main module settings. You can enable or disable module here, specify buttons color, define the width of the window, etc.
General section includes main module settings, and Social settings section serves for social icons display setup in the pop-up window.

Frontend:

- In order to enable or disable module completely, you’ll need to use Enabled option. It provides the possibility to deactivate the module completely.
Show on startup and Show on footer options allow you to configure the subscription form pop-up display.
- Show on startup option shows up the pop-up after visiting the site. As soon as shop page is loaded, you will see the pop-up offering you to subscribe to this site’s newsletter.
You can set up the pop-up to display once again after navigating to the site footer by using a scrollbar. E.g., if you close the pop-up that appeared after the initial page loading and scroll down to the footer then, the same pop-up will show up for the second time. In order to re-display this subscription window, you have to enable Show on footer option.
Show subscription link in footer option allows you to display a link in the site footer, to display the newsletter pop-up after clicking on it. Footer link text field changes the label for the link displayed in the footer after activating the Show in footer option.
- Pop-Up width option allows you to define the newsletter pop-up window width. Its size can be set in pixels only.
- The pop-up may not be displayed immediately, but after some certain time period. This setting is controlled by Pop-Up delay option. You can set a delay before the newsletter pop-up appearance and it will not show up right away, but only after the time you have specified passes since the client visits your site.
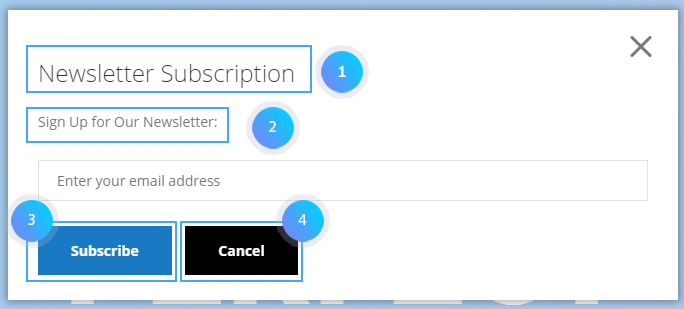
- Button color and Button hover color options let you set a background color for the “subscribe” button.You can change Content in pop-up window: Title, Content, Submit button text, Cancel button text.
- You may need the CSS-class option when customizing the pop-up design. This option allows you to apply additional custom CSS-class for the pop-up window.
Social Settings
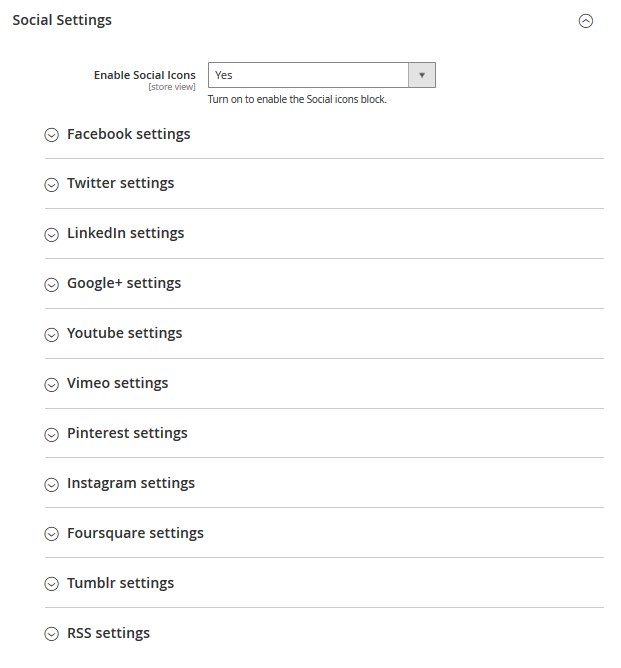
This section is responsible for social icons display and configuration in the newsletter pop-up. It consists of a few subsections that have similar options.

Main settings’ subsection allows you to set colors and social icons’ appearance for the following services: Facebook, Twitter, LinkedIn, Google+, Youtube, Vimeo, Pinterest, Instagram, Tumblr.
You can enable or disable certain icon appearance by using the respective Enabled ……. icon option. This option activation will make a respective sections appear to let you configure each icon individually.
This section also includes the Use default icon colors option. Use this option to change icons color.

By default, it’s enabled, so all the icons have their corporate [standard] color that is specific for each social network. However, if you’d like to define icons color on your own, you should disable this option.
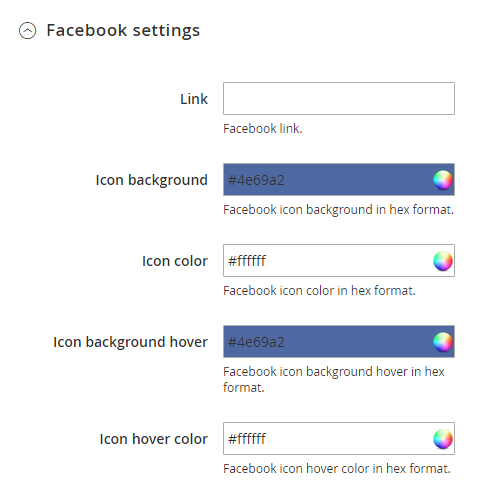
Facebook Settings
Each social network section has a Link option available. It lets you define the link to any page [your profile] in a respective social network.

After disabling the Use default icon colors option, you will see the new fields in subsections for each social network icon configuration.

All of these options allow you to customize the icon appearance. They provide you with the option to set the icon background and color for the initial state and on hover [after hovering the icon with the mouse cursor].
✓ Just in case you’d like to return all the default settings, there is a Reset button available next to the Save one.


