


In the following tutorial, we are going to overview how to delete or disable Google Fonts in html5 templates.

Google Fonts is the leading host of open-source fonts for use on the web, with hundreds of font families available for inclusion in web pages or downloads.
Change the Google Fonts Connection in HTML5 Themes
To change the Google Fonts connection through the service to a local font connection, you need to follow a few steps.
First, determine the included fonts, their weight, and their style. To do this, in the index.html file, find the font connection code that contains the following text fonts.googleapis.com.
Example 1 (may differ from your template):

In the example, after the word family=, your fonts and their styles are written. Here it is “Roboto Slab” at 400. And the font is “Roboto” at 400, 700, and also 700 – italic.
The “i” symbol next to the boldness of the font means its italic style. “%7C” is a font separation character. Styles for a particular font are found immediately after the colon, for that font.
Example 2 (may differ from your template):

In the example, after the word family=, your fonts and their styles are written. Here it is “Roboto Slab” at 400. And the font is “Roboto” at 400, 700, and also 700 – italic.
The entry “0,700” means that the font is regular, with a weight of 700. “1,700” means that the font is italic, with a weight of 700. Styles for a particular font are located immediately after the colon, for that font. If the font does not specify its weight after the colon, then it is set by default and equals 400.
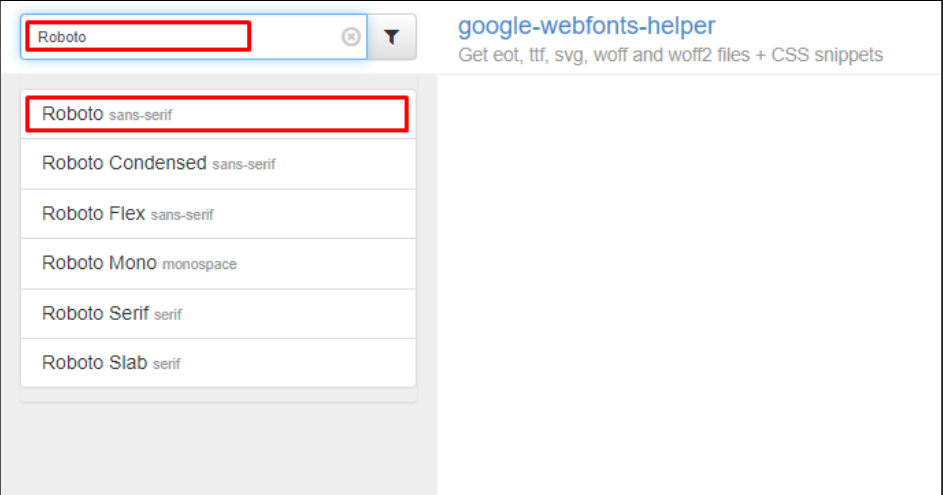
After determining the fonts used in the template correspondingly, we will use the Google Webfonts Helper service to connect them locally.
To do this, follow the link. In the search bar on the site, enter your font (in the example “Roboto”), and click on the desired one in the sidebar:
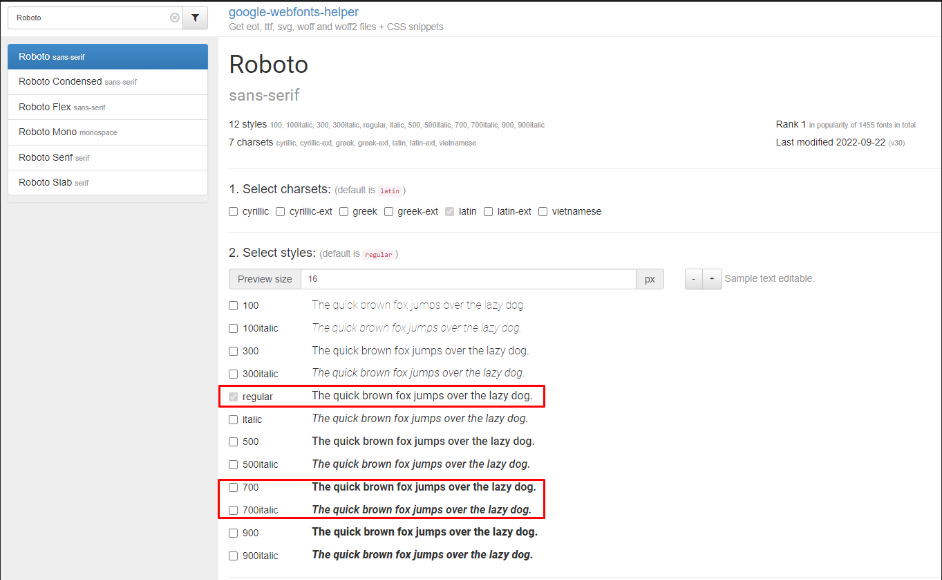
In the window that appears, select the weight and weight of the font found earlier (in example 400, 700, and 700italic):
Then, scroll down the page. Here is the code for connecting local fonts to your site:
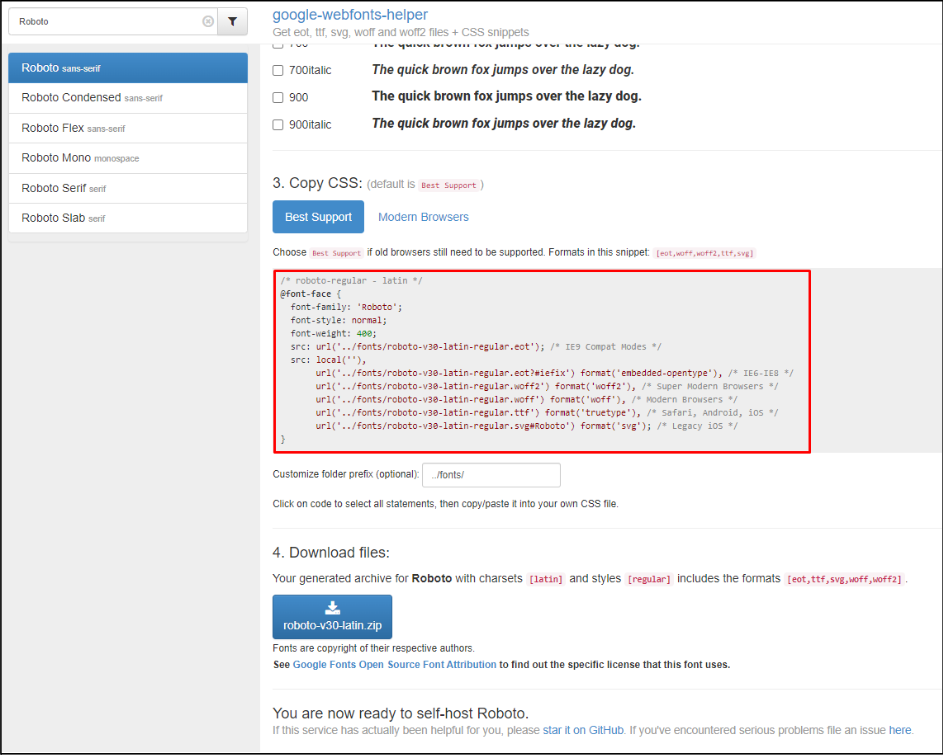
Then, copy it and add it to the css/fonts.css file on your site, at the top of the file:
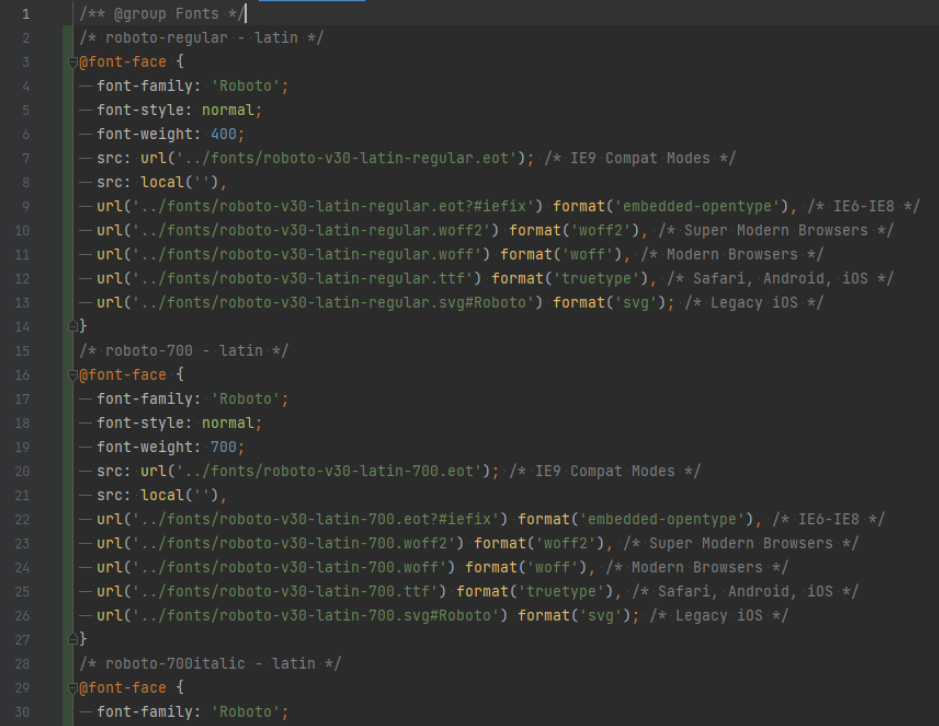
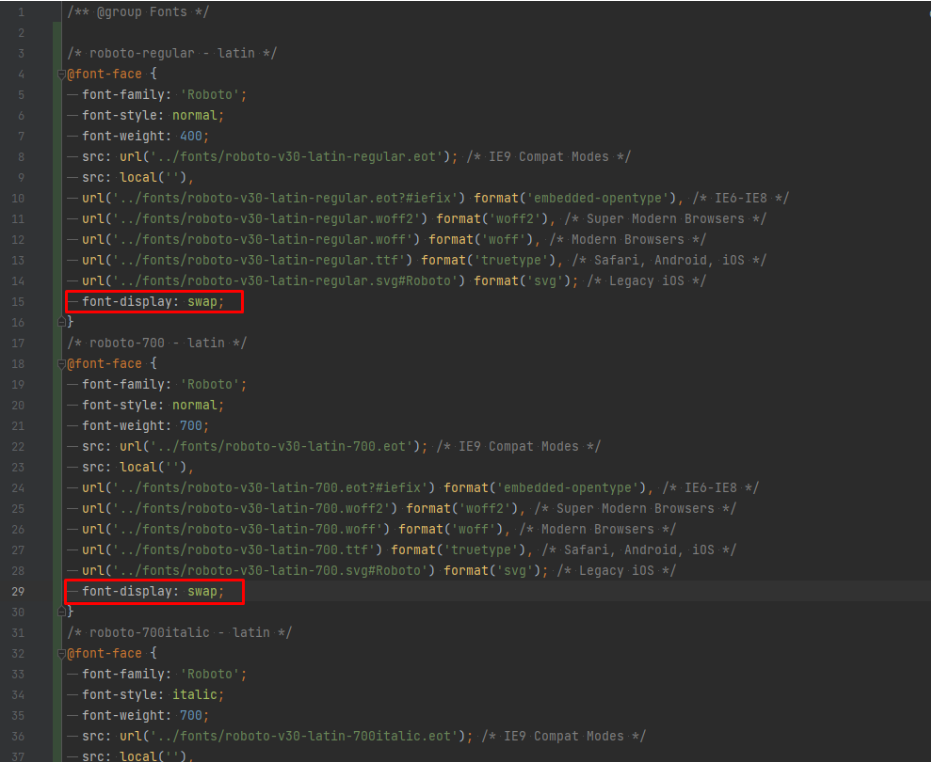
Moreover, here you need to edit your code a little for optimization. For each @font-face rule, add the font-display: swap; property:
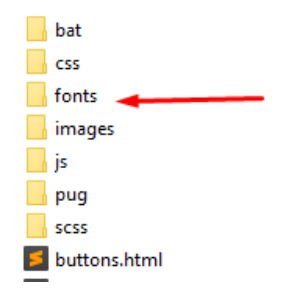
Then download the files of the font itself (item 4 in Google Webfonts Helper). And copy them to the fonts folder on your site:

Ready! There is a local connection to the font. It remains to remove the old connection code in each of your *.html files. The same code that we found at the very beginning. In particular, in the example it is:

Hopefully, this tutorial on how to enable/disable the sticky menu in WordPress was helpful. This tutorial may be useful as well “How to change a Google web font“.
Getting Stuck? Feel free to contact our Dedicated Support Team for further assistance.
