To make your website more unique and outstanding you may need to add a logo and a favicon. Usually, these elements help to identify your website.
From this tutorial you’ll learn how to change logo and favicon in WordPress.
A logo is one of the elements of your website of immense importance, as it represents the website’s main idea to the visitors, and makes its appearance easily recognizable.
A favicon is an element that helps visitors to navigate right to your website when looking through the rows of tabs in their browsers. It performs the presentational function.
Change logo in Elementor
Open your website, and click on Edit with Elementor -> Header in the top panel.

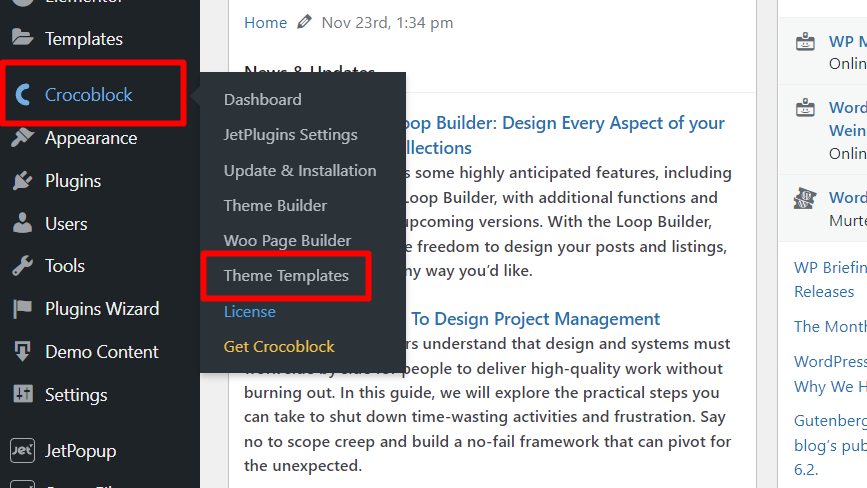
Alternatively, you may reach it from the WordPress admin panel. In case you prefer this way, hover over the Crocoblock tab, go to Theme Templates, and choose Edit with Elementor option for Header.

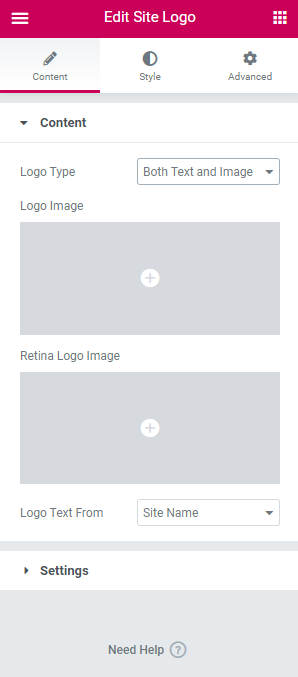
You’ll get to the header section content editing. To edit the logo, click on it and replace the default image with your desired one for both regular and Retina screens. If needed, you may also switch the image logo to a text one (the site name or a custom text) or display them both at the same time.

Feel free to click on Need Help? at the bottom of the Edit Site Logo section or proceed to this page to learn more about managing the Site Logo widget in Elementor.
Change Favicon
Favicon is what you see in browser tabs, bookmark bars, and within the WordPress mobile apps. You should upload your one to Appearance -> Customize -> General Site settings -> Favicon tab. The image should be square and at least 512 × 512 pixels.
![]()
Hopefully, this tutorial on how to change logo and favicon in WordPress was helpful for you.
Getting Stuck? Feel free to contact our Dedicated Support Team for further assistance.


