


Widgets are the useful tools, that make your website not only look spectacular but also increase its ergonomics and functionality.
From this tutorial you’ll learn how to work with the Widgets section.
A Widget is a separate block, that has its own functionality. You can add it to the website’s page using widget areas (header, footer, after loop, etc.)

The list of widgets can vary from template to template, depending on its main purpose, but there are also widgets, that you can use in almost every template.

Widget Areas
Widget area is the area of your webpage, where you display the widgets.
There is a wide range of widget areas, that can contain different widgets.
Widget Areas Location
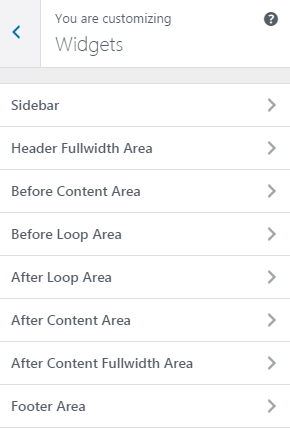
- Sidebar Area — you can find it where your sidebar is (on the left or on the right of your webpage). Though, if you are currently customizing a home page, you may previously need to set a sidebar, and then return to widgets customization.
- Header Fullwidth Area — is at the top of your website’s page. You can use it for various slider widgets, as this area displays all the content using the website’s full width.
- Before Content Area — is before main content of the page, and before the sidebar, though, it is not a full width area.
- Before Loop Area — you can find it before the page’s content, and it is displayed with the sidebar at its side.
- After Loop Area — you can find it after the page’s content, and it is displayed with the sidebar at its side.
- After Content Area — is located after main content of the page, and after the sidebar, though, it is not a full width area.
- After Content Fullwidth Area — is at the bottom of your website. You can use it for various slider widgets, as this area displays all the content using the website’s full width.
- Footer Area — is at the very bottom of your website. You may need to enable it in the Footer settings before starting to customize it.
This tutorial is based on Marigold WordPress theme.
