


People usually think template installation to be a hard and mind-occupying task, but we can prove you wrong with the help of Cherry Theme Wizard plugin!
From this tutorial you’ll learn about template installation using Cherry Theme Wizard.
Cherry Theme Wizard is an extremely useful tool providing tremendous help in installing template together with all the necessary plugins and demo content practically in several clicks. All the process is clear and easy, it won’t take much effort from you. All you’ll have to do is follow the steps, that will guide you through all the routine.
Theme Installation
First, let’s find out where to find Cherry Theme Wizard. You can download the plugin using this link. You should install it before proceeding to further actions. Feel free to read Manual Plugins Installation tutorial to learn more about how to install Cherry Wizard. If you’ve already installed this plugin, just go to the Dashboard.
You’ll see Cherry Theme Wizard in the Tools tab. Left-click on it, and you’ll be directed to the window, offering you to install a new theme.
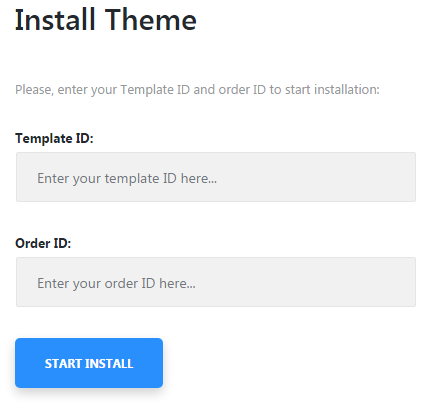
- To begin theme installation you’ll need to indicate your template ID and order ID, both of which you can find on the template delivery page (you should navigate there from the delivery letter). Copy the necessary information, and insert it into the fields, where IDs are required.
- Cherry Theme Wizard will upload and install the theme. It may take several minutes before the template is completely installed.
- After that a new window appears, offering you to automatically generate a Child theme. Using the Child theme is advantageous, as all the changes, that you apply for its appearance, are safe and don’t involve a Parent theme. Using the Child theme instead of the Parent theme prevents any occasional damages for your template.
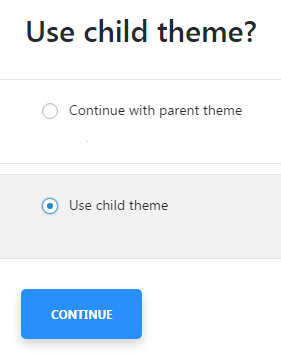 You must know, that all the customization changes will take place in the Child theme, so generating and installing it is a safe and easy way to apply any custom changes in your template’s appearance.
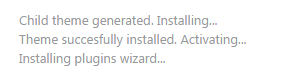
 - If everything is done correctly, you’ll see the next notice:
Plugins Installation
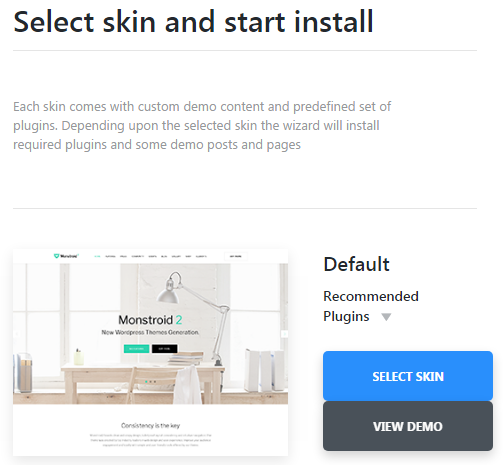
- The next step will bring you right to plugins installation. You’ll proceed to the list of recommended plugins, which are necessary for your theme and will make it work and display content correctly.If you’re using Monstroid2, WooStroid, Magic or other flagman templates, you’ll be offered to select a skin for your template first.
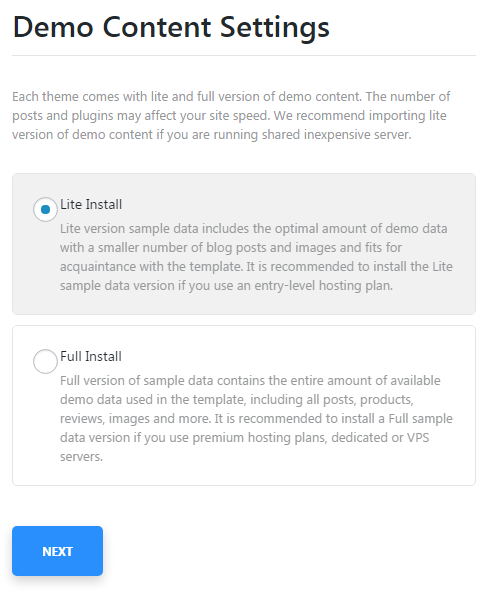
- You’ll also be offered to choose if you’d like to install the full amount of sample data, or you’d rather install a lite version, that was developed particularly for those people, who have an entry-level hosting plan.
- Now that all the preparations are made, you’ll see Configure Plugins window, containing the full list of plugins for your theme.There are three categories of plugins.
- Required plugins — the minimal list of plugins, needed for your template.
- Recommended plugins — the set, which is necessary to make your website’s content be displayed correctly.
- Extra plugins — the ones, that provide additional functionality for your template.
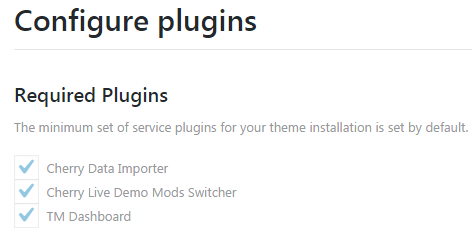
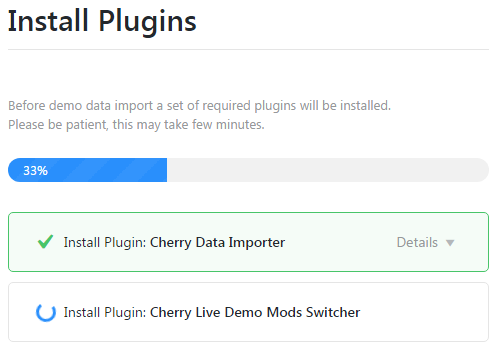
- You can choose, which plugins you want to install. After that, you can proceed to the installation process itself. The progress bar will show the success of the process.
Demo Content Installation
The next step is to install demo content, that comes with your theme. It usually adds to your theme the necessary images, posts and other sample data.
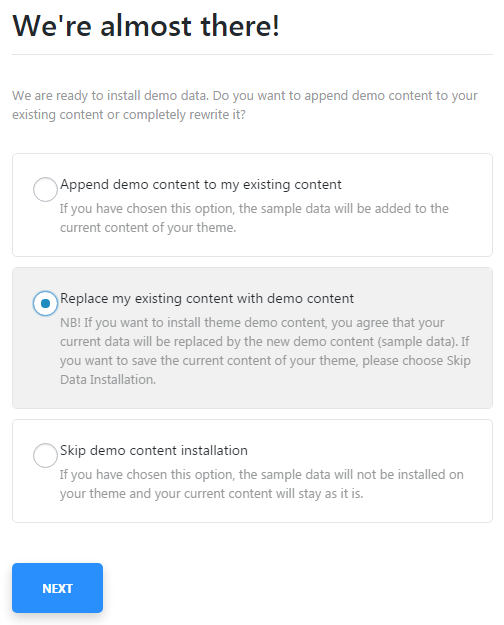
- You will have to choose from these variants.
- Append demo content to the existing content — if you choose this option, your current sample data will merge with the new demo content, that goes with the theme.
- Replace existing content with demo content — choose this option if you want to overwrite your current content with sample data, that goes with the template completely.
- Skip demo content installation — this option cancels demo content installation, so your template will go with your existing demo content.
- When you choose to install demo content, you will see the Importing Sample Data window. Enter your administrator password in the required field, and the importing process will begin.
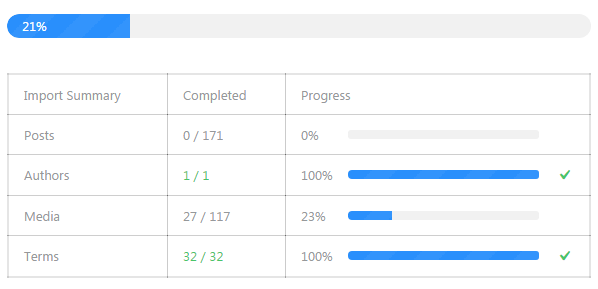
- You’ll also be able to monitor the state of importing through the progress bars.
As you can see, all the steps start automatically, and after one step is over, the other begins immediately. They follow one another logically, and the process is clear and easy.

