


From this tutorial you’ll find out how to enable and disable wp_debug constant, that is often used to activate the debug mode in WordPress.

Enabling WP_DEBUG
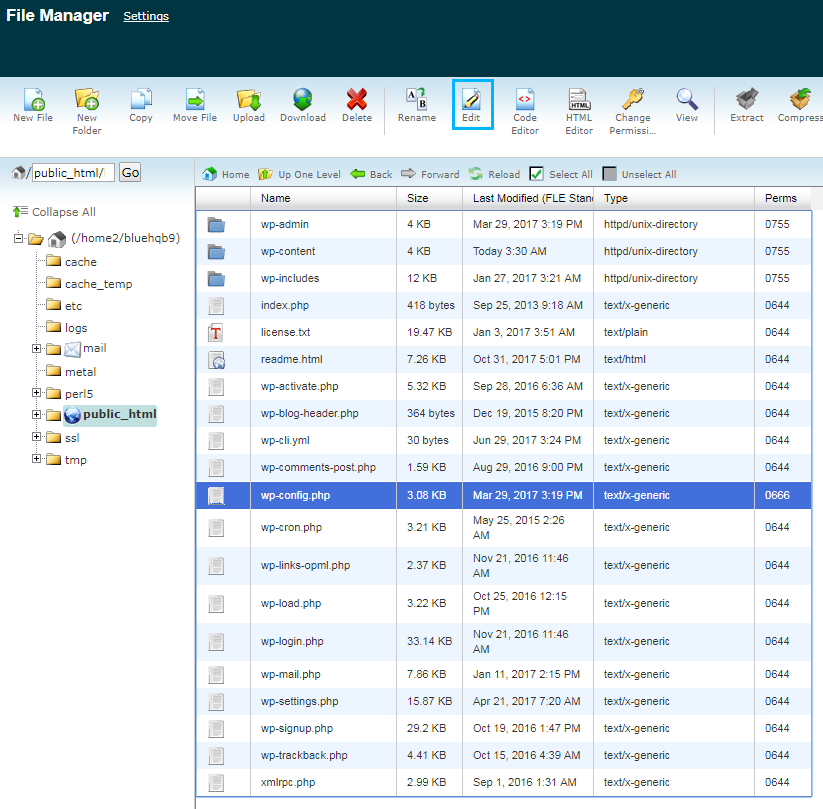
- In order to enable WP_DEBUG, please, access your hosting cPanel and locate the root directory (the folder where WordPress is installed).

- Here look for wp-config.php file. Open it for editing.
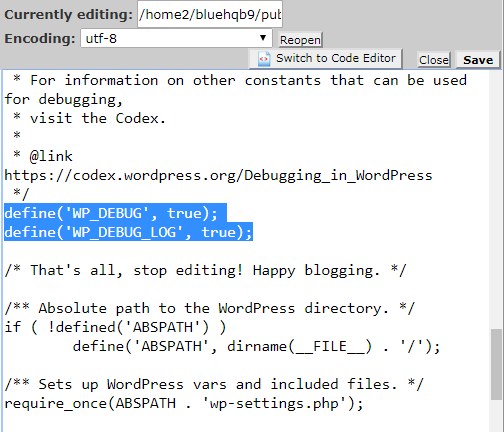
- Paste the following line of code to it.
define( 'WP_DEBUG', true );
- Note, that in some cases WP_DEBUG constant already exists in the file. To enable it you need to change its value from false to true.
- Now WP_DEBUG is active. As a result, you’ll see all PHP errors, notices, and warnings. There will also be notices about deprecated functions and arguments which are used on your site.
WP_DEBUG log
WP_DEBOG log is a perfect tool to save all the errors in the debug.log file (it is located in the wp-content directory).
Add the following line of code to the wp-config.php file to enable it.
define('WP_DEBUG_LOG', true);WP_DEBUG display
If you don’t want to display errors on your site, you can turn them off with WP_DEBUG_DISPLAY constant.
Its value is often set to true by default, so to disable displaying errors you’ll need to change the constant value to false.
You can check how to do it in the code below.
define('WP_DEBUG_DISPLAY', false);Note, that this constant works only when WP_DEBUG log is active.
Debugging Plugins
Sometimes it is more convenient to use special debugging plugins. Here is the short list of those, which can assist you in debugging your site.
Note, that WP_DEBUG should be used on local sites only. Don’t turn on WP_DEBUG for live websites.

