


From this tutorial you’ll learn how to use TMPL files in Cherry Testimonials plugin.

Using TMPL Files in Cherry Testimonials
- First, let’s see where we can find .tmpl files in order to use them in Cherry Testimonials. To do it, please, navigate to wp-content/plugins/cherry-testi/templates folder.

- Here you can see two Cherry Testimonials templates:
- archive-tm-testimonials.php – for displaying testimonials list;
- single-tm-testimonials – for displaying a single testimonial page.
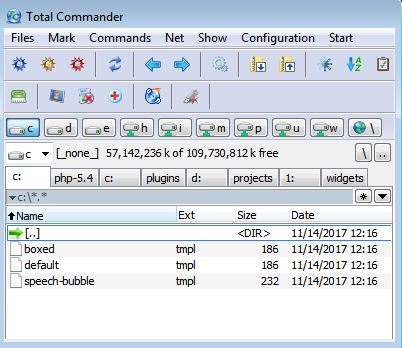
- Now navigate to templates > shortcodes > testimonials to locate the available templates. Here they are:
- boxed.tmpl;
- default.tmpl;
- speech-bubble.tmpl.
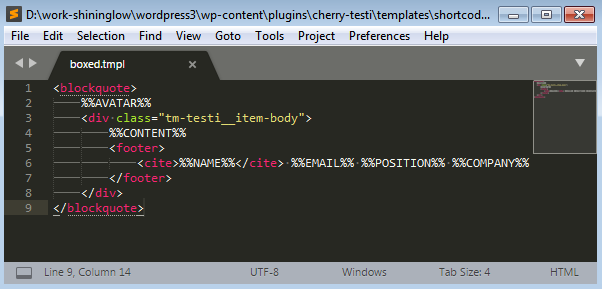
- Each of them contains macros codes, which allow displaying different testimonials elements. Let’s overview the macros codes available for using in .tmpl files.
- %%AVATAR%% – use this macros to show avatar in the testimonial template.
- %%CONTENT% – add this macros in order to show testimonial content in the template.
- %%EMAIL%% – input this macros to display the testimonial author’s email address in template.
- %%NAME%% – add this code in order to show the testimonial author’s name.
- %%URL%% – use this macros to display the URL link in the template.
- %%POSITION%% – input this macros to show the working responsibility of the testimonial author.
- %%COMPANY%% – add this macros to add the information about company in the testimonial.
- In order to change the templates and use them on your site you need to create cherry-testi folder in your active theme directory and copy the templates there saving the structure.
- After that you can open the .tmpl files in any code editor convenient for you and make changes in the templates according to your needs.
Adding Testimonials Archive Page
- Let’s create a Testimonials archive page using the shortcode. It can list the existing testimonials, or show them in the form of slider.
Please, navigate to Pages > Add New tab on the left of the Dashboard and paste the needed shortcode in the content field.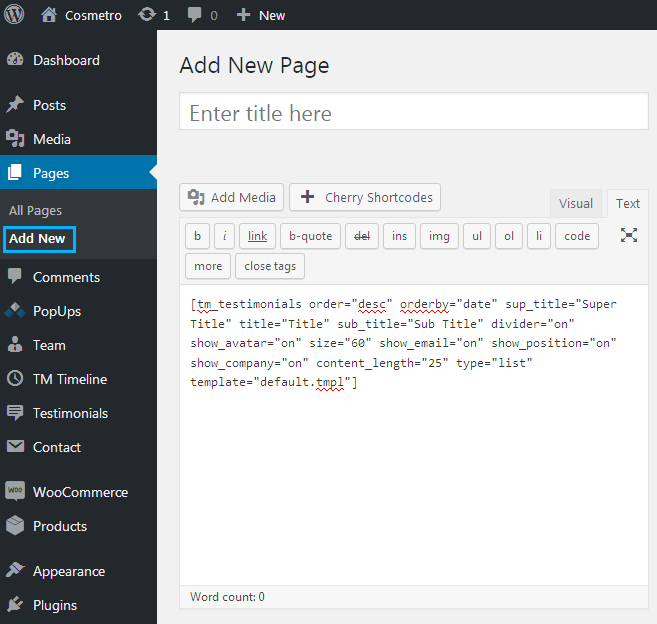
Listhttps://gist.github.com/Shininglow/0aad6ae9e1727fe96c5064b1de3066caSlider
https://gist.github.com/Shininglow/7d6c8cefd6ca3e1581df14ee1752b13e - You can also change some of the shortcode attributes. Here you can see the list of all the available attributes to use in the shortcode.
- type – here you can define the layout type (list or slider, e.g., type=”slider”);
- sup_title – here you can display the super title (sup_title=”Super Title”).
- title – here you can display the title (title=”Title”).
- sub_title – here you can display the sub title (sub_title=”Sub Title”).
- divider – turn the divider on or off to display the divider between the title and the testimonial (divider=”on” ).
- limit – the number of testimonials (limit=”-1″ stands for show all).
- orderby – here you can set the custom order for the testimonials (orderby=”date”).
- order – here you can select, whether you want ot use ascending or descending order ( order=”desc”).
- category – here you can define the category from which you need to display testimonials.
- ids – this attribute can assist you in displaying testimonials by the specified IDs (e.g., ids=”1,3″).
- show_avatar – set the attribute to display the testimonial author’s avatar (show_avatar=”on”).
- size – here you can set the width of the avatar in px (size=”60″).
- content_length – here you can specify the number of words to show in the testimonial content (content_length=”25″ ).
- show_email – here you can enable displaying of the testimonial author’s email address (show_email=”on”).
- show_position – here you can enable displaying of the testimonial author’s working responsibilities (show_position=”on”).
- show_company – here you can enable displaying of the company’s name (show_company=”on”).
- template – here you can specify which template you want to use for the page (e.g., template=”default.tmpl”). Type in the name of the template you want to apply (see the block about templates above).
- custom_class – here you can apply your custom CSS class to use.
- In the case you decided to use Slider type of the testimonials archive page, feel free to use the following attributes in the shortcode.
- autoplay – the time needed to switch between slides (autoplay=”5000″).
- effect – here you can select the slide effect to use (“slide” or “coverflow“, e.g., effect=”slide”).
- loop – here you can enable the slider loop включить (loop=”on”).
- pagination – with this attribute you can enable slides pagination (pagination=”on”).
- navigation – use this attribute to show Prev/Next buttons (navigation=”on”).
- slides_per_view – here you can specify the number of visible slides (slides_per_view=”1″ ).
- space_between – here you need to specify the space between the slides in px (space_between=”15″).
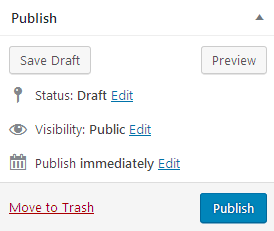
- Now that your Testimonial archive page is ready, let’s publish it.
- After that, plaese, navigate to Testimonials > Settings tab on the left of the Dashboard and select the newly published page in Testimonials archive page dropdown list.
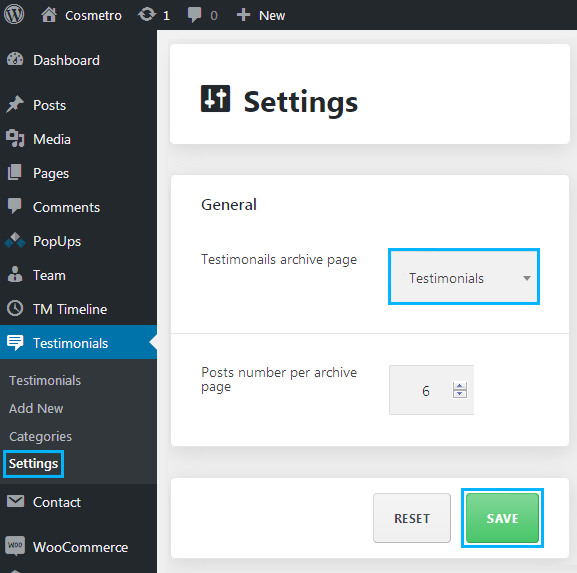
- Click Save button to save the changes. As a result, you’ll assign the page you’ve created as the testimonials archive page.
This tutorial is based on Cosmetro Cosmetics Store WooCommerce WordPress theme.

