


There are more than 800 Google fonts available for use today and some of them are already included to your theme settings. But what if some new font is created and you decide to add it to the site settings?
This tutorial will show you how to update Google Fonts list in WordPress Customizer:

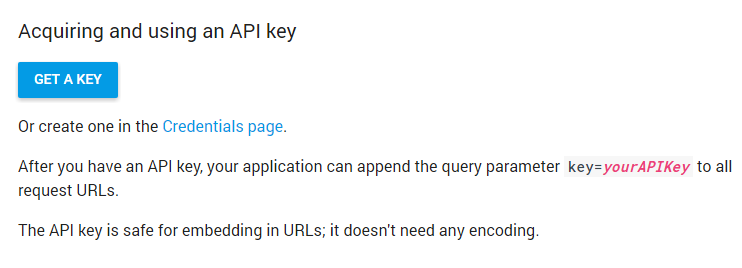
- Firstly, you need to generate the Google API key. To do this, open the following site.
- Click on a Get a Key button under the Acquiring and using an API key title.
- Select an already existing project and click the Enable API button.
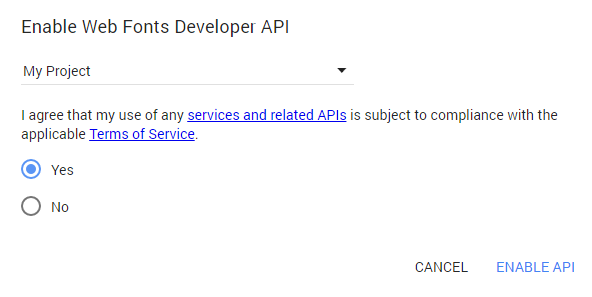
- If there are no projects created yet, do the following:
- Choose Create a project option in the drop-down.
- Enter its title.
- Then, click on the Create and enable API to generate a key.
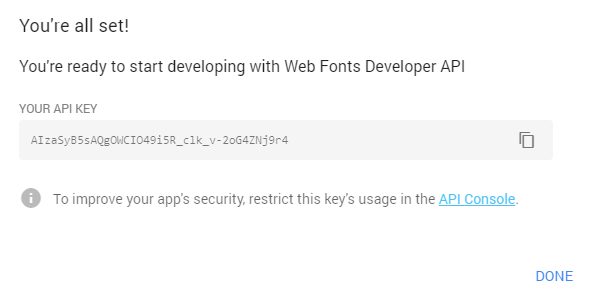
- Replace YOUR-API-KEY with the key you generated earlier.
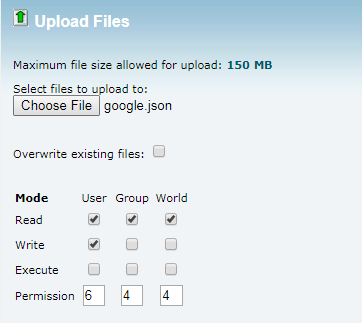
- Now you need to save this code as google.json file. To save it, use CTRL+S hotkeys on your keyboard. Make sure your file name is google.json.
- Connect to your server using FTP client or open the hosting cPanel File Manager tool. Navigate to the wp-content/themes/theme_name/cherry-framework/modules/cherry-customizer/assets/fonts folder (here theme_name stands for your actual theme name).
- Upload the google.json file to this directory confirming the overwrite.

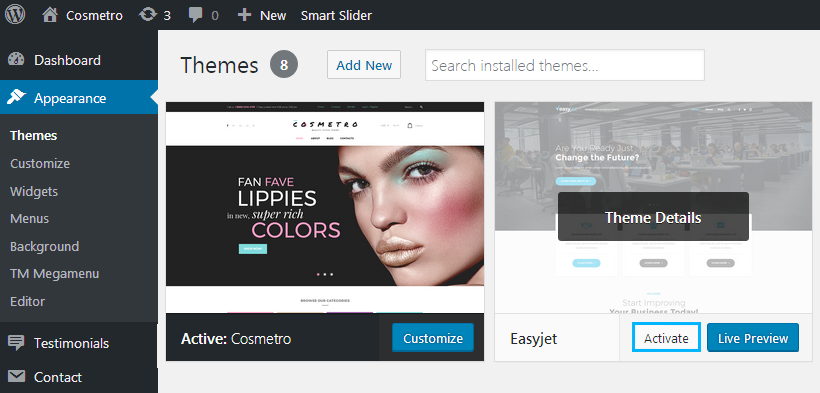
- Open the Appearance > Themes section in your WordPress dashboard. Activate any default WordPress theme and then re-active the theme you use.
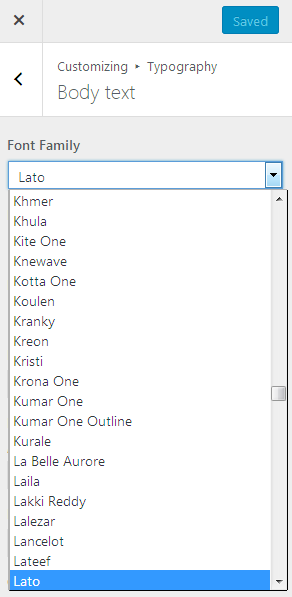
- Refresh the Appearance > Customize page (you can use CTRL+F5/CMD+R hotkeys to do that) and you will see the updated Google fonts list now.
Now you know how to update the list of Google fonts. More tutorials are coming soon!

