From this tutorial you’ll learn how to display various widgets per language using WPML plugin.
Displaying Widgets per Different Languages
- First, let’s make sure you have WPML plugin and Widget Logic plugin installed. If you don’t, then you’ll need to download and install them to your website. Check the detailed Manual Plugin Installation tutorial to learn how you can install plugins manually.WPML plugin translates titles and text, but usually you can’t manage widget language using it. That’s why you need to use Widget Logic plugin to access the widget language with WPML.
- Now let’s navigate to Appearance tab in the left column of the Dashboard (Administration panel). Proceed to Widgets submenu to access the widgets.

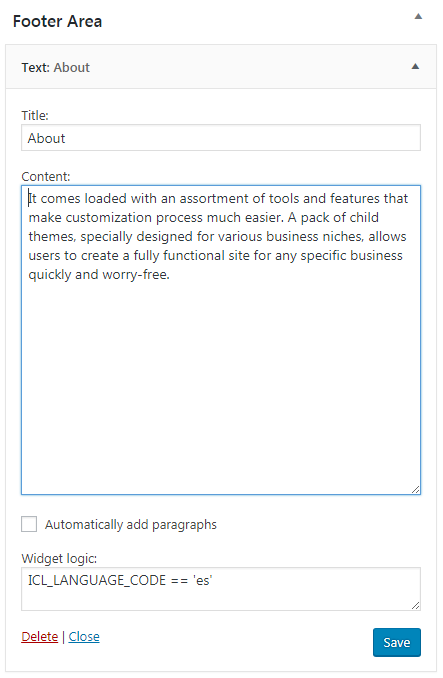
- Choose the required widget type and put it into the specific widget area. Add content to the widget.
- Now you need to define the language, for which the widget will be used. To do this add the following code constant under Widget Logic tab.
- Make sure to replace XX symbols with the language specification (e. g., de for German, es for Spanish, etc.).

- Please, repeat the steps, listed above, to get the second language for the widget (you should use another language specification for it).
- Now save the changes and navigate to your website. As a result, you have different widgets appearing per different languages.


