From this tutorial you’ll learn how to display Categories with Taxonomy Tiles widget.

Adding Taxonomy Tiles Widget
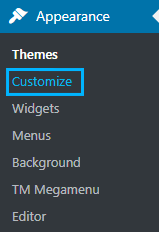
- First, let’s log in to WordPress Dashboard. Then navigate to Appearance > Customize tab in the left column of the Dashboard in order to access Customizer.
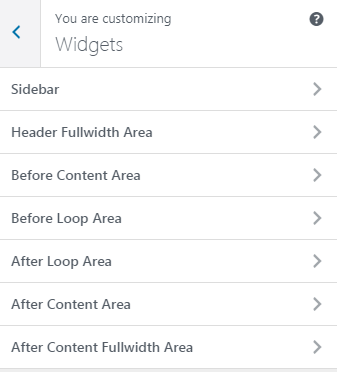
- Locate Widgets tab on the left of the Dashboard and click on it. Here you need to select the widget area where you want to add Taxonomy Tiles widget.

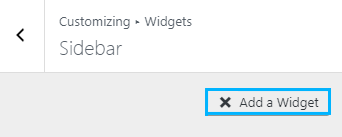
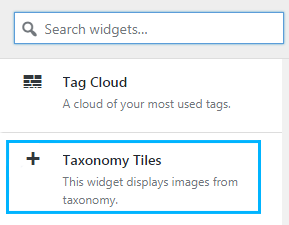
- Click on Add a Widget button to open the list of widgets you can add to the widget areas. Here select Taxonomy Tiles widget from the list of widgets.
- Now you need to fill in the fields with the required information. Type in the title of the block in the Widget Title area.

- Select the taxonomy type you want to use for the widget content. You can choose Category or Tag taxonomy type.
- In the Select Category/Tag to show you can type in the category or tag title to display the posts in this category in the Taxonomy Tiles widget. If you leave the field empty, all the categories/tags will be displayed by the widget.
- In the Description Words Length you can set the words count value for the description accompanying tiles.
- Enable Show Post Count option to let the visitors see the number of posts for each category.
- Now choose the layout type. You can select grid layout or tiles layout, depending on your website’s style and your unique vision.
- Columns Number – here you can define the number of columns to show in the widget. You can set up to 4 columns, or either use a single column.
- In the Items Padding block you can set your custom tiles padding for this widget.
- Save the changes. As a result, you can see the Taxonomy Tiles widget on your website page.