


From this tutorial you’ll learn how to apply custom featured image dimensions.

Applying Custom Featured Image Dimensions
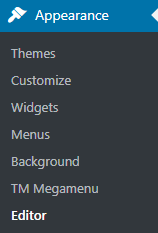
- You can add a featured image for every post. But sometimes you’re not content with the default dimensions for this image (it happens to be too small or too large). Let’s change the featured image dimensions. To do it log in to WordPress Administration panel (Dashboard). Locate Appearance > Editor tab on the left of the Dashboard.
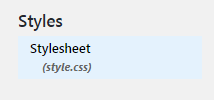
- Locate style.css and open this file.
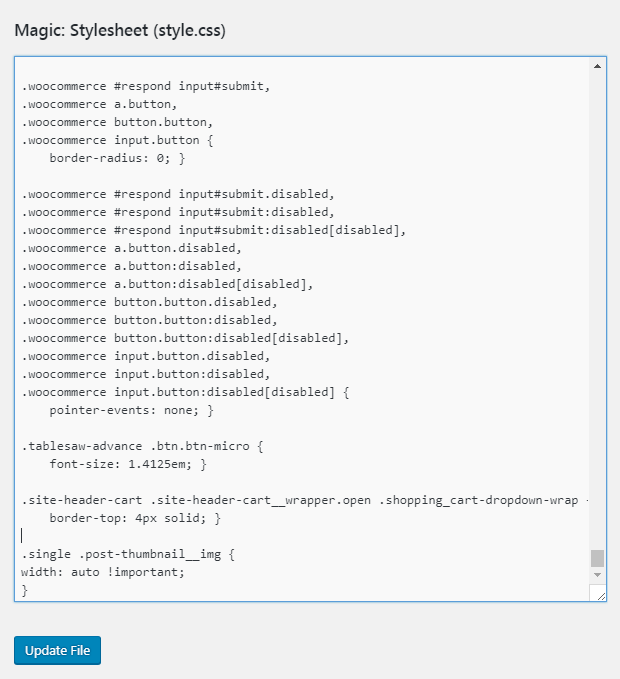
- Now you need to scroll the file content to its bottom and add the following lines of code to it. Then click on Update file button to save the changes.
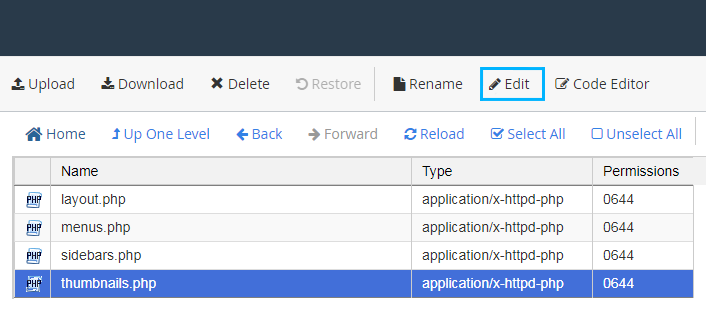
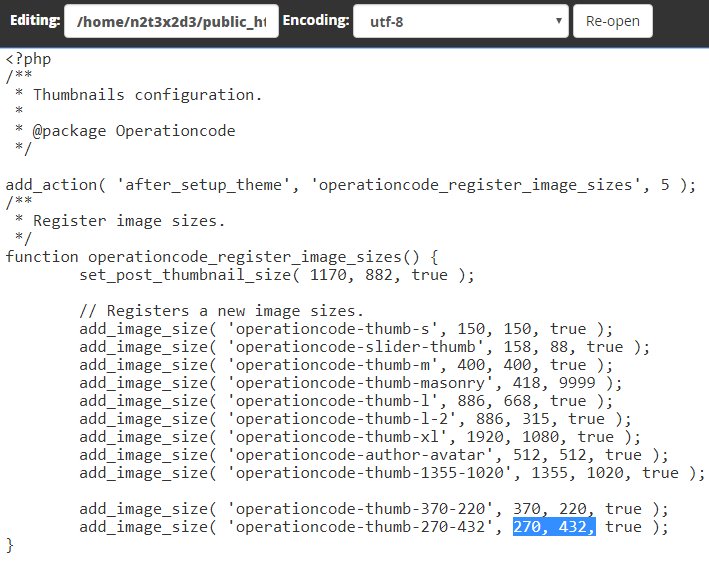
- Now you need to edit thumbnails.php file. To do it log in to your hosting server cPanel and open the file manager.Here you need to navigate to wp-content/themes/themename/config directory. Open thumbnails.php file for editing.
- Locate the line of code for single post thumbnails. Here you need to set the preferable dimensions. Then save the changes.
- Now return to WordPress Dashboard and navigate to Posts > All Posts tab. Open the post to upload the featured image once again. Then update the changes.
This tutorial is based on Monstroid2 Multipurpose WordPress theme.
