


From this tutorial you’ll learn how to add content using Posts JetElements module for Elementor.
Posts module is a multipurpose tool, that can create attractive post grid layouts, sort posts by categories, IDs or the date of publishing. This module is also helpful when creating post sliders and post carousels.

Changing Posts Layout With Posts Module
There are three ways to display posts using Posts module. You can display posts in the form of Grid, in the form of Carousel and in the form of Post Slider. Let’s find out how to display posts in different ways.
Posts Grid Layout 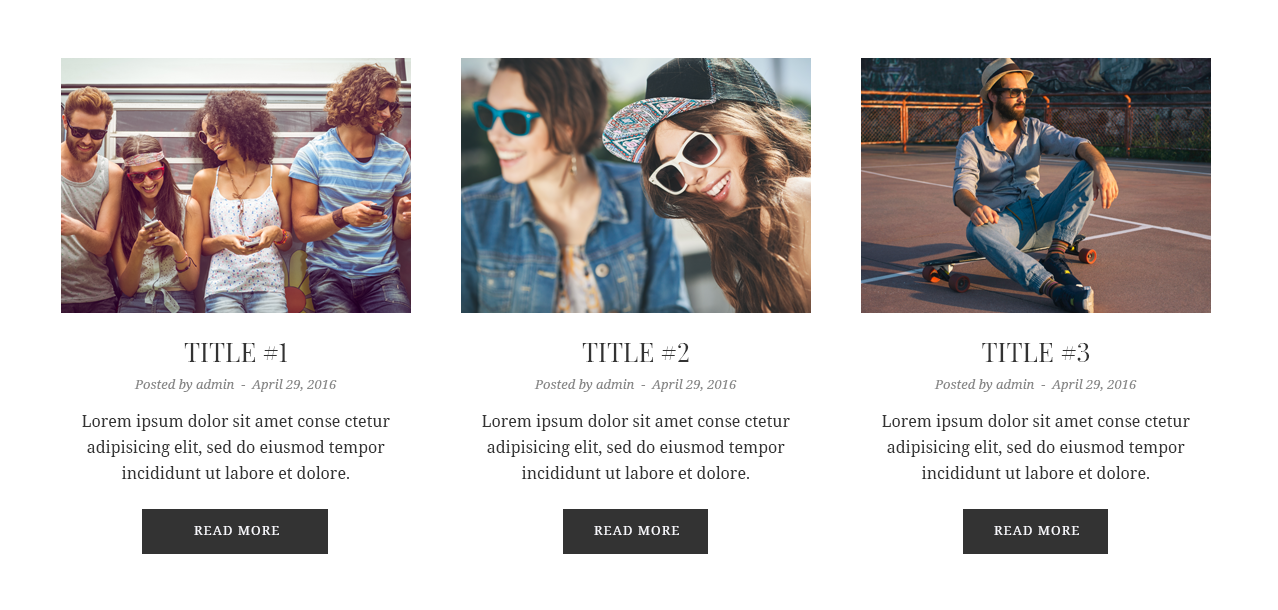
- To create Grid layout navigate to Content > Carousel settings and disable Enable Carousel option.
- Next, locate Content > General tab and type in the Posts Number field the number of posts you want to display using this module (for Grid layout it has to be more than 1 post).
- In the Columns field select the number of columns from the dropdown list. It has to be larger than 1 (select from 2 to 6 columns).
Posts Carousel Layout 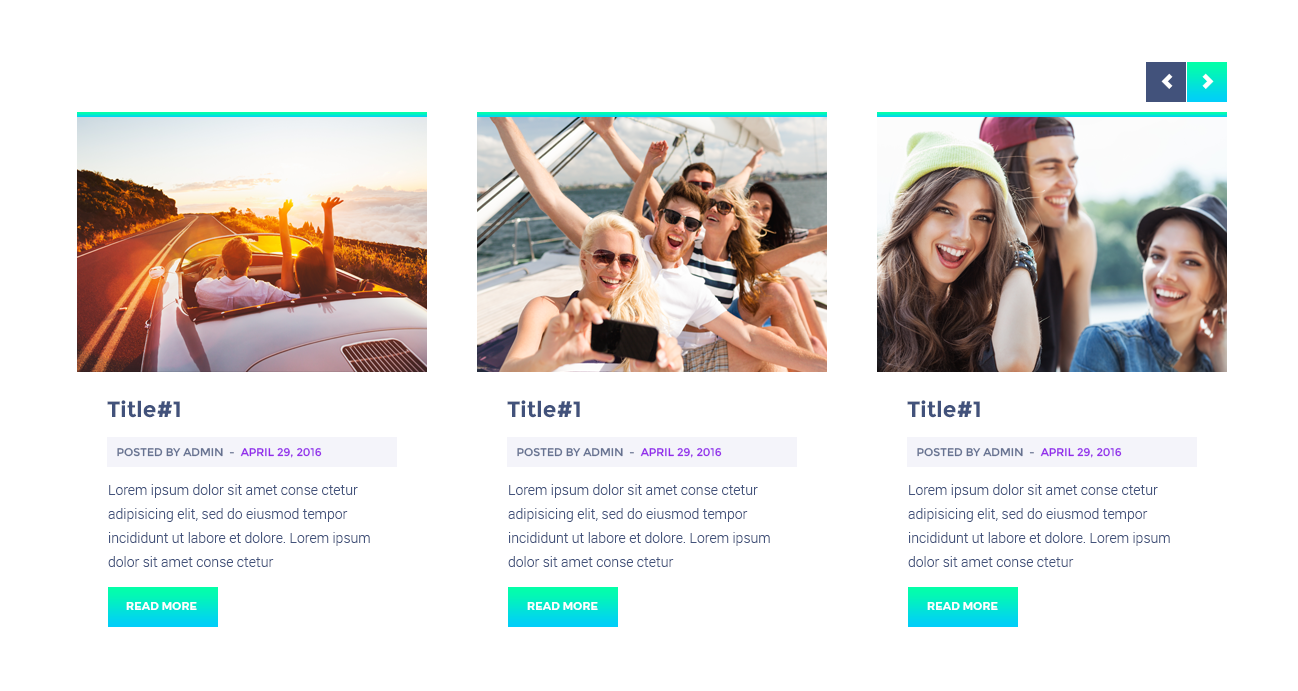
- To create Carousel layout go to Content > Carousel and switch on Enable Carousel option. In this block you can tune up such options, as the number of slides to show, enable or disable autoplay and different types of navigation (arrows and pagination dots), in order to specify the main carousel settings.
- Now navigate to Content > General tab and define in the Posts Number field the number of posts you need to display. To create Carousel layout the number of posts has to be larger than the number of columns you use.
- In the Columns field select the number of columns. It has to be larger than 1—2 columns.
Posts Slider Layout 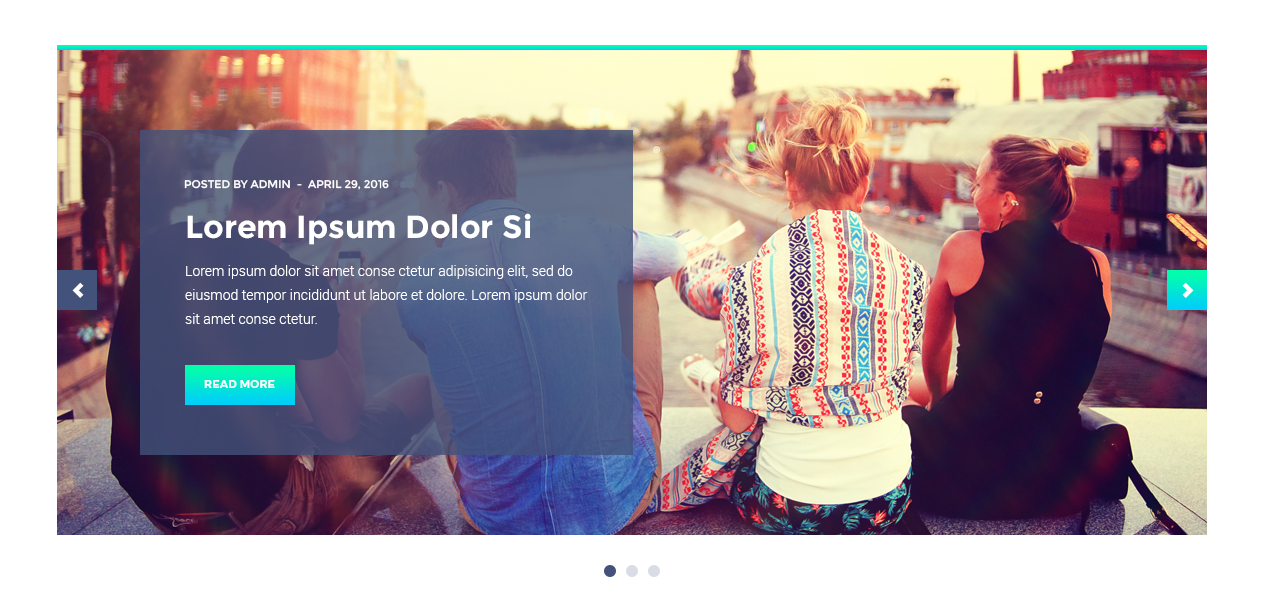
- To create a Post slider using Posts module navigate to Content > General tab and select the number of columns in the Columns field. In order to create Post Slider you need to have only one column.
- In the Posts Number field fill in the number of posts you want to display. The number of posts must be larger than 1 (the more, the better).
- Now navigate to Content > Carousel tab and turn on Enable Carousel option, in order to use a carousel.
Content
General 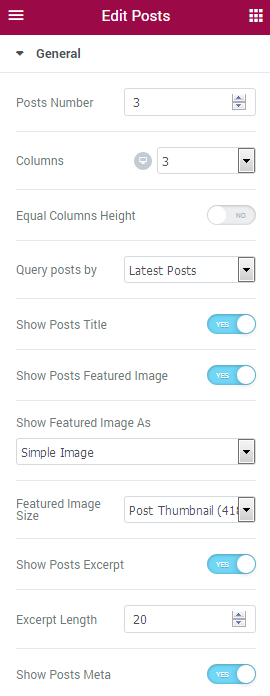
In this block you can customize Post General settings, such as posts sorting type; define information to show (meta, post excerpts, featured images, etc.).
- Posts Number — here you need to define how many posts you need to display with this module.
- Columns — in this block you need to choose the number of columns to use from the dropdown menu. You can select from 1 to 6 columns to show per block.
- Equal Columns Height — in this block you can enable or disable the same height for all the module columns.
- Query Posts By — here you can specify if you want to filter and show posts by categories, or by IDs. You can also show only the latest posts.
- Show Posts Title — enable this option if you want to display post title in the module, so that the visitors could see this information.
- Posts Featured Image — enable this option to display featured images for the posts that are shown in the module.
- Show Posts Featured Image As — here you can select if you want to show the featured image as a simple image, or either as the box background image.
- Featured Image Size — here you need to define the size of the featured image (usually it can be medium, large and thumbnail).
- Show Posts Excerpt — here you can enable displaying the excerpts for the posts shown in the module.
- Excerpt Length — here you can specify the number of words from the post content you want to display as a post excerpt.
- Show Posts Meta — enable the option if you want to show such meta information, as post author, publish date.
- Author — enable the option if you want to show the author of the post.
- Date — enable the option if you want to show the date when the post was published.
- Comments — enable the option if you want to show the number of comments to the posts, so that the visitors will see the popularity of each publication.
- Show Read More Button — here you can enable Read More button to ensure comfortable navigation from post excerpt to the full version of the post.
- Read More Button Icon — here you can select the icon to use it for the Read More.
- Read More Button Text — in this field you need to fill in the text for the Read More button title.
You can also add gaps between columns and rows. To do it enable the corresponding option in the General block.
Carousel 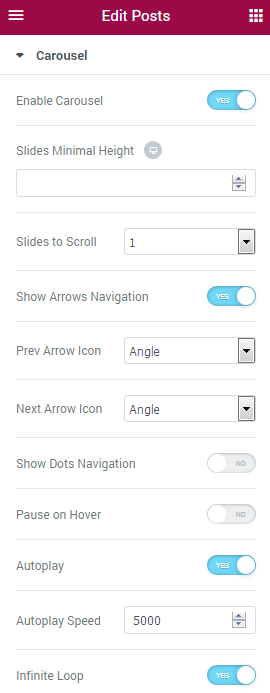
In this block you can customize animation, enable carousel slider and post slider, etc.
- Enable Carousel — turn on this option to create post slider or carousel.
- Slides Minimal Height — here you can define the necessary height for the slides, in order to apply your custom height.
- Slides to Scroll — here you need to define how many slides you want to scroll when autoplay or using navigation arrows.
- Show Arrows Navigation — here you can enable or disable navigation arrows to provide easier navigation from slide to slide for the visitors.
- Prev Arrow Icon — here you can select the type of icon to use for the previous control arrow.
- Next Arrow Icon — here you can select the type of icon to use for the next control arrow.
- Show Dots Navigation — here you can enable or disable pagination dots at the bottom of the carousel slider to ensure easier navigation.
- Pause on Hover — enable this option if you want autoplay to pause when the visitor puts the mouse to the carousel area, in order to make navigation through the slides more smooth.
- Autoplay — enable this option if you want the slides to play automatically.
- Autoplay Speed — here you can set the speed of switching between slides in ms.
- Infinite Loop — enable this option if you want the slides to repeat continuously.
- Animation Speed — here you can define the speed of animation when the transition between slides takes place (in ms).

