


Sometimes you need to change colors for various website content, such as title and body text, background color or social icons color.
From this tutorial you’ll learn how to edit colors using Power Builder.

Preparing to Edit Colors Using Power Builder
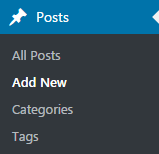
- First, let’s switch from the default post editor page to Power Builder page editor. Log in to WordPress Dashboard. Open Posts tab in the left column and click on Add New sub menu.
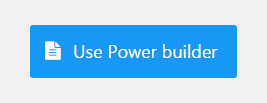
- Click on Use Power Builder button.
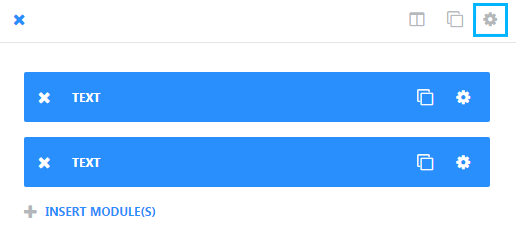
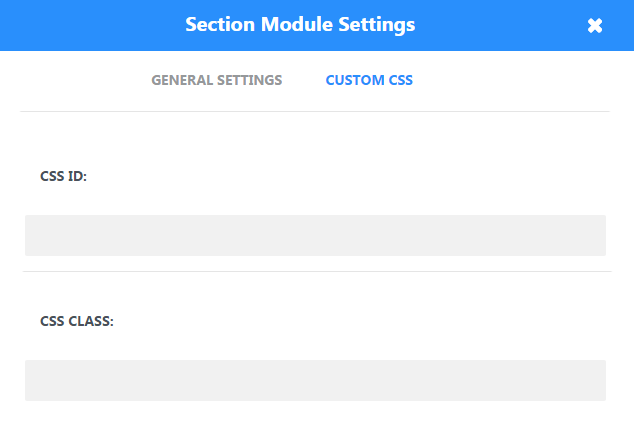
- Now we should turn off the custom CSS classes for the sections we need to edit. Click on section settings and delete everything from the CSS Class field in the Custom CSS tab.
- Save the changes to proceed to colors editing.
Editing Titles with Power Builder
- Locate the module, which contains needed title. Click on the Settings icon.
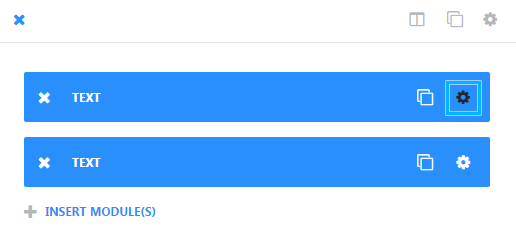
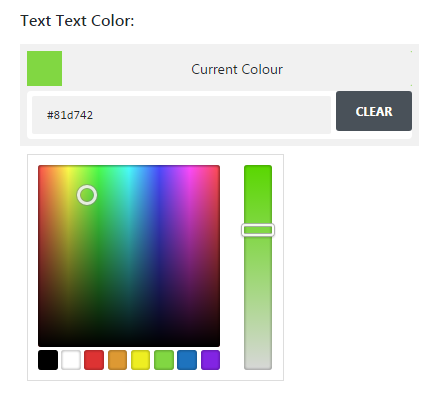
- Navigate to Advanced Design Settings tab and scroll to the Text Color settings.

- Click on the field and choose the preferable text color using color picker.
- Click on Save & Exit button to save the changes. Now you can preview the changes you’ve made and update the page if everything suits you.
Editing Body Text with Power Builder
- Find the module, which contains body text. Click on the Settings icon.
- Navigate to Advanced Design Settings tab and scroll to the Text Color settings.
- Click on the field and choose the preferable text color using color picker.
- Click on Save & Exit button to save the changes. Now you can preview the changes you’ve made and update the page to enjoy the results.
Editing Module Background Color
- Find the module where you want to change a background color. Proceed to its Advanced Design Settings.
- Locate Background Color field and choose the needed background color using color picker tool.

- Click on Save & Exit button and preview the changes or update the page for changes to take place.
Editing Icon Color
- Locate the module, which contains icons. Proceed to the module settings.
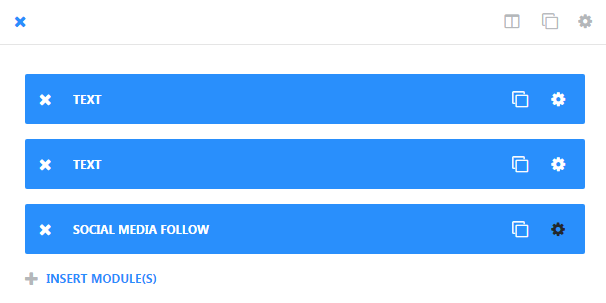
- In the General Settings tab click on the social icon settings you want to edit.

- Scroll down to find the Icon Color field. Set the color you want to use for the icon.
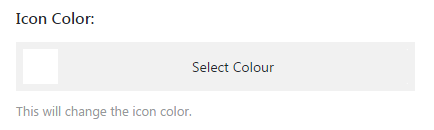
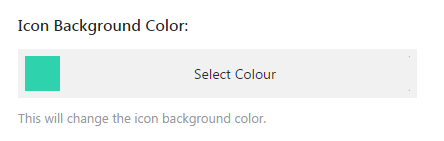
- You can also set the Icon Background Color. Set the necessary color in the required field.
- Click on Save & Exit button and preview the changes.Some elements, such as links colors, menu and submenu colors can be changed through Customizer.

