


You might need to create a new menu when you want to add new pages or links to redirect your site visitors to.
A custom menu is an element, that provides more profound access to especially important links.

Creating Custom Menu
Now let’s find out how to create a new custom menu.
- First, log in to Administration panel (Dashboard) and navigate to Appearance > Customize tab. Live Customizer will open in your browser window.
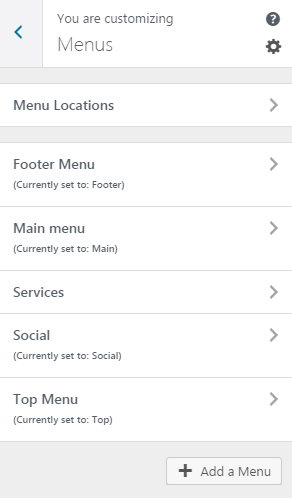
- Now proceed to Menus tab and click on Add a Menu button.
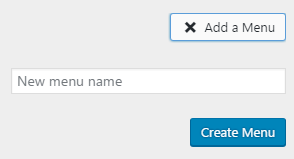
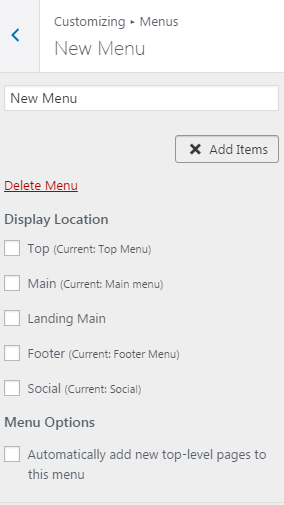
- Enter your new menu’s name and click on a Create Menu button. A form will open allowing you to add menu items and define menu location.
- Click on Add Items button to open the form with the items, available for adding.
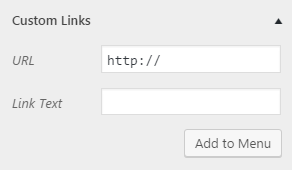
- Expand the Custom Links option to open the form where you can add a custom link that will lead outside from your website. Here you can fill in the link you want to use and the text that will define the link in a menu. Then click on Add to Menu button.
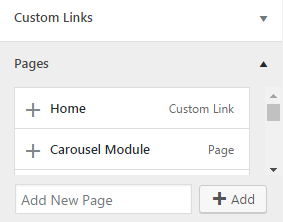
- You can also choose a link leading to one of your website’s pages. To add a new page enter its name to the respective field and click on Add button.
- When you’ve added all the items you wanted to be shown in a custom menu, choose the location where you want a menu to be displayed.
- When everything is ready click on Save & Publish button.
Congratulations! Now you have a custom menu added to your website!
This tutorial is based on Monstroid2 Multipurpose WordPress theme.
