


From this tutorial you’ll learn how to use Timetable and Event Schedule plugin to create timetables and schedule events.

Timetable Location
- First, log in to WordPress Dashboard and find Timetable tab in the left column. Here you can manage plugin settings, as well as events.
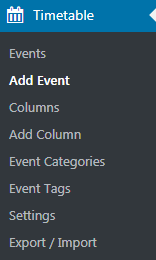
- Navigate to Events section to manage your upcoming events. If you need to add a new event, simply click on Add Event section.
- In the Columns section you can manage timetable columns with time slots. Use Add Column section to add a new column if there is a need.
- Event Categories section allows you categorize the events and organize them to show specific event categories and help the visitors browse through the events.
- There is also an option, that allows using tags for the events.
- You can as well export and import data using Export/Import section.
Adding Events
- Now let’s create a new event. Navigate to Add Event section to open the Event editor.
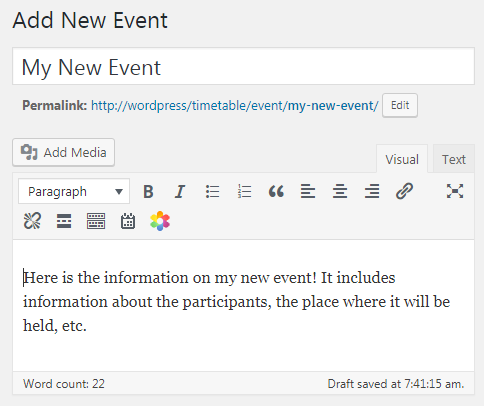
- Enter the title for the event in the Title field.
- Add the content to the content field in order to add it to the event you’re currently creating.
- Let’s proceed to the Timeslots. Here you need to fill in the required fields the time when your event starts and ends, add the short event description and choose the person, responsible for the event – the event head.
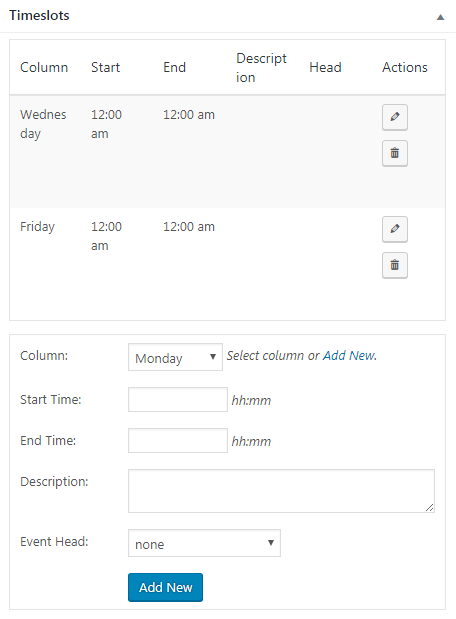
- Add the event to the column (or several columns, where you want it to be displayed. Then click on Add New button to add the time slot.
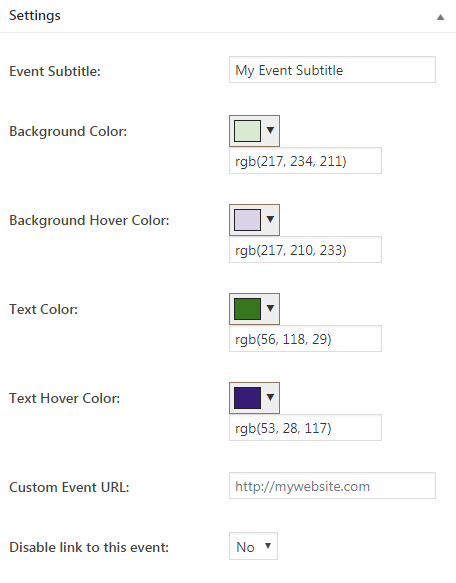
- In the Settings block you can set the specific settings for the event appearance. Choose the subtitle for the event you’re customizing, and define the colors for the background, text, and hovers. In the required field define the URL of the event.
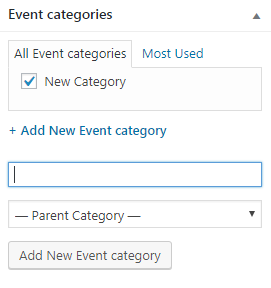
- In the Event Categories block you can set the category for your event from the existing ones, or add a new category.
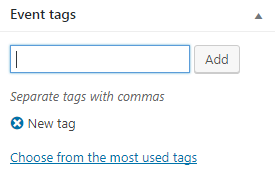
- In the Event Tags you need to define the tags of the event.
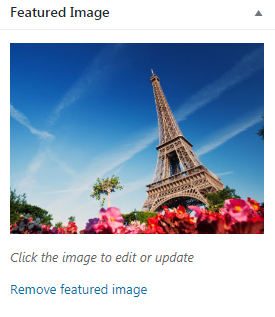
- You can also set the featured image to the event you are adding.
- When everything is correct, click on Publish button to publish your new event.
Adding Columns
- In the Columns section you can add columns to organize a timetable. It can be organized using the days of the week, or months, etc.
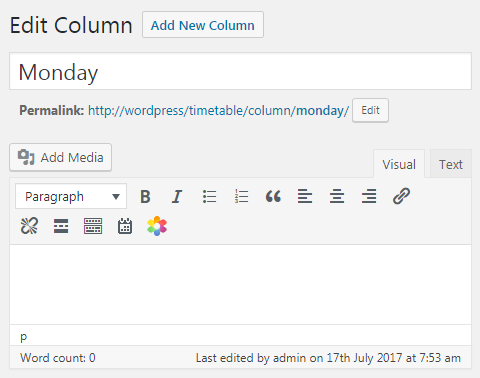
- Click on Add New Column button to add a new column. Fill in the title of the column and its description. Then click on Publish button to publish it.
Publishing Events Timetable
- Now let’s add the events timetable to the page using shortcodes. To do it navigate to Pages > Add New, and click on the Timetable icon.

- When you’ve set everything, click on Add Timetable button and click on Publish button to publish the page with the events timetable.

