From this tutorial you’ll learn how to copy WordPress website from live server to local server to edit and customize it safely.
Moving WordPress Website from Live Server to Local Server
- First, you have to create a backup copy of your current website. If you don’t know how to do it, you can learn about creating website backup from Creating Full Website Backup tutorial.
- When you’ve saved the files to your hard drive, you need to run localhost software you’re using. In our example, we use WAMP Web development environment.
Navigate to wamp/www folder on your hard drive. Create wordpress folder here.
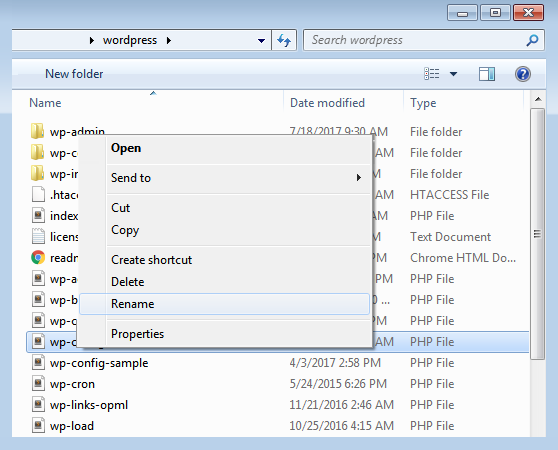
Copy the website ZIP files to your new wordpress folder and unzip them. Now you’ll have to rename wp-config.php file. You can as well delete it completely.
- When all the steps are accomplished you’ll need to create a database in your localhost.
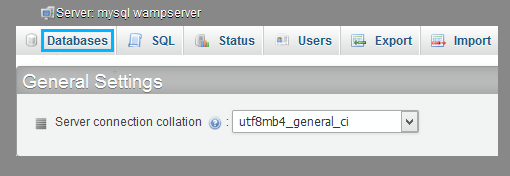
Run your browser and type in localhost/phpmyadmin in the address bar.
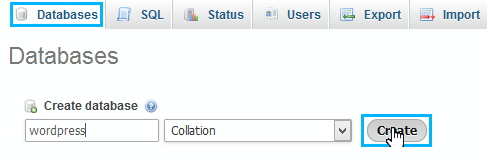
- Navigate to Database tab and create a new database.


- Click on the new database to open it.
- Now you need to import SQL demo content file from the backup to the new database, but before doing it you’ll need to make changes in the existing SQL file.
Open the SQL file (you can locate it in the folder where your website’s backup is stored) with any code editor that is convenient for you.
Hit Ctrl+F hotkeys to search for the URL address of your live website. You need to replace this link with a local one. It will look as http://localhost/wordpress.
- Save the file.
- Now return to localhost/phpmyadmin in the address bar. Click on the Import tab and upload the edited SQL file.

- The next step is to connect the website’s files with the new database. To do it open a new tab in your browser window and fill in the local URL address in the address bar.
WordPress installation will start. You’ll be able to create a new wp-config.php file and add the localhost database information. - As a result, you’ll be able to log in to your website locally using the same credentials you used when log in to your live website.


