From this tutorial you’ll learn how to change page visibility. This will also work for posts, which you don’t want to display to the visitors.

Changing Page Visibility
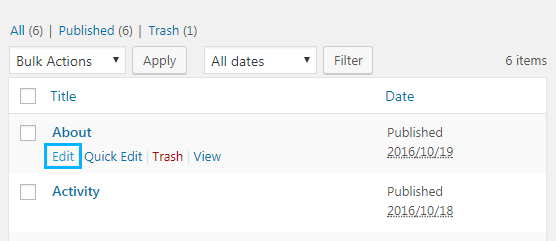
- First, let’s log in to WordPress Dashboard. Here you need to navigate to Pages > All Pages tab in the left column of the Dashboard. (If you want to apply the settings for the posts, please, navigate to Posts > All Posts tab.

- Here you need to select the post you want to edit from the list of existing posts. Then click on Edit option under the post you’ve selected.
- Locate Publish block in the top right corner of the page. Here you can see the Visibility settings field. Select the necessary option you want to apply for the post or the page you’re currently editing.
- Public visibility – enable this status if you want all the visitors to be able to see your post content.
- Password protected – enable this visibility status and fill in the password for this post if you want this post to be accessible only for those visitors that have a password. A visitor to your site must enter the password in the box in order to see the content of the post or page.
- Private – enable this visibility status if you want the post to be seen only to you and to those with authorization permission levels to see private content. Once you change the visibility to private, the post or page status changes to Privately Published.
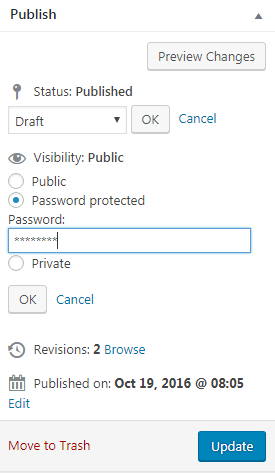
- Now click on Update button in order for the changes to take place.