


Even though you can make style changes with Elementor, it is not almighty. Sometimes you still need to create additional CSS to achieve the desired look.

Every browser has Developer Tools to assist with website development. For example, by using its device toolbar you can easily preview websites as they would display on various mobile devices. There are also tools that allow you to Inspect Elements on a page and make edits to the CSS live (without affecting your website for other visitors). This can be useful in developing and previewing CSS modifications. In this tutorial, you will learn how to use Developer Tools to inspect an element, modify the CSS live, and add CSS to Customizer.
Opening Developer Tools
To open Google Developer Tools you can follow any of the steps below:
- Press the F12 key.
- Select the Menu icon, hover over More Tools, and click on Developer tools.

- Press Ctrl + Shift + I (for Windows/Linux) or Command + Option + I (for Mac).
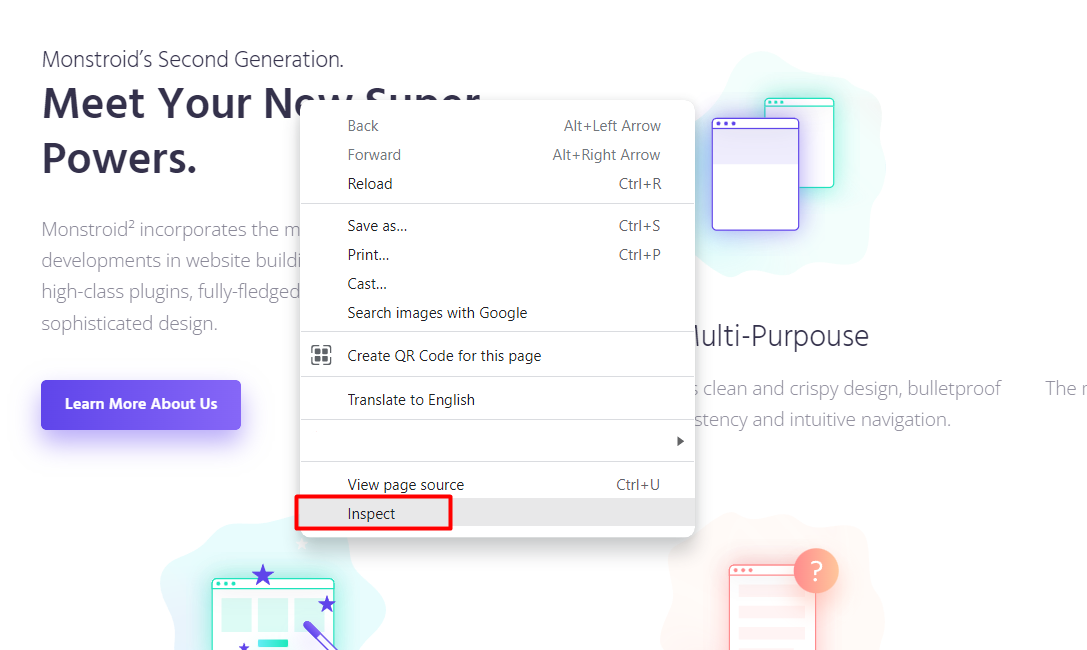
- Right-click on an element on your website page and select Inspect.
Now that you are familiar with accessing Developer Tools, you will be able to inspect CSS elements to modify them live.
Inspect An Element
Inspecting an element helps to identify the code needed to modify a particular object on your website. Developer Tools simplifies this process by displaying and highlighting the specific code that renders the element being inspected.
Open Developer Tools and click the Select Element icon from the top left.
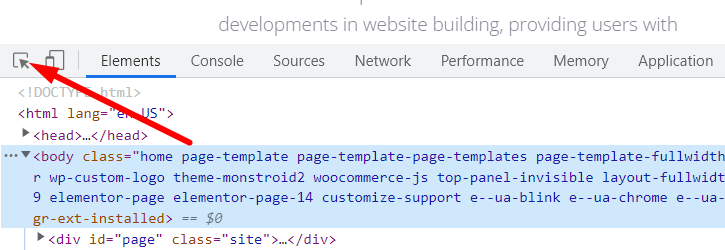
Now, as you hover over elements on your page, they will be highlighted. Click on any object (text, heading, image, etc) that you would like to customize. Notice the Elements tab displays and highlights the HTML for the element.
Inspecting an element is the first step to implementing the code needed to modify the object you want. However, DevTools also allows you to modify the code live.
Making live changes to CSS and adding to Customizer
Developer Tools provide the ability to make changes to the CSS live. This ensures that you are able to preview the changes yourself without affecting the appearance of your website for other visitors. There is no need to refresh your browser to see the changes, they are updated in real-time. In fact, if you refresh your browser after making changes in the Developer Tools console, your changes will be lost because the browser will reload the unmodified version of your website. Using a browser for live CSS testing also ensures that your live website’s actual code remains untouched.
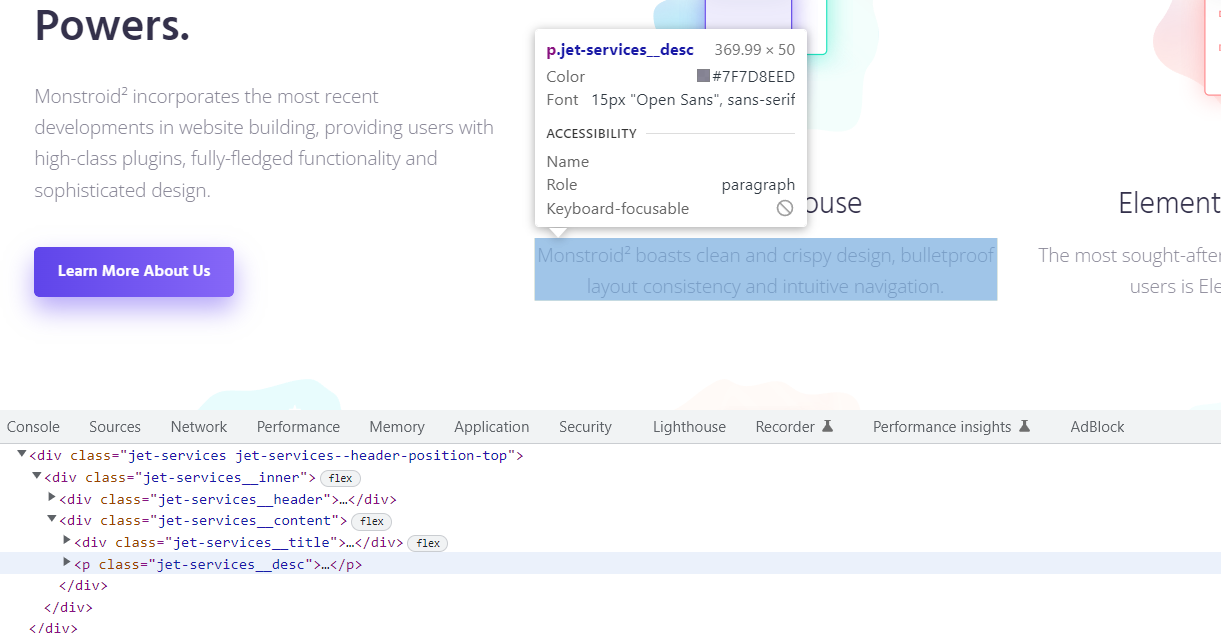
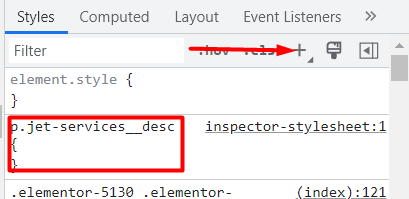
As you can see, there is no option to set the text-align to “justify” for the description of the service. So, let’s change it with additional CSS.
1. Navigate to a page of your website that you would like to modify the CSS for and inspect an element.

2. On the right side, you can see that the value for the “text-align” property is “center”.

3. You need to click on the word “center” and just type “justify”.

4. Now you can copy the CSS and paste it to Appearance -> Customize -> Additional CSS.

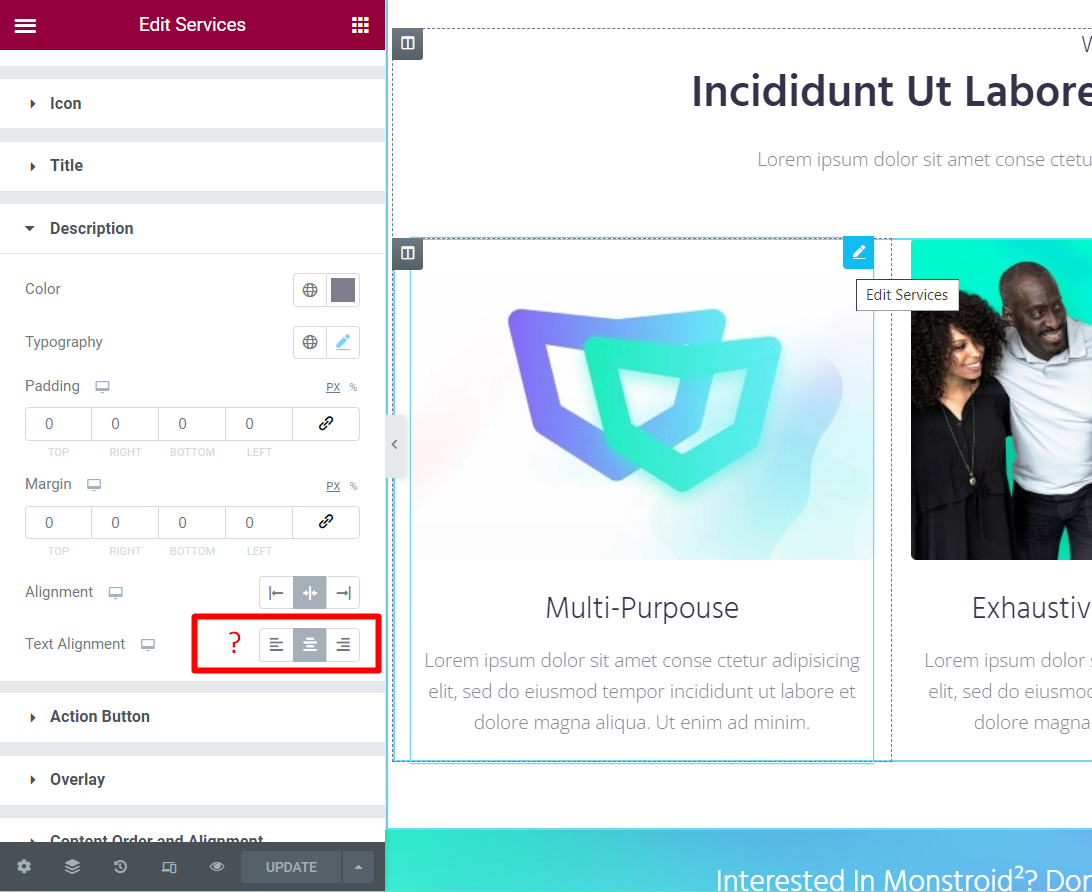
This CSS will work only for the specific widget. If you want to apply it to all similar elements you need to get a more generic selector. You can do this by just clicking on the Plus sign.
Oops! My CSS does not work
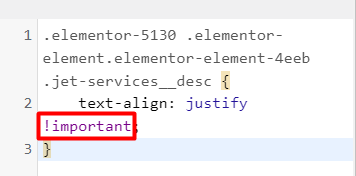
Sometimes when you create additional CSS it might not work. In this case, you need to add “!important” to the value.
Hopefully, this tutorial on how to create additional CSS using your browser console was helpful.
You can learn more about CSS, properties, values, effects, etc. at W3 Schools.
The tutorial on How to disable Google Fonts in WordPress may be useful as well.
Getting Stuck? Feel free to contact our Dedicated Support Team for further assistance.
