


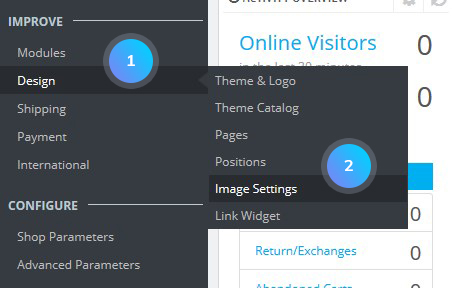
- In your PrestaShop admin panel go to Design -> Image Settings section:
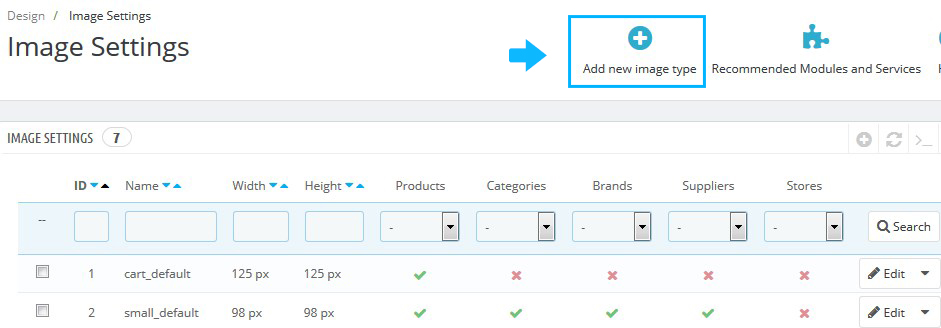
- You will see the list of predefined image dimensions. You can enable the image size for the specific type of content directly in the image sizes list:

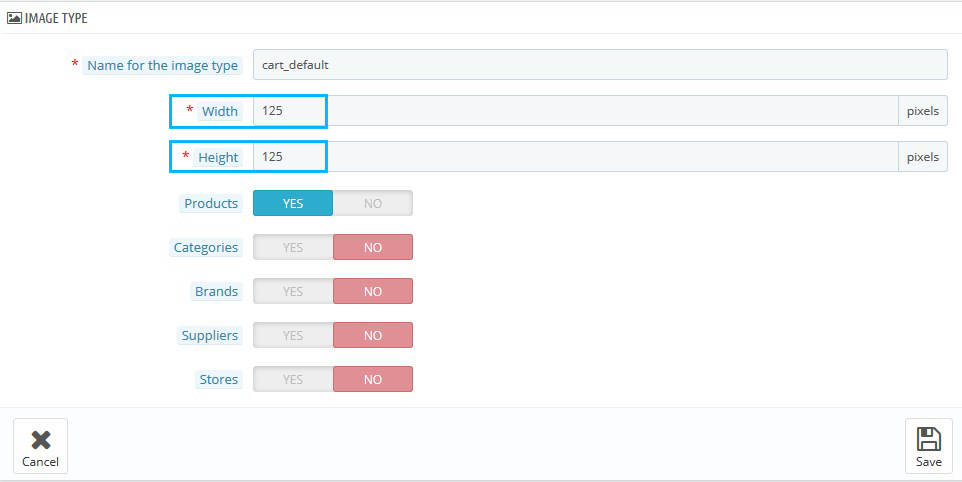
- Click on the image size which should be regenerated for editing. You can set your own width and height parameters. Save the changes:
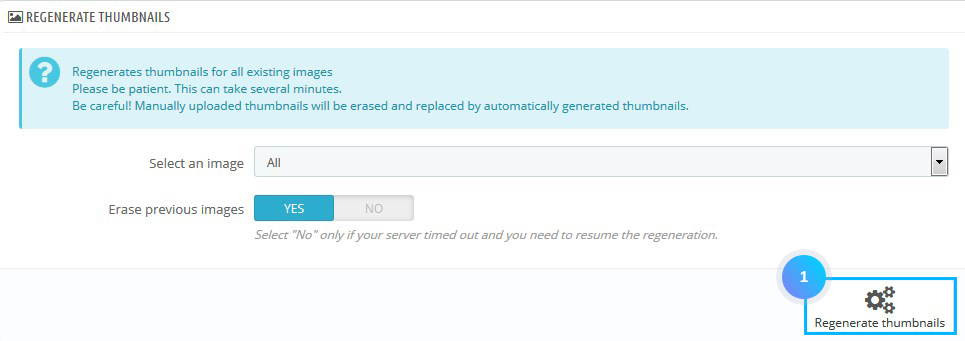
- Once all the desired image dimensions are changed, click the Regenerate thumbnails button at the bottom of the page:
- Refresh your website to see the changes. It is possible, you’ll need to clear the PrestaShop cache and browser cache.
Add a new image size and define the type of content
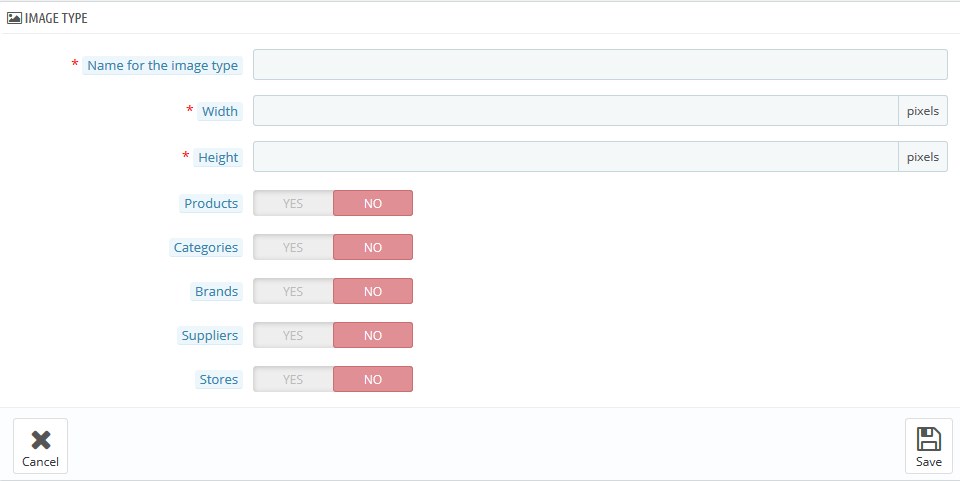
- Go to Design -> Image Settings section. Click the Add new image type button:
- You can set the following options:
- Name for the image type – the title of the new image type;
- Width – maximum image width in pixels;
- Height – maximum image height in pixels;
- Products – the type will be used for Product images;
- Categories – the type will be used for Category images;
- Brands – the type will be used for Brand images;
- Suppliers – the type will be used for Supplier images;
- Stores – the type will be used for Store images.
- Go to Design -> Image Settings section. Click the Add new image type button:

- Save the changes and refresh your website.
Hopefully, this tutorial was helpful for you.
