


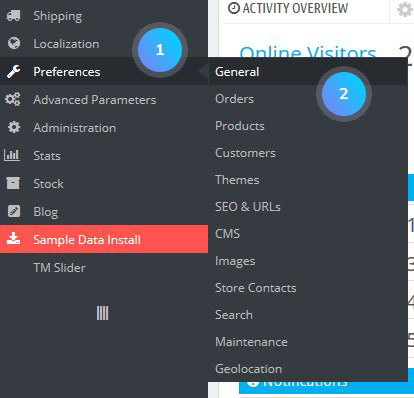
- In your PrestaShop admin panel go to Preferences -> General section:
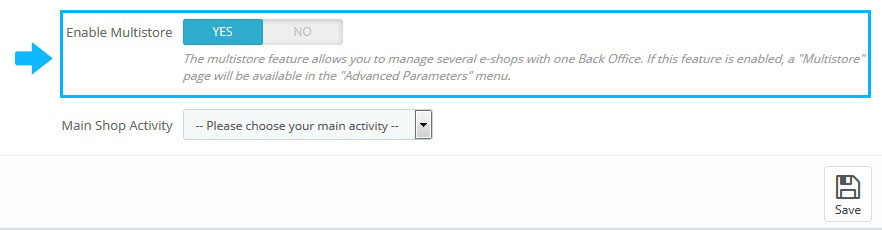
- Scroll down and find Enable Multistore option, set it to Yes:
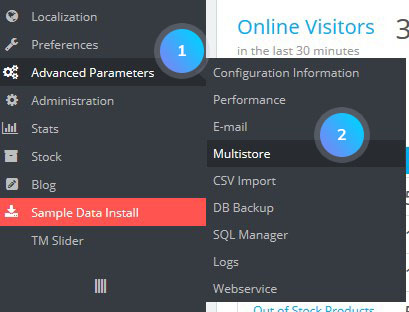
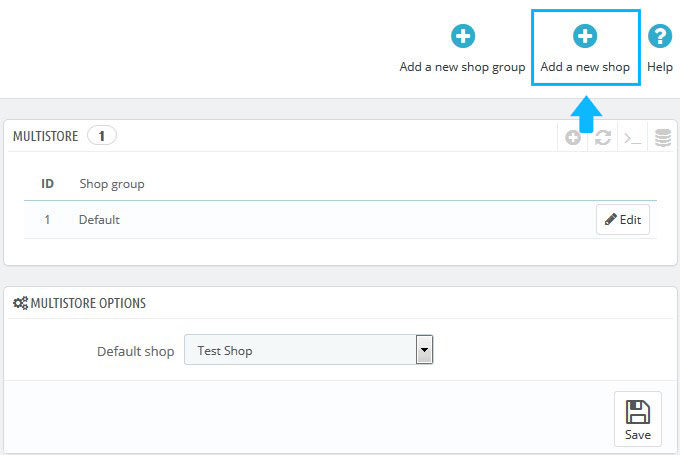
- Go to Advanced Parameters -> Multistore section:
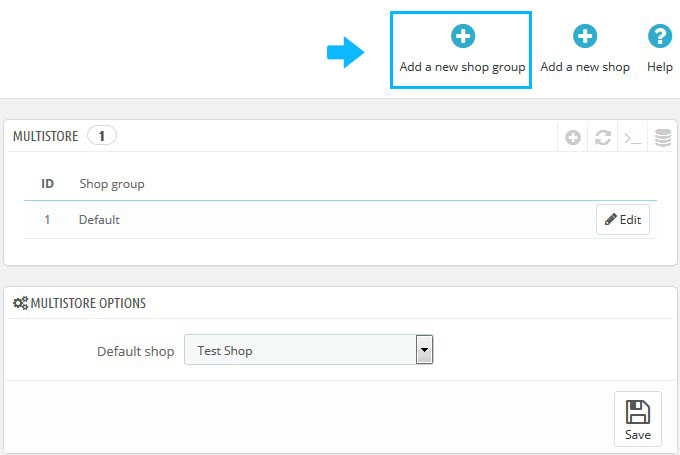
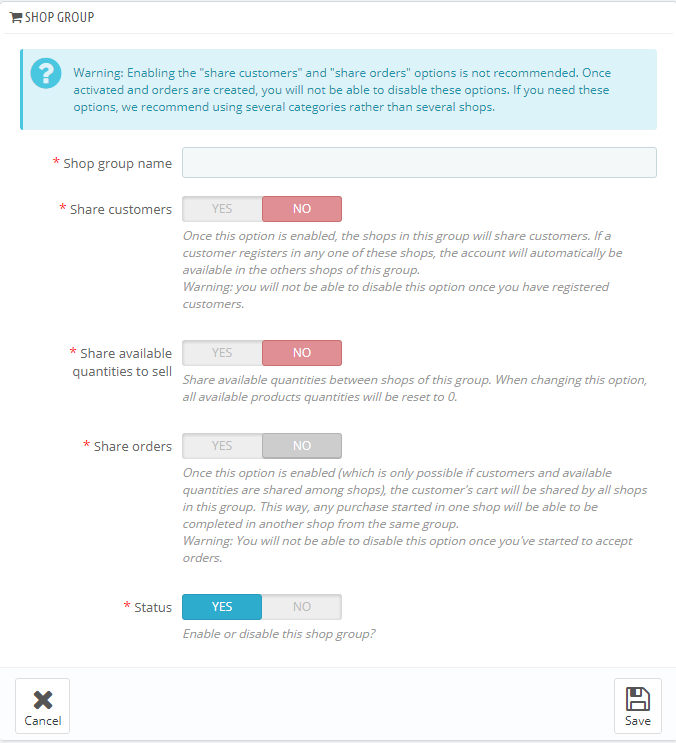
- Click Add a new shop group button at the top:
- You can set the following options:
- Shop group name – the title of the shop group.
- Share customers – enable this option and the shops in this group will share customers.
- Share available quantities to sell – share available quantities between shops of this group.
- Share orders – the customer’s cart will be shared by all shops in this group if the option is enabled.
- Status – enable/disable the shop group.
- You can add a new shop by clicking Add a new shop button:
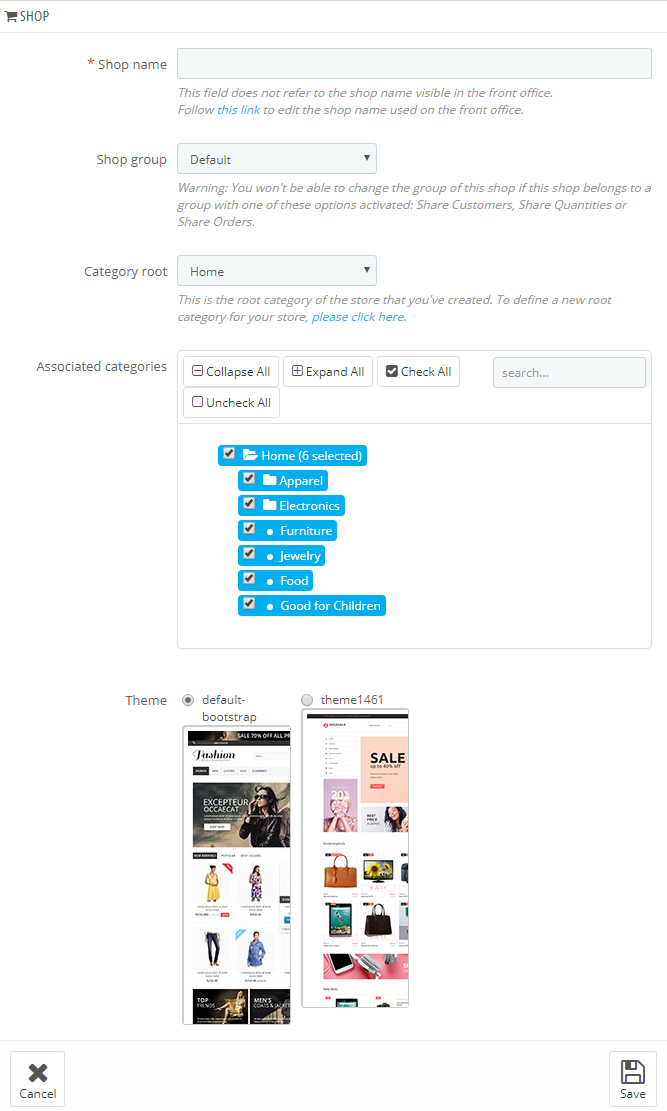
- You can set the following options:
- Shop name – the title of the shop.
- Shop group – set the group of the shop.
- Category root – the root category of your store.
- Associated categories – assign categories to your shop.
- Theme – select the theme for your store.
- In Import data from another shop section, you can select data that should be imported to the new store:

- Save the changes.
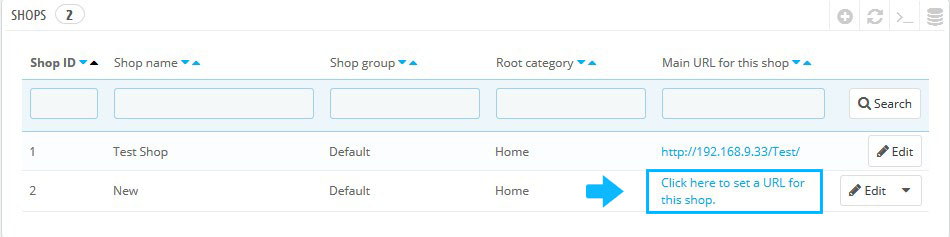
- You can set URL for your new shop now. Click on Click here to set a URL for this shop:
- You need to specify the Domain name, SSL domain,Physical and Virtual URL:
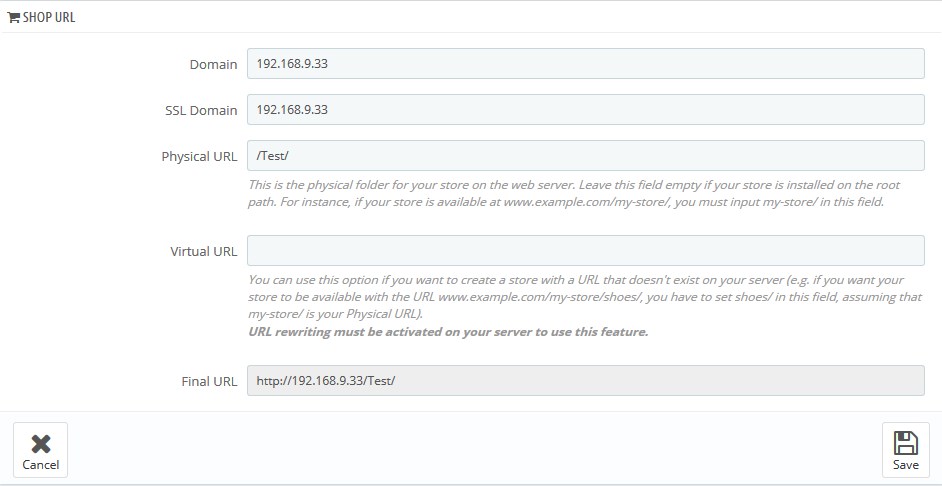
- Save the changes. Open URL and check your website now.
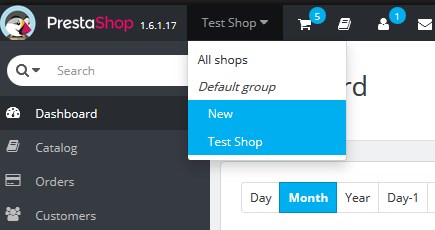
- In admin panel, select the appropriate store or store group when you perform changes in PrestaShop:
Hopefully, this tutorial was helpful for you.

