


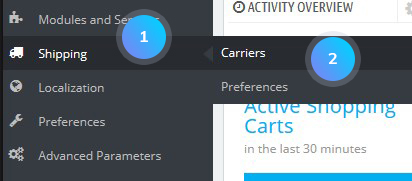
- In your PrestaShop admin panel go to Shipping -> Carriers section:
- Click Add new carrier button:

- Set the General settings for your new carrier:
- Carrier name – the carrier’s title;
- Transit time – delivery time;
- Speed grade – speed class of carrier;
- Logo – upload the carrier company logo;
- Tracking URL – package delivery tracking.
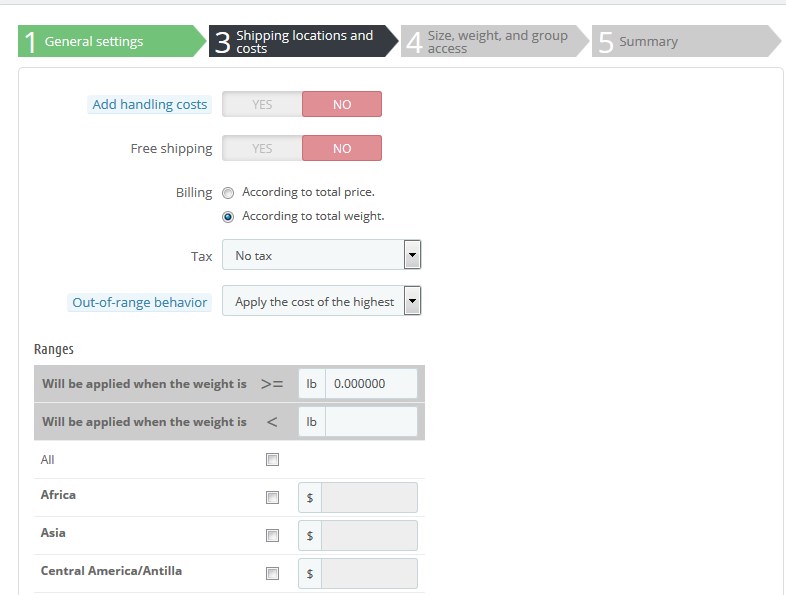
- Go to the Next step. Set Shipping locations and costs settings:
- Add handling costs – the handling costs (as set in Shipping -> Preferences) in the final carrier price;
- Free shipping – enable/disable;
- Billing – select either According to total price or According to total weight
- Tax – the products tax type;
- Out-of-range behavior – what to do with the carrier if a customer orders a product out of scope of the carrier;
- Ranges – the geographical range of your carrier.
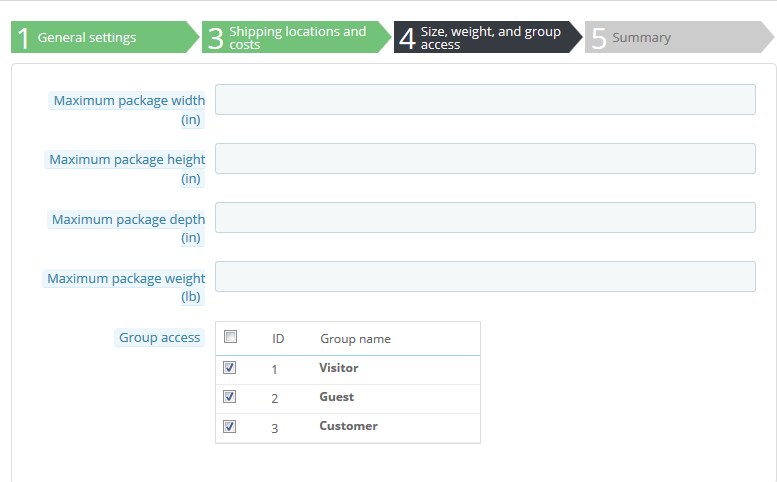
- To proceed to the next step, set maximum values for Size, weight, and group access:
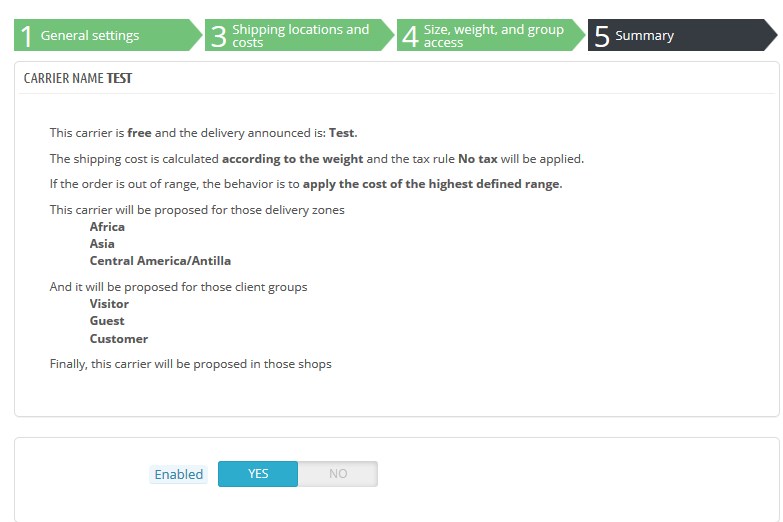
- On the Summary step, you can review and check the set carrier information and enable/disable it.
- Click Finish to save the new carrier:
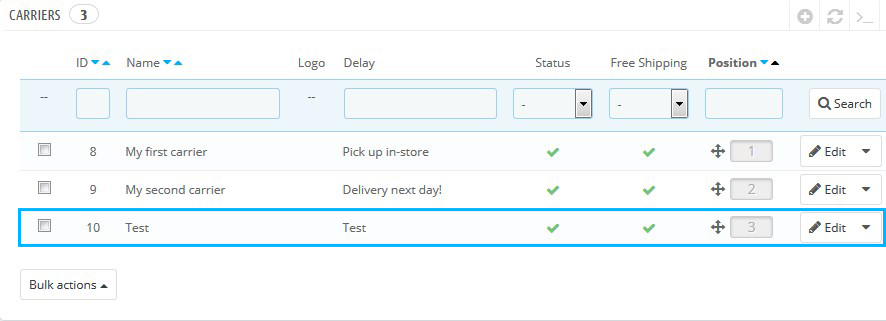
- Now you’ll see the new carrier in the list:


Hopefully, this tutorial was helpful for you.
